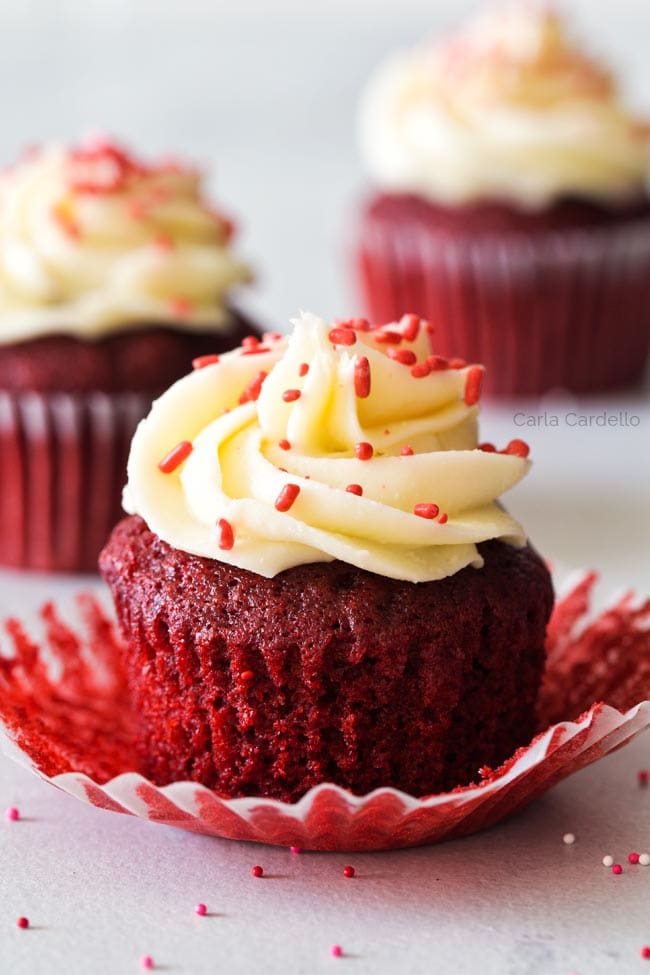
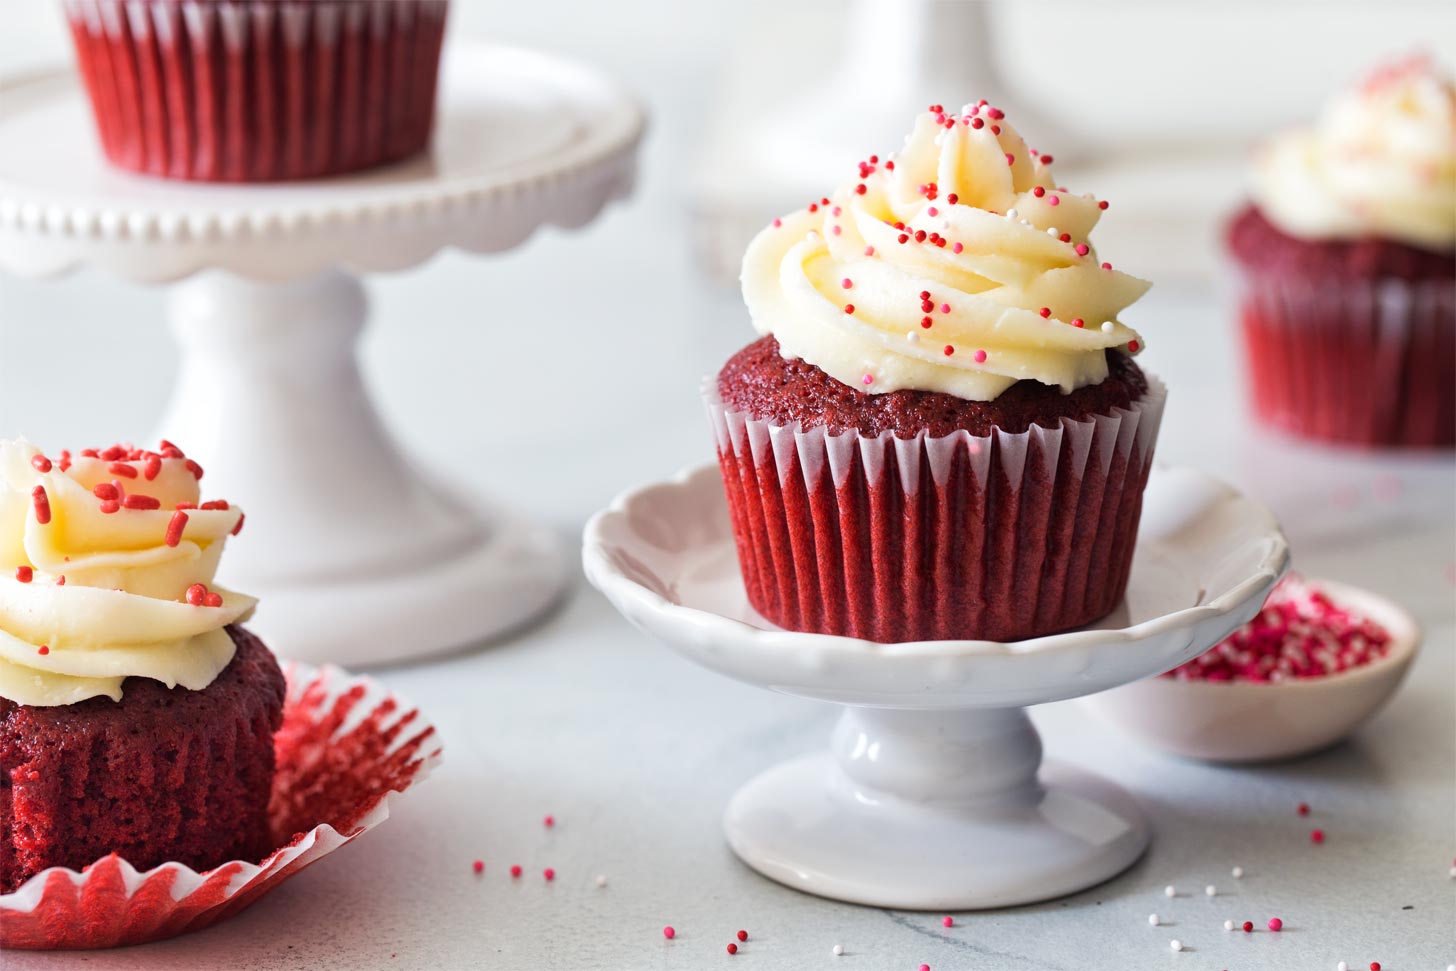
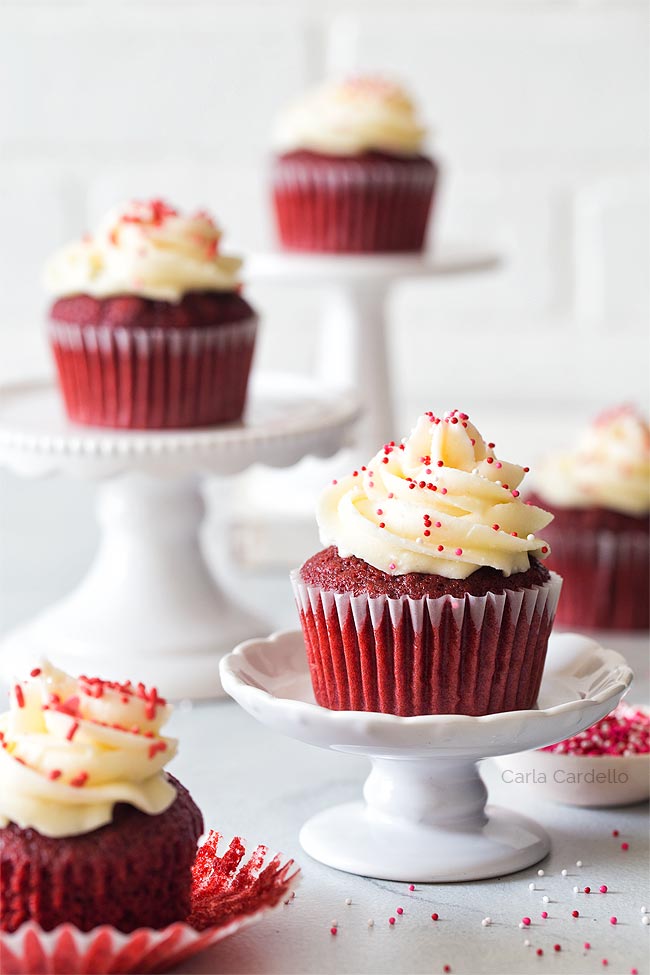
Red Velvet Cupcakes (Small Batch)
These vibrant homemade Red Velvet Cupcakes with a tangy cream cheese frosting is a moist and delicious 6 cupcake recipe made from scratch without cake mix.
Every January I take time off from work, but honestly I wish I was more mentally rested. Usually I’d travel somewhere, but this year all I wanted to do was stay home and relax.
And let me tell you – it’s tough to not work while staying home. Especially when you’re so far behind on cleaning your apartment.
Plus there’s never enough time to make all the fun recipes from my various cookbooks. Most of them take several hours to prep and cook, so they’re definitely not quick, lazy recipes.
But now that I’m back to work, it’s time to look forward to the next holiday, which is what my blog lives for – Valentine’s Day!
All those recipes for two sure come in handy for when you’re skipping the busy restaurants and making easy date night recipes at home.
Now there are two popular types of romantic desserts for two for Valentine’s Day – chocolate desserts like my Mini Lava Cakes and anything red velvet like my small red velvet cake, red velvet lava cakes, and these homemade Red Velvet Cupcakes!
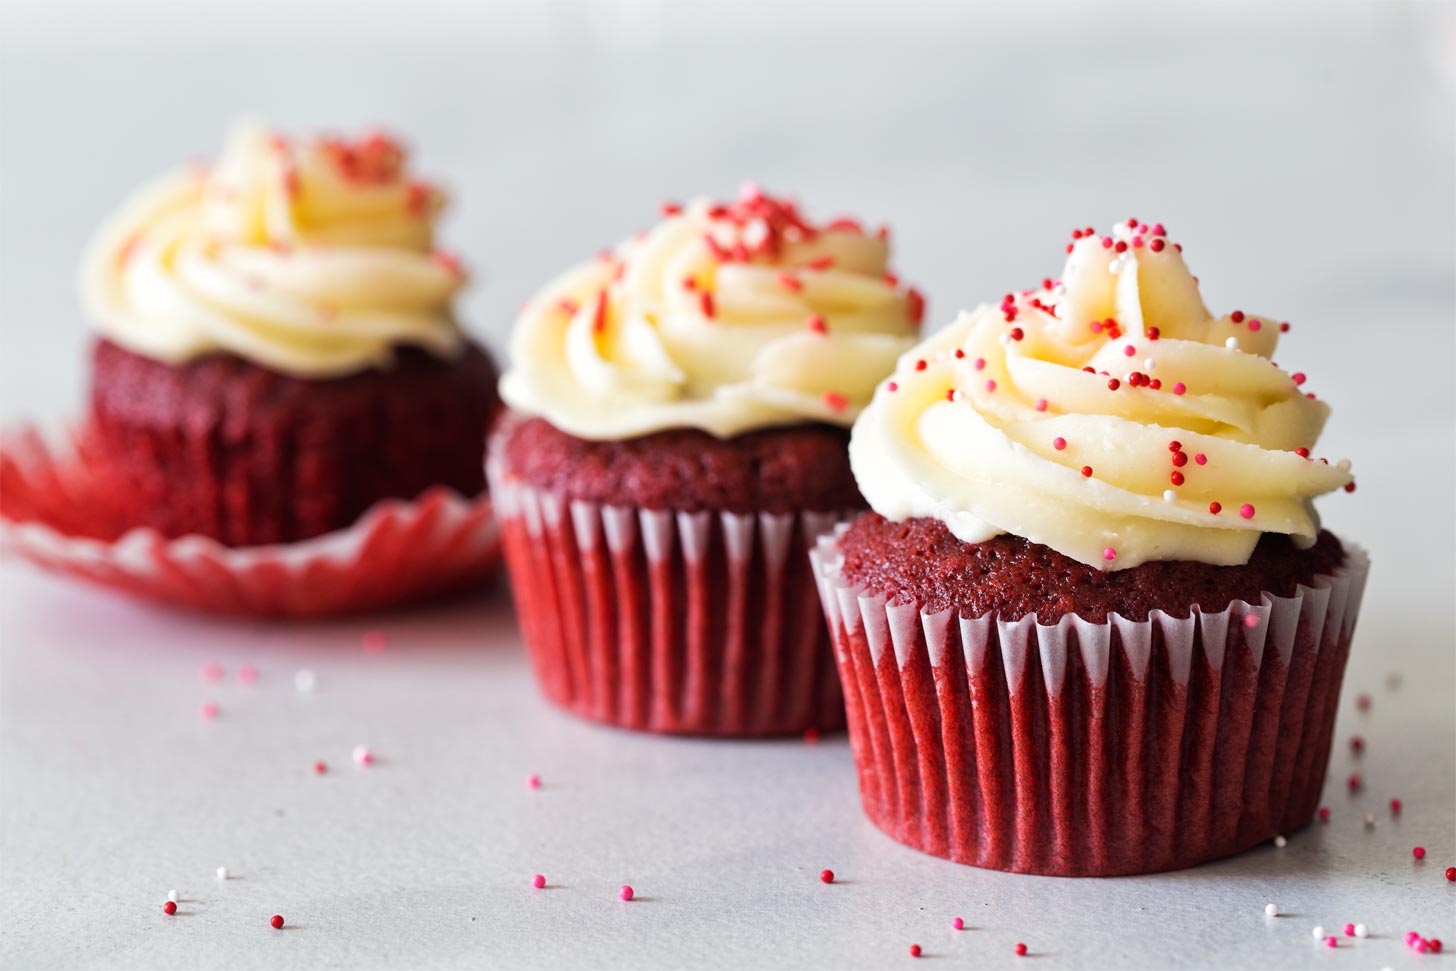
Paired with small batch cream cheese frosting, these small batch red velvet cupcakes the perfect ending to your romantic dinner for two because it’s a 6 cupcake recipe that’s fluffy and moist with a buttery cocoa flavor.
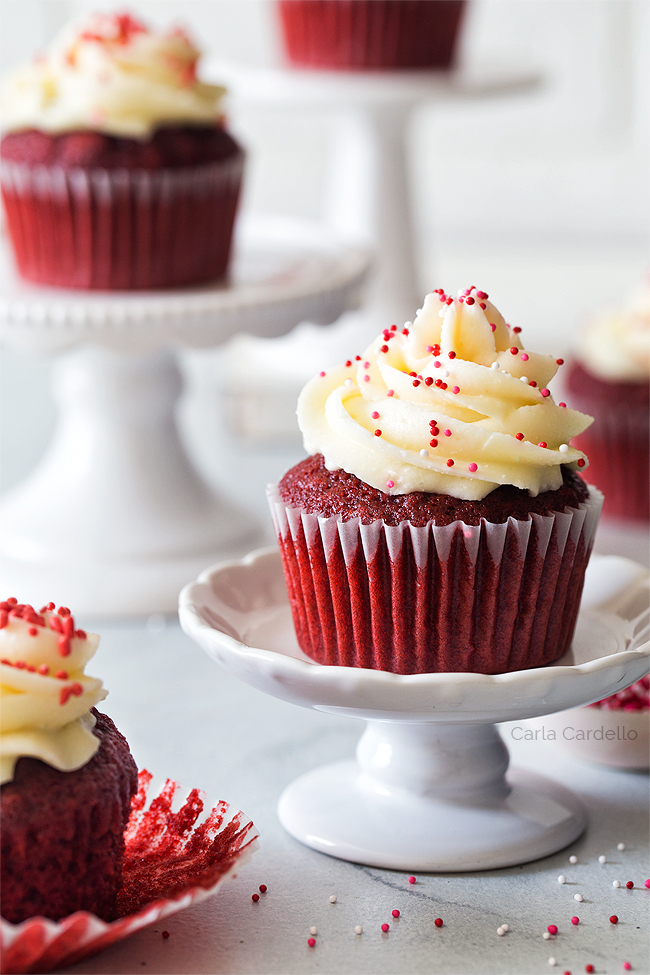
Bonus points for styling them as a small cupcake bouquet. I’d rather receive a bouquet of cupcakes than flowers, if we’re being honest.
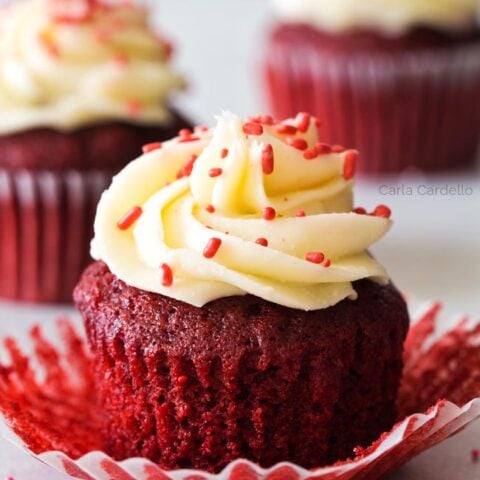
The cream cheese frosting adds tanginess to balance the sweetness of the cupcakes, but you can also use my cream cheese whipped cream for a less sweet option.
Of course this red velvet cupcake recipe isn’t restricted to only Valentine’s Day, but it’s often popular in February due to its red color.
You can also make red velvet Christmas cupcakes or all year round for a special birthday or anniversary dessert.
What is red velvet cake?
If you were to google homemade red velvet cupcakes, you’ll notice not every recipe is the same.
Some used only butter. Some used only oil. Some used both butter and oil. Some used a lot of cocoa. Some only used a tablespoon. One recipe even used only egg whites.
So what exactly is it?
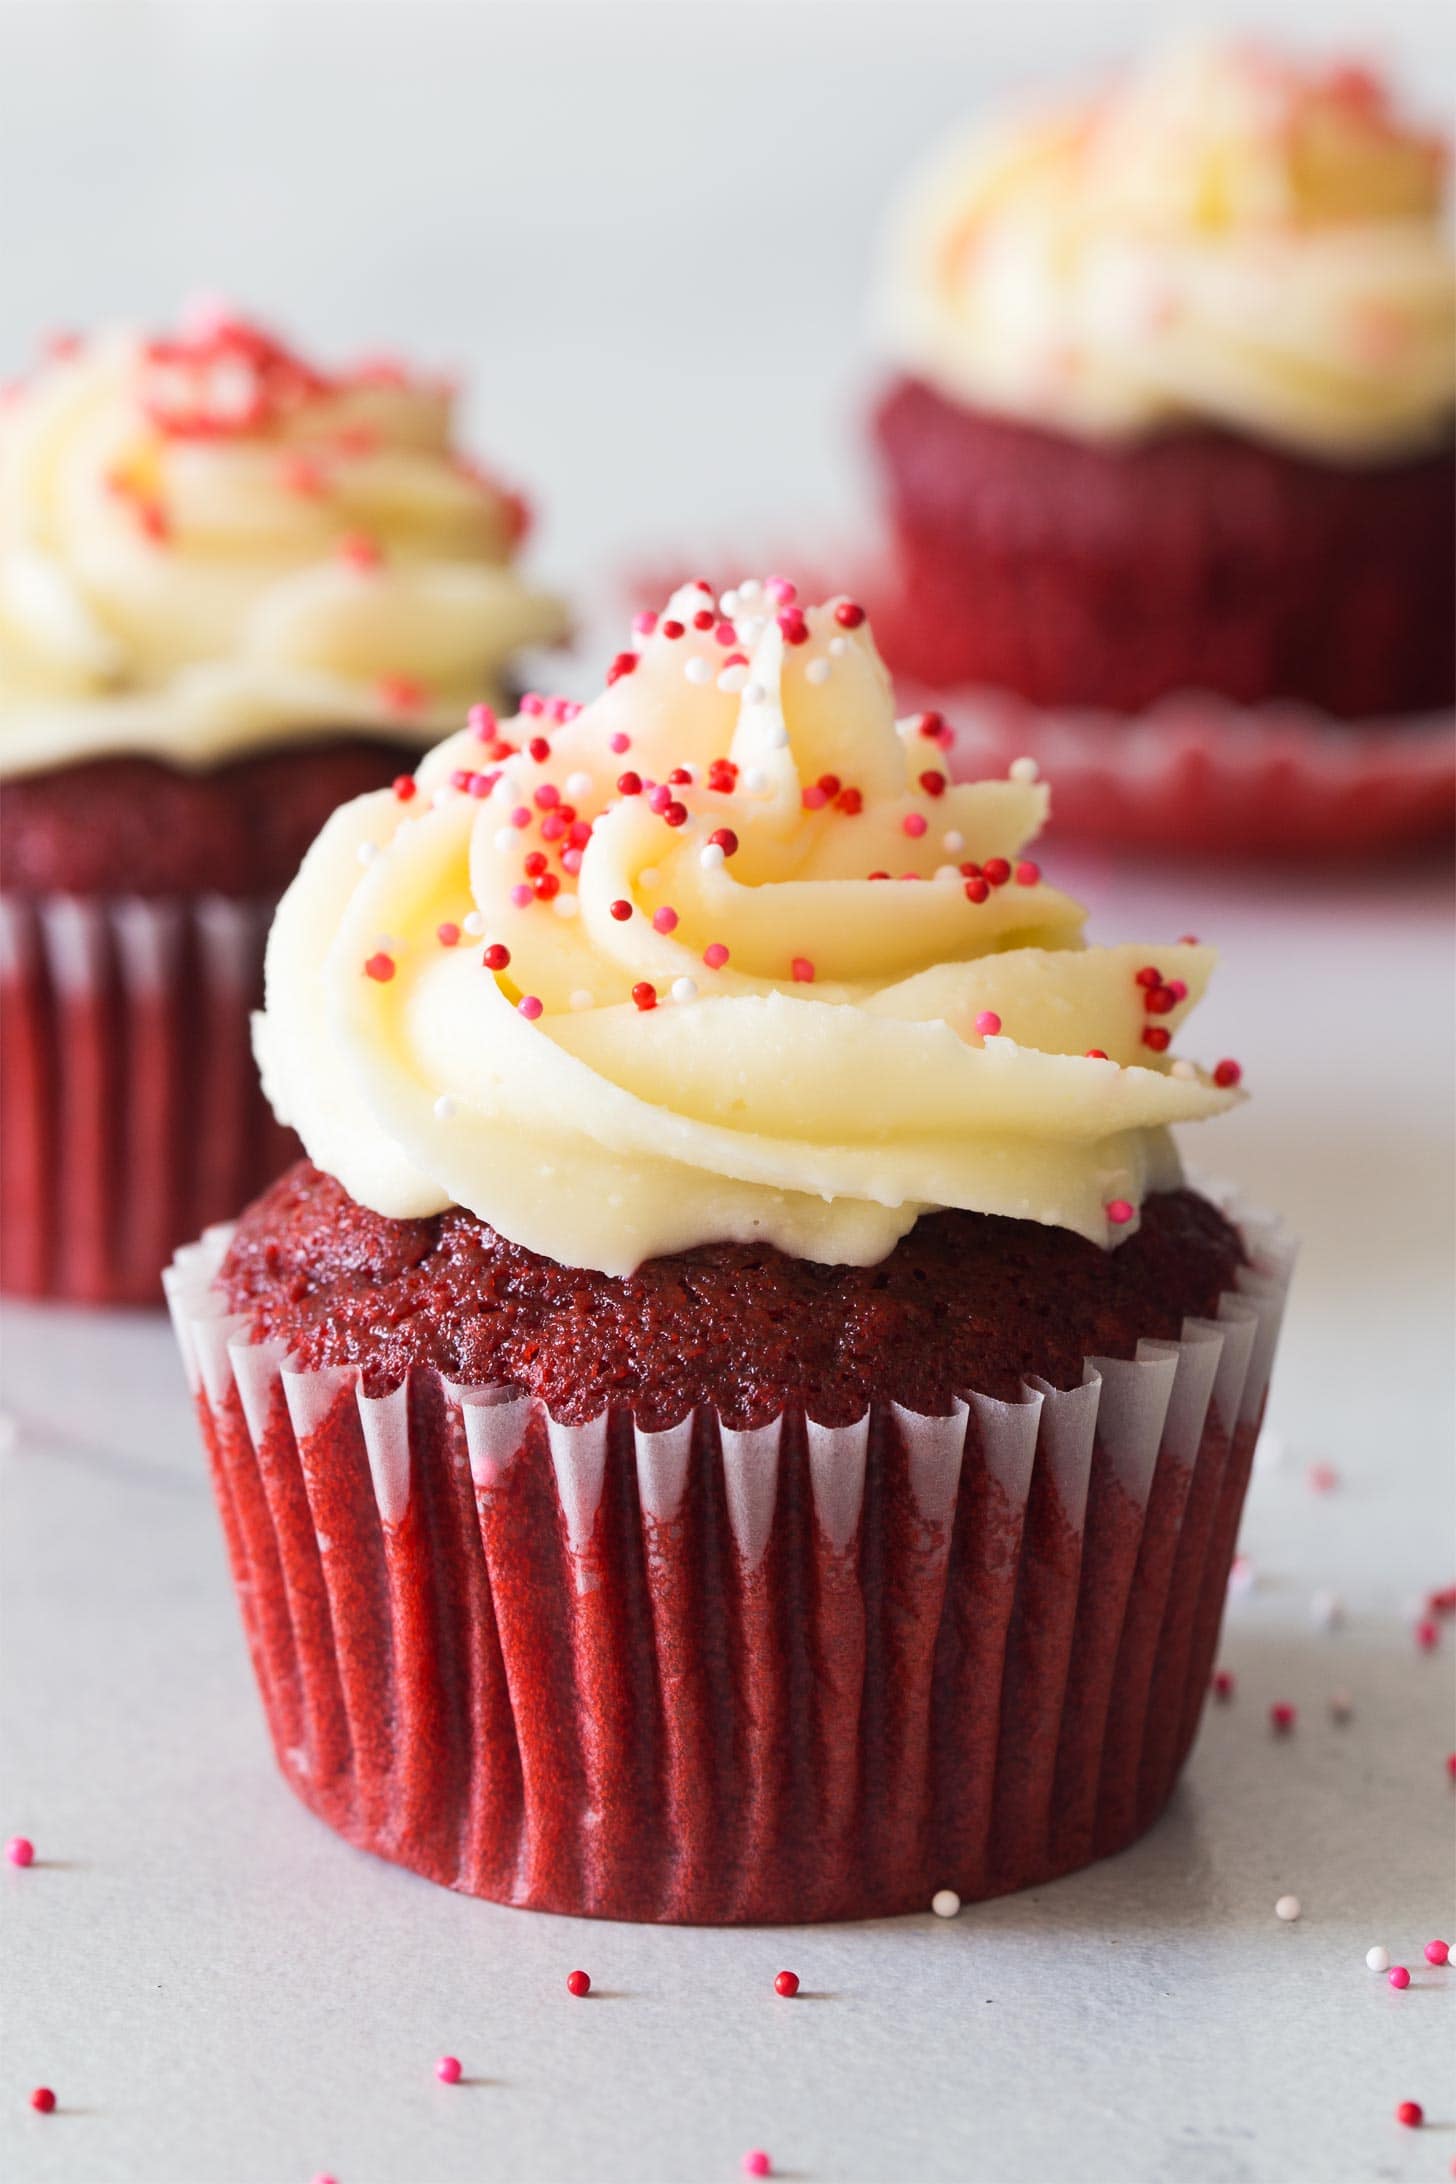
Red velvet cake is a subtle chocolate cake flavored with buttermilk and vinegar then enhanced in color with red food coloring.
It’s not a small vanilla cake with red food coloring, yet it’s not just a small chocolate cake with such a small amount of cocoa powder.
What is the difference between chocolate cake and red velvet cake?
The difference between chocolate cupcakes and red velvet cupcakes is the amount of chocolate used.
Chocolate cupcakes have a deep rich chocolate flavor, thanks to melted chocolate and cocoa powder. The brown color is also too dark for red food coloring to shine through.
Red velvet cupcakes use a small amount of cocoa powder, allowing the red to shine through. It’s not meant to be a rich chocolate cake.
Ingredients For Red Velvet Cupcakes
You’ll need the following ingredients to make the best red velvet cupcake recipe:
- All-Purpose Flour: I opted for all-purpose flour instead of cake flour because it’s more common in pantries. Make sure you know how to measure flour by using the spoon and level method.
- Cornstarch: Cornstarch makes up for the gluten difference since we’re not using cake flour. If you do use cake flour, swap this for additional cake flour.
- Cocoa powder: As mentioned earlier, cocoa powder is what gives red velvet cupcakes their subtle chocolate flavor. Use natural unsweetened cocoa.
- Baking soda: Helps the cake rise as it reacts with the acidic buttermilk.
- Salt: Used so your cupcakes aren’t bland.
- Granulated sugar: Needed to sweeten the batter.
- Vegetable oil: Using a neutral oil means the tangy buttermilk flavor will shine while also making moist red velvet cupcakes. Butter would overpower the flavor.
- Egg: Use a standard large egg at room temperature.
- Red food coloring: Use liquid food coloring, the kind you add by the drop. You can use gel or paste, but the amount will vary. The color will bake out, so make your batter brighter than what you want.
- Vanilla: Really enhances the other flavors
- Buttermilk: Because buttermilk is acidic, it’ll activate the baking soda, which is what causes your cake to rise properly. Only have regular milk? Add lemon juice or vinegar then wait 5 minutes or until curdled.
The chemical reaction among cocoa powder, buttermilk, vinegar, and baking soda help give red velvet a natural deep maroon color, which is often enhanced with food coloring.
If you’re ever reading an easy red velvet cupcake recipe without those ingredients, run. Don’t make it.
How To Make Red Velvet Cupcakes
Here’s how to make the best red velvet cupcake recipe with buttermilk:
- Sift together your flour and cornstarch then stir in cocoa powder, baking soda, and salt.
- Beat oil and sugar until smooth.
- Beat in egg, food coloring, and vanilla, scraping down your bowl if necessary.
- Add the dry ingredients alternately with the buttermilk, adding the flour in 3 additions and the milk in 2 additions (begin and end with dry ingredients).
- Fill your cupcake liners about 2/3 of the way full. They will rise a good bit, so you don’t want them too full.
- Bake at 350F for 18-20 minutes or until a toothpick inserted in the center comes out with a few crumbs (but not wet batter).
To store small batch cupcakes, place them in an airtight container (deep enough so you don’t mess up the frosting) for up to 1 week.
You don’t need to refrigerate unfrosted or buttercream frosted red velvet cupcakes. However, once you add cream cheese frosting you do need to refrigerate them. Let sit at room temperature for about 15-30 minutes before serving to get rid of the chill.
More Red Velvet Recipes
Can’t get enough red velvet recipes? Check out my Red Velvet Oreo Cheesecake, Red Velvet Sugar Cookies, and Red Velvet Bars.
How To Decorate Small Batch Red Velvet Cupcakes
Traditionally you frost red velvet cupcakes with vanilla cream cheese frosting, although chocolate cream cheese frosting would be a great pairing as well!
Although not traditional, you can also make small batch buttercream or even small batch chocolate frosting.
Don’t want to use cream cheese? Check out my full list of small batch frosting recipes to mix and match.
Why did my red velvet cupcakes not turn red? I used food coloring!
Some of my international readers outside of the U.S. have mentioned they use red food coloring, but their mini red velvet cupcakes turned out brown.
I don’t know the answer without studying the colorings they used, but for comparison purposes I use McCormick red food coloring.
Make sure your food coloring doesn’t use natural colorings such as beetroot, which will dull during baking.
More Small Batch Cupcake Recipes
Looking for more small batch cupcake recipes? Check out these favorite recipes:
- Small Batch Chocolate Cupcakes
- German Chocolate Cupcakes
- Small Batch Vanilla Cupcakes
- Small Batch Yellow Cupcakes
- Strawberry Cupcakes
- Strawberry Shortcake Cupcakes
- Carrot Cake Cupcakes with pineapple
- Coconut Cupcakes
- Pumpkin Pie Cupcakes
- Gingerbread Cupcakes
- Banana Cupcakes
Don’t want to make cupcakes? Check out my full list of 6 Inch Cake Recipes.
Red Velvet Cupcakes (Small Batch)
These vibrant homemade Red Velvet Cupcakes with a tangy cream cheese frosting is a moist and delicious 6 cupcake recipe made from scratch without cake mix.
Ingredients
- 1/2 cup + 3 tablespoons all-purpose flour
- 1 tablespoon cornstarch
- 1 tablespoon unsweetened cocoa powder
- 1/4 teaspoon baking soda
- 1/4 teaspoon table salt
- 1/2 cup granulated sugar
- 1/4 cup vegetable or canola oil
- 1 large egg, room temperature
- 2 teaspoons liquid red food coloring
- 1 teaspoon vanilla extract
- 1/2 teaspoon white distilled vinegar
- 1/4 cup buttermilk, room temperature (or substitute whole milk with 1 teaspoon lemon juice added)
- Small Batch Cream Cheese Frosting (get recipe here)
Instructions
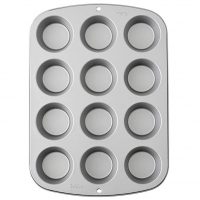
- Preheat oven to 350F. Line a cupcake pan with 6 paper liners.
- In a medium bowl, sift together the flour, cornstarch, and cocoa powder then whisk in baking soda and salt.
- In a large mixing bowl, beat together the sugar and oil until moistened, about 1 minute.
- Beat in the egg, food coloring, vanilla, and vinegar.
- Add the flour mixture alternately with the buttermilk, adding the flour in 3 additions and the milk in 2 additions (begin and end with dry ingredients).
- Transfer the batter to the cupcake liners, filling them no more than 2/3 full. Bake 18-20 minutes or until a toothpick inserted in the middle is clean (few crumbs ok but no wet batter). Cool for about 15 minutes then transfer cupcakes to a wire rack to finish cooling.
- Decorate with cream cheese frosting. Refrigerate frosted cupcakes in an airtight container for up to 1 week. Let sit at room temperature for 15-30 minutes before serving.
Notes
- Enjoyed this recipe? Check out my full list of Small Batch Cupcake Recipes, including chocolate, strawberry, vanilla, and more!
- Want more red velvet? Check out my Small Red Velvet Cake, Red Velvet Oreo Cheesecake, and Red Velvet Sugar Cookies.
Recommended Products
As an Amazon Associate and member of other affiliate programs, I earn from qualifying purchases.
This post may contain affiliate links. As an Amazon Associate and member of other affiliate programs, I earn from qualifying purchase.
What is the conversion for cake flour? Is it 1/2 cup plus 3 tablespoons Cake flour as well?
3/4 cup cake flour and omit the cornstarch.
I have tried few red velvet cake recipes . But by far this is the best. Thanks Carla for sharing this recipe.
Oh wonderful! I’m happy to hear that.
Hello, I am making my own buttermilk, is it 1/4 cup of milk with 1 tsp of lime juice?
Do I still add the vinegar?
Thanking you in advance.
Yes, 1/4 cup whole milk with 1 teaspoon acid (lime juice should work just as well). And yes, keep the vinegar in.
Is this the equivalent of a 4″cake
It’s from my 6 inch cake, so just a bit bigger.
Can I skip the cornstarch?
The all purpose flour plus cornstarch is equivalent to using cake flour, producing a better texture. You can do 3/4 cup cake flour and omit the cornstarch. If not, you can technically do 3/4 cup all purpose flour. It’ll be fine but won’t be the best it can be.
Hi Carla! I really hope you see this message! I have been on the search for the perfect cupcake consistency and this cupcake has it and I’m so happy I found it! I have been having a hard time finding the perfect consistency for my vanilla cupcakes and was wondering if I could omit the cocoa powder and red food dye and perhaps it would make the same fluffy consistency in a vanilla cupcake? I am eager to try it because all the other recipes I have found came out a bit gummy. Thanks for this recipe tho!
I’m actually going to be testing vanilla cupcakes this week! With that said, you cannot omit the cocoa powder without subbing for it because it’s part of the dry ingredients and will mess up the ratio. I haven’t tried this particular recipe without it, but my guess is substitute with more flour.
I do have my small vanilla cake recipe. It makes 2 layers, so you can cut it in half for a small batch. However, I haven’t tested it as cupcakes yet https://www.chocolatemoosey.com/2017/06/29/cherry-vanilla-layer-cake/
Hi Carla thanks so much for the response! I’m so so happy I found this recipe it is amazing!! I tried it without the cocoa powder and red food colouring and added a teaspoon more of vanilla and it was amazing for a vanilla cupcake. thanks again
Glad it worked out!
The cupcakes tasted very sour and bitter it was so gross I spit it out I give this recipe 0 Stars 👎🤮🤢😡
Oh no! If it tasted sour and bitter, then something happened with your ingredients. Make sure you used everything as directed and didn’t get anything mixed up (didn’t use salt instead of sugar, for example). Make sure everything was measured correctly (didn’t mix up teaspoon and tablespoon, used the correct dry and liquid measuring cups). Make sure nothing expired. And lastly, some people are really sensitive to food coloring, so maybe you didn’t like the taste of that?
So this was amazing but now I want to make a big batch for a party. Do I just triple everything ?? :-D
If you want 18 cupcakes, then yes.
These cupcakes turned out great for me! They were light and airy and had good flavor. I did use 3/4 cups of cake flour instead of all purpose + cornstarch as suggested in another comment. I reduced the liquid food coloring (Kroger brand) to 1 tsp and the cupcakes were still deep red, so mileage may vary depending on brand and type of food coloring used. I forgot to add the vinegar, oops. I made the homemade cream cheese frosting to top them with which I think is a must!
Glad you enjoyed the cupcakes! And I agree about the food coloring. I wish there was a universal ingredient, but it really varies by brand.
Thanks for this recipe. I’ve made it twice. I love this recipe because I always wanted one that will give me exact 6 cupcakes without leftovers or having to calculate in halving recipes to make exact 6 cupcakes. They are nice and yummy.
Wonderful! Happy to hear you enjoyed the cupcakes.
I’ve baked a lot over the years, but have never done red velvet! I work at an office with a small crew, made these for VD and they were yum! I will say I got seven cupcakes and feel like I could have gotten eight. Just a bonus. :)
Glad everyone in the office enjoyed the cupcakes! For the yield, I think it heavily depends on your cupcake pan size. Sometimes when I make someone else’s recipe, the yield varies.
Hey what do u mean by adding the flour in three additions
I’m very stuck please help me out
You want to add the flour three times. Add 1/3 of the flour mixture, half of the buttermilk, add another 1/3 of the flour mixture, add the rest of the buttermilk, then add the last 1/3 of the flour.
Absolutely loved this recipe.. easy to follow and turned out great. Kids keep asking for them! Thank you for the recipe!
Wonderful! Glad you enjoyed the recipe.
So I made this because I only wanted a few cupcakes, but they are so good, now I want to know how I can convert this into a bigger cake 😋
I have a 6 inch cake you can make! https://www.chocolatemoosey.com/small-6-inch-red-velvet-cake-for-two/
WOW!!!! Your Red Velvet Cupcake recipe is delicious!!! Instead of making six cupcakes, I ended up making ten. I topped the cupcakes using your cream cheese buttercream recipe. I’m glad that I came across your blog using the Google search engine and I’m looking forward to making the cupcakes again. Thank you so much!!!! ☺️
Wonderful! Happy to hear you loved the cupcakes.
it had an awful aftertaste (probably of food coloring) and the texture was rubbery. too much oil maybe?? i don’t know. does anyone know what to do differently next time?
A rubbery texture means you overbeat your cake batter, especially after the flour was added. Sounds like you had an issue with technique.
The batter to me seemed a bit thin. The flavor of the cupcake was satisfactory but the frosting was too salty.
Did you use salted butter for the frosting? I only call for a pinch of salt along with unsalted butter so either you use salted butter or your pinch was really, really big.
Can you add a little sour cream(1 tablespoon)to make it more moist?
It’s going to mess with the ratio of everything. Did you actually try the recipe and was it dry?
It wasn’t dry, but was looking for something a little more dense; almost like a pound cake. I tried the 1 tablespoon of sour in the batter, but it didn’t make a difference
I don’t think this is the recipe you’re looking for then. You can try searching for a red velvet pound cake from another site (I don’t have one).
I really enjoyed the taste! Especially with the cream cheese frosting. With the cream cheese frosting I used more powdered sugar just for taste and not structure but it paired amazingly with it. I used an ice cream scoop and they were all quite even however I found the cupcakes a little bit dry, I wonder if it would be better with butter over oil so I may try that if I make them again. Other than that they were great! I think the food dye I got was very pigmented because I used 1.5tsp because after 1 I thought it was super bright but was nervous most would cook out and they were almost bright red haha
Using butter instead of oil won’t help. If they’re dry, you likely mismeasured your flour, overbeat the flour, or overbaked them. Make sure you’re using an oven thermometer for accuracy (my oven runs 25 degrees hotter than what the knob says, so I use an oven thermometer to ensure I’m at 350).
hi do you think I could multiply the ingredients? if so could you help me convert bc I want to make for 12 ppl thank you !
Yes. For 12 cupcakes, you can double the recipe.
thank you so so much for this recipe my friends loved it and it tastes so gooodoododoood!:)
Happy to hear everyone loved the cupcakes!
Hello, I made the small batch red velvet cupcakes and it was the best recipe I’ve used. I was wondering if you have the same recipe for a full batch? I need to make 60, but I do t want to make the recipe 10 times.
You can multiple the ingredients by 10, but please note I haven’t made this recipe at such a large scale so I can’t guarantee results.