Small Pie Crust (6 Inch Pie Pan)
When you’re craving pie for two, bake up this buttery, flaky Small Pie Crust for a 6 inch pie pan. Made with both butter and shortening, this is the only pie dough recipe you’ll need for small batch baking. Step by step photos included.
Every year I look through my Thanksgiving For Two and Christmas For Two menus to see what I’m missing.
First thing I noticed – I don’t have a traditional pumpkin pie recipe. Sure I have Mini Pumpkin Pie and Eggless Pumpkin Pie, even Pumpkin Pie Cupcakes, but no straight-up pumpkin pie.
And since this is a dessert for two blog, I knew I had to make a small pie recipe ASAP.
I decided to split the small pie crust and small pumpkin pie recipes into two posts.
Check out my small pumpkin pie recipe for the second part.
Not only will you be using this small batch pie crust over and over for future small pie recipes, this post is already super long and I’m not even talking about pumpkin pie.
So here it is – a buttery, flaky Small Pie Crust for a 6 inch pie pan. Made with both butter and shortening, this is the only pie dough recipe you’ll need for small batch baking.
As mentioned, this post is really long and packed full of useful info. I didn’t even know I had this much knowledge about pie baking until I wrote it all down.
If you find yourself struggling to make the best pie crust, you will want to read every section.
However, if you’re experienced or simply want the recipe ASAP, you can use the “Jump To Recipe” button at the top of this post.
Pie Crust Ingredients
The first step in making the best small pie crust starts with your ingredients. To make a homemade pie crust from scratch, you will need these 6 ingredients:
- All-Purpose Flour – Flour helps make a tender crust with its gluten as well as helps keep the dough from getting too sticky. To properly measure your flour, spoon it into your measuring cup then level it off with a knife. Do not dip your measuring cup into the flour to fill it as you may accidently over-pack it with too much flour.
- Sugar – Sugar adds a touch of sweetness to dessert pies. If you’re making a savory pie like my Chicken Pot Pie For Two, you can leave out the sugar.
- Salt – Salt is a flavor enhancer and will only make your pie crust taste even better, especially if you’re using unsalted butter.
- Cold Butter – It’s not pie dough without the fat! Butter adds the most flavor and melt-in-your-mouth quality, although it doesn’t make the most tender dough…
- Cold Shortening – …which is why I also add shortening. Shortening may lack flavoring, but it makes the most tender, flaky crust. Crisco makes sticks of shortening that are easy to cut into tablespoons, exactly like a stick of butter. I usually keep a stick in the freezer to ensure it’s extra cold for pie crust.
- Cold Water – Water creates steam in the dough, which helps create flakes. It also helps bind everything together to form a dough. Be careful you don’t add too much water! If your dough is too wet, it’ll puff too much from the excess steam.
Pie Crust Equipment
Before you get started making your pie crust, here is some equipment you will need:
- Food Processor – Before you panic, you don’t actually *need* a food processor, but it makes everything so much easier and quicker. I use this 8 cup food processor (Amazon affiliate link), mostly because my old one broke while recipe testing and this is what I found at the store later that evening for the best price.
- Pastry Blender – If you’re making the dough by hand, grab yourself a pastry blender to cut the fat into the flour. If you don’t have one, you can use two knives in a pinch.
- Large Mixing Bowl – If you’re using a pastry blender, you will need a large mixing bowl.
- Rolling Pin – The best way to roll out your pie dough evenly is with a rolling pin. If you don’t have one, you can use a wine bottle or a can in a pinch.
- 6 Inch Pie Plate – My individual pie crust recipe makes enough dough for a 6 inch pie plate. Keep reading below for more detail on which pan works best.
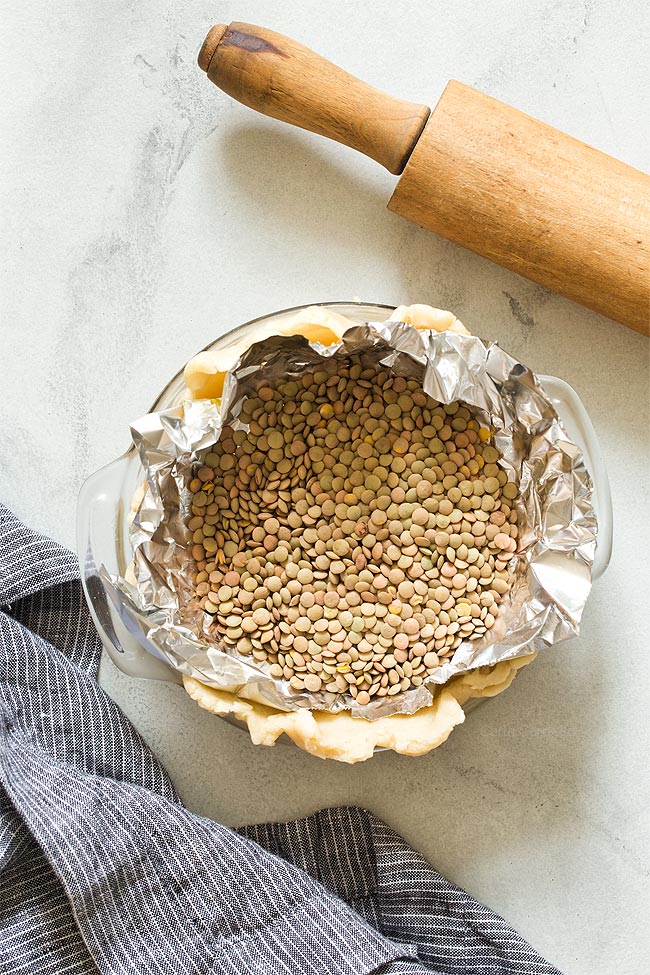
- Pie Weights – You’ll need pie weights when you blind bake your crust because it keeps the dough from puffing up too much, but you don’t need actual pie weights. I use dried lentils, but you can also use dried beans or rice.
Where to buy a 6 inch pie plate
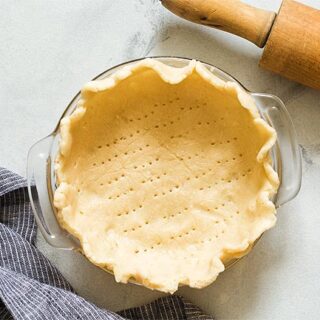
I bought my 6 inch pie pan online. There weren’t many options I liked, so I opted for this 6 inch glass pie plate (Amazon affiliate link).
Please note – cold glass cannot be put directly onto a hot oven rack or hot baking sheet. It will shatter if you do this.
In order to transfer it from the fridge to the oven, place your glass plate onto a room temperature baking sheet.
Can you use disposable pie pans?
Yes, you can also use 6 inch disposable pie pans. I tested my mini pie crust in these aluminum foil mini pie pans online (Amazon affiliate link).
I found they aren’t as deep as the glass pie plate, so you’ll have extra dough and filling. That means you can make a second mini pie in a ramekin to bake alongside your small pie.
Do you need a pie dish to make a pie?
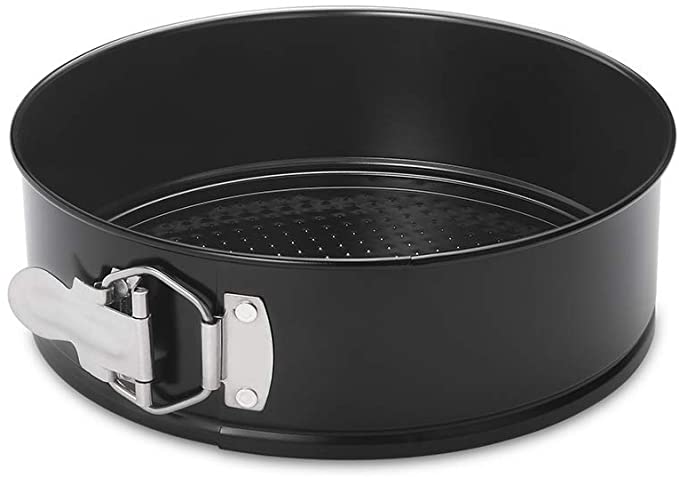
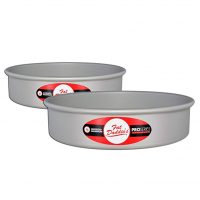
Although using a pie dish is the easiest way to serve your pie, you can also make your small pie crust in a 6 inch cake pan or 6 inch springform pan (Amazon affiliate links).
With the springform pan, you can remove the pan side and slice your pie as normal.
However, with the cake pan I found it a little challenging to cut and serve your pie. Because most pies are delicate, you can’t invert the pan like you would with a cake.
Instead, you may need to remove the pie one slice at a time.
How many does a 6 inch pie serve?
A 6 inch pie can be cut into 4-6 slices, which is an ideal dessert for two.
The slices are much smaller than the average pie slice because they aren’t as long.
How To Make A Small Pie Crust
The easiest way to make a small pie crust is to use a food processor because all you do is dump and pulse.
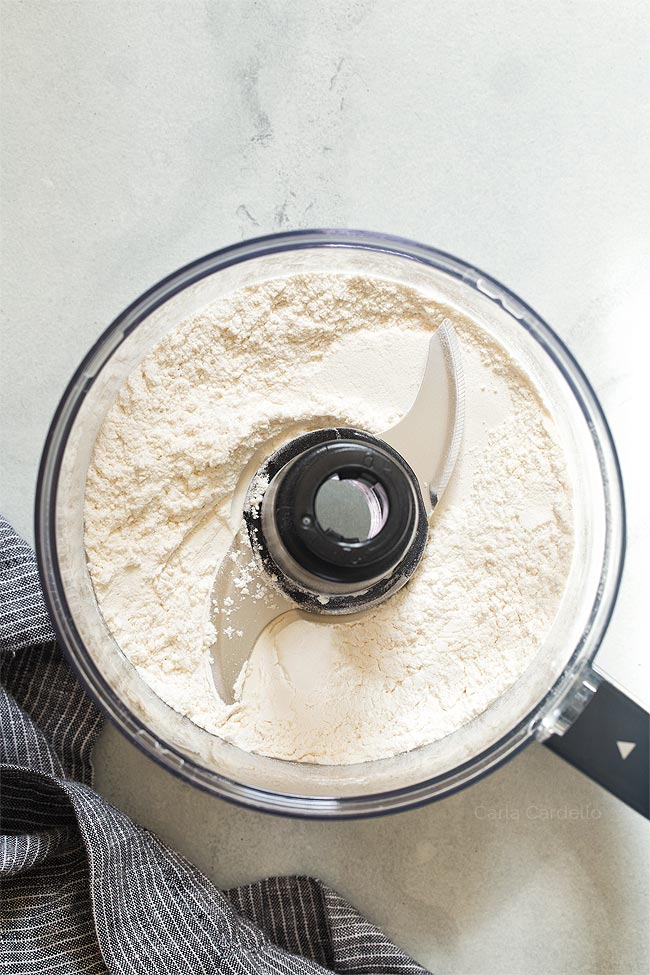
First, add your flour, sugar, and salt to the bowl. Pulse 1-2 times to mix it together.
Bonus – you can also add 2 tablespoons cocoa powder to make a chocolate pie crust like you see with my German Chocolate Pecan Pie.
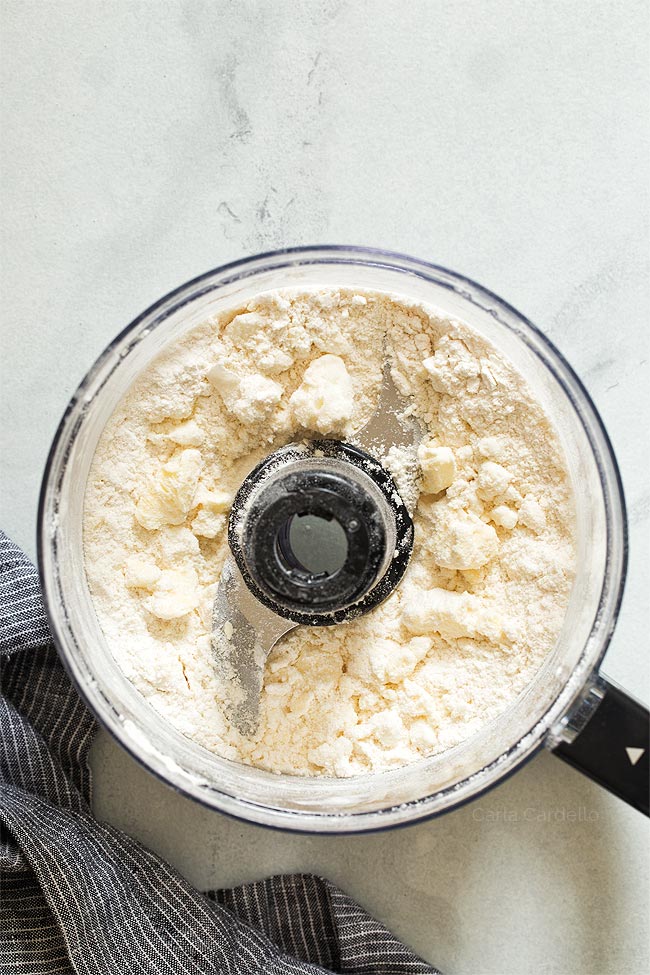
Next, add your cold butter and shortening to your bowl. It’s important your fat is super cold or your dough is going to get soft and sticky.
I personally keep a stick of shortening in the freezer since I mostly only use it for dough. Butter I’ll freeze if I remember, but I’ve used it straight from the fridge and it stays cold enough.
Pulse until the fat is cut into the flour and looks like little pebbles.

Now it’s time to add cold water. Once again, you want to work with cold ingredients so your dough doesn’t get too warm.
Pulse until a dough forms. If it still looks crumbly, give it another minute or so to come together.
If it’s really dry, you can add a teaspoon of water, but you don’t want to add too much because then the dough will puff too much in the oven.
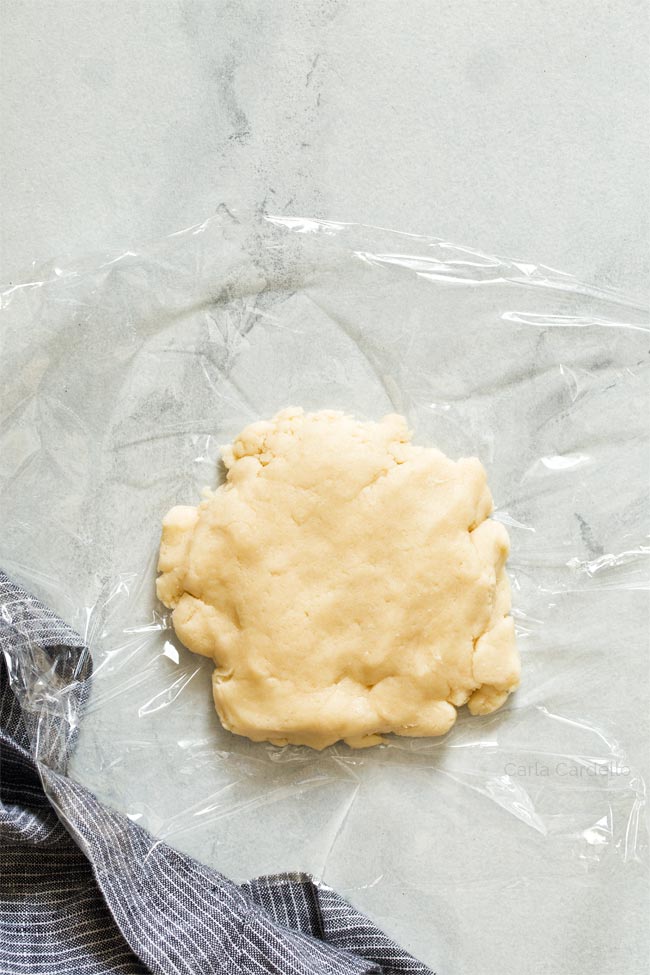
Next, gather your dough and place on a sheet of plastic wrap. If you don’t have plastic wrap, use a lightly floured surface.
Gently knead the dough together then form a round disk. Cover the top with another sheet of plastic wrap then refrigerate for at least 1 hour.
Can you substitute butter for shortening?
Yes, you can substitute an equal amount of butter for shortening. Please note your pie crust won’t be as flaky without the shortening.
How To Roll Out Pie Dough Without Sticking
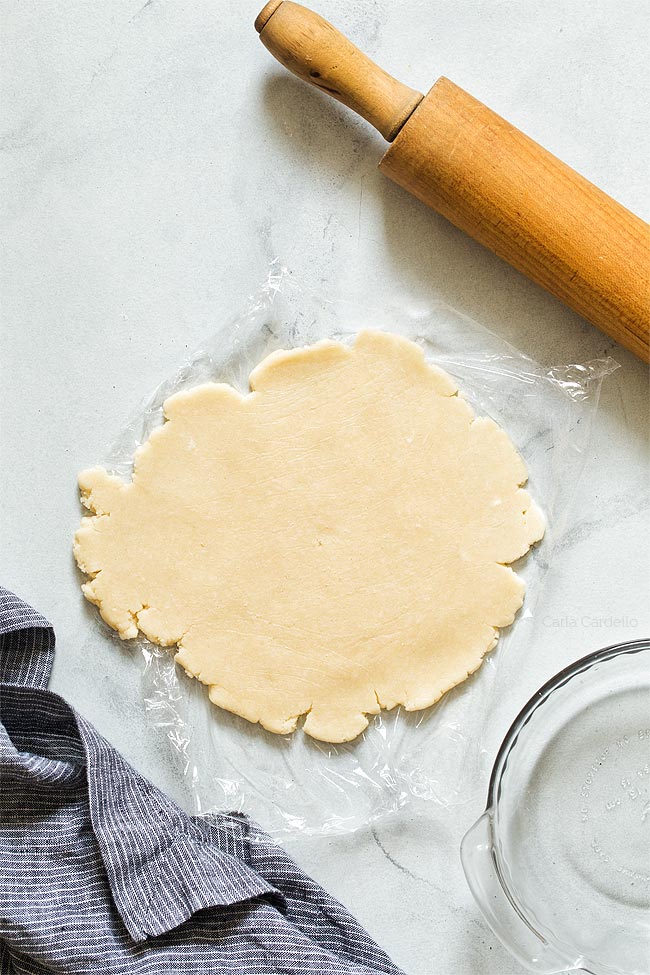
After your dough has chilled for an hour, it’s time to roll it out!
I personally keep it between the plastic wrap while I roll. It doesn’t stick to my rolling pin and the plastic wrap peels off easily. Win win.
Plus if it does start sticking, you can easily put it back in the fridge without having to scrape it off the counter.
If you don’t want to do that, make sure your surface and rolling pin are lightly floured.
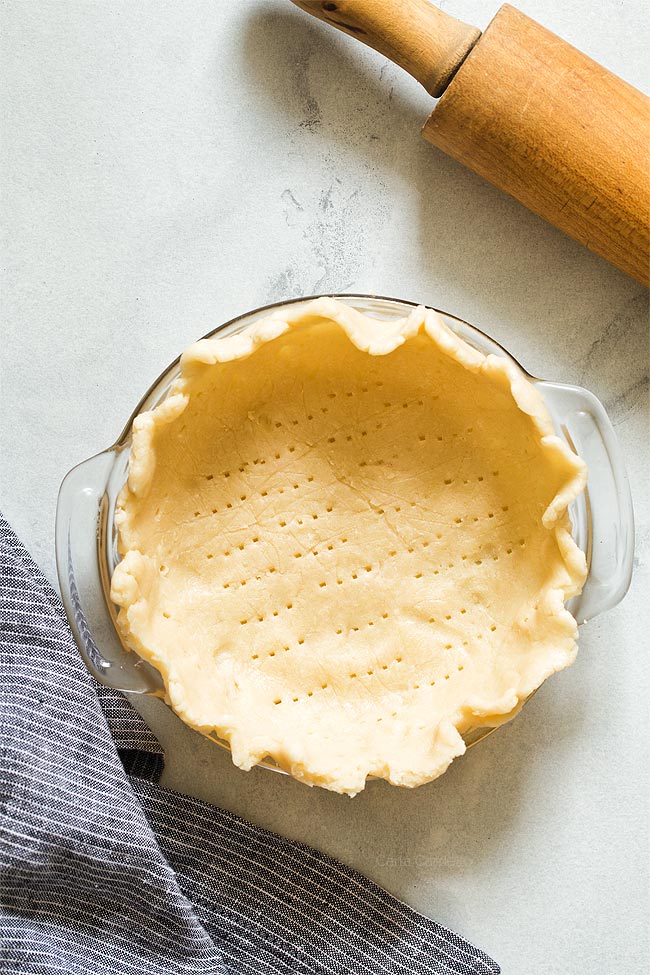
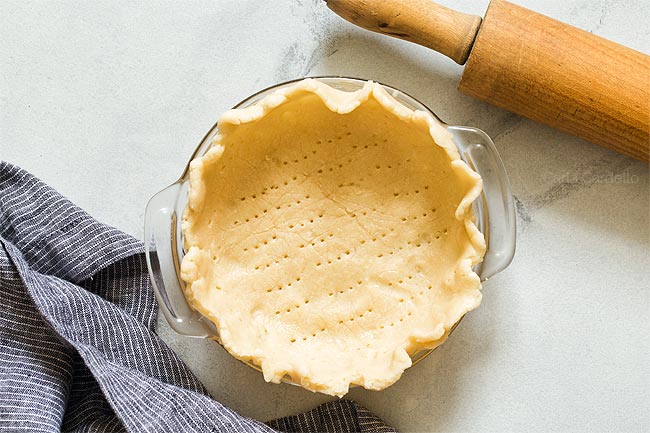
For a 6 inch pie plate, roll your dough out to about 7-8 inches wide, roughly between 1/8 – 1/4 inch thickness. This gives you enough dough to cover the plate as well as a little extra to flute your crust.
You may have to trim off excess dough, especially if you’re making it in a disposable pan.
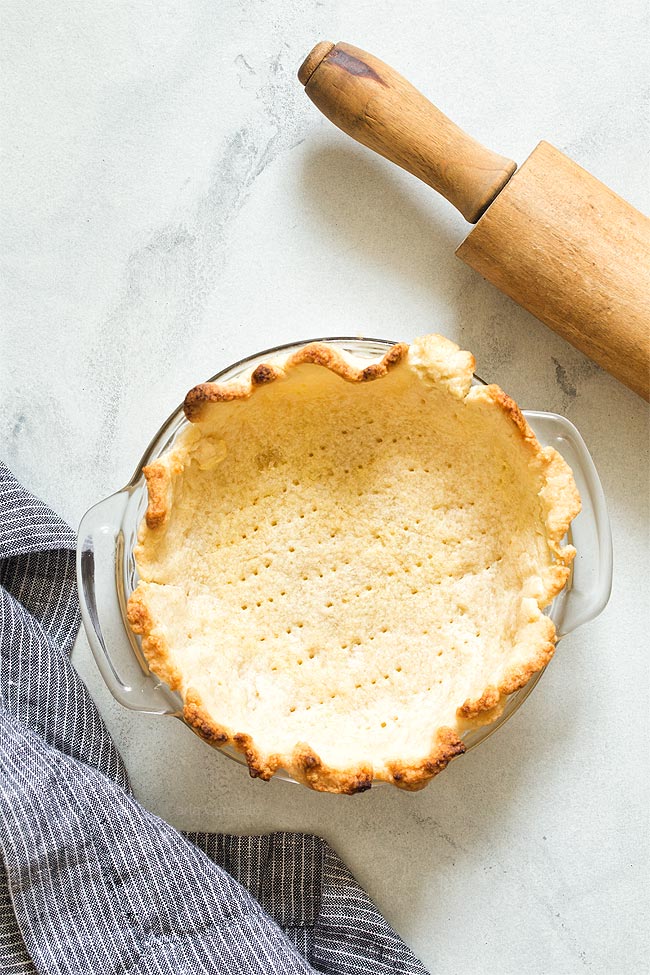
Poke your dough with a fork to allow steam to escape then place it back in the fridge to chill at least 30 minutes. At this point, you can preheat your oven.
How To Blind Bake Your Pie Crust
What is blind baking, you ask? Blind baking is when you bake the pie crust on its own without any filling inside. There are two reasons to do this:
- Prevents the crust from getting soggy – When your dough is raw and you add filling to bake together, there’s no way the bottom is getting flaky because it’s absorbing said filling. By blind baking, the oven partially bakes your dough for a flaky crust.
- Fully bakes the crust for no bake filling – Not all pie fillings are baked, such as banana cream pie, so this is the only time you bake the crust.
Before blind baking your crust, line it with lightly greased foil, covering the pie edges as much as possible, then fill it with pie weights. This helps prevent the crust from puffing and browning too much.
Bake with the foil for 15 minutes then remove the foil. Bake another 5 minutes or until the bottom no longer looks wet.
At this point, you need to check your pie recipe. If you’re going to bake it with filling, you’re done for now.
However, if you’re fully baking your crust, bake for another 15 minutes or until golden brown and done.
Can you make small pie crust ahead of time?
Yes, you can blind bake your pie crust up to 3 days ahead of use. Wrap carefully in plastic wrap then refrigerate until ready to use.
Can you freeze small pie crust ahead of time?
Yes, you can freeze your small pie crust ahead of time. There are three ways to do this:
-
- After making the dough
- Before blind baking
- After blind baking
Whichever method you prefer, wrap thoroughly in plastic wrap, place in a freezer-safe plastic bag, and freeze for up to 6 months.
If you’re worried about your crust getting ruined, you can place the plastic bag in a container to protect it.
If you freeze your pie crust inside your pie pan, place your pan on a room temperature baking sheet before transferring to the oven.
Cold glass cannot be put directly onto a hot oven rack or hot baking sheet because the sudden change in temperature will shatter it.
Recipes For Your Small Pie Crust
Now that your 6 inch pie crust is ready to go, here are some small pie recipes:
Please note: The ramekin recipes can easily be baked in one 6 inch pie pan.
Small Pie Crust (6 Inch Pie Pan)
When you're craving pie for two, bake this buttery, flaky Small Pie Crust for a 6 inch pie pan. Made with both butter and shortening.
Ingredients
- 1 cup all purpose flour
- 2 tablespoons granulated sugar (optional - can leave out for savory pies)
- 1/2 teaspoon salt
- 3 tablespoons cold shortening, cut into 3 pieces
- 3 tablespoons cold unsalted butter, cut into 3 pieces
- 2 tablespoons cold water
Instructions
- In the bowl of a large food processor, add the flour, sugar, and salt. Pulse 1 time to combine.
To make by hand, add to a large mixing bowl. - Add the cold butter and cold shortening. Pulse until cut into the flour, looking like small pebbles.
If making by hand, cut the fat by hand with a pastry blender or 2 knives. - Add the water and pulse until a dough forms. If it seems crumbly, pulse for 1 more minute.
If it's still not coming together, you can add a teaspoon of water but don't add too much water or your crust will puff up too much.
If making by hand, stir in the water with a spoon. - Transfer the dough to a piece of plastic wrap and shape into an evenly round disk. Top with another piece of plastic wrap and refrigerate at least 1 hour.
- Once cold, roll your dough into an 8 inch circle between 1/8 - 1/4 inch thick. You can roll it out in between the plastic wrap or on a lightly floured surface.
If your dough is sticking, refrigerate for another 15 minutes or until cold. - Transfer your dough to a 6 inch ungreased glass pie plate, 6 inch greased disposable pie plate, 6 inch greased springform pan, or 6 inch greased cake pan. If you're having trouble, you can patch the dough back together in the pan.
- Trim off any excess dough then shape crust as desired. Prick the bottom with a fork then refrigerate for at least 30 minutes.
- Preheat the oven to 400F. Have a room temperature baking sheet ready.
- Line the pie crust with greased foil covering the top (touching the dough) then fill with pie weights, such as dried lentils or beans.
- Place your pie pan onto the room temperature baking sheet. Bake for 15 minutes.
Do not put a cold pan directly onto a hot oven rack or hot baking sheet. The sudden change in temperature may cause your pan to shatter. - Remove the foil and weights then bake another 5 minutes or until the bottom is golden brown and no longer looks uncooked.
- At this point, double check your pie recipe. If you are blind baking your crust, you are done.
If you need to finish baking your crust, bake another 10-15 minutes or until golden brown and done. - Cool your crust while you finish your pie recipe. If you're not filling it right away, let it cool completely then cover and refrigerate for up to 3 days or freeze for up to 6 months.
Notes
- Not sure how to fill your crust? Check out my recipes for Mini Peach Pies, Mini Strawberry Pies, Small Pumpkin Pie, Mini Apple Pie, Mini Cherry Pie, and Mini Lemon Meringue Pie.
- Baking your small pie for the holidays? Check out my Thanksgiving For Two, Christmas For Two, and Easter For Two menus for recipe pairings.
- Want to put a top crust on your pie? Double this recipe then split the dough in two before rolling. Work with one dough at a time so the other stays cold.
Recommended Products
As an Amazon Associate and member of other affiliate programs, I earn from qualifying purchases.


This post may contain affiliate links. As an Amazon Associate and member of other affiliate programs, I earn from qualifying purchase.
If you are making dough to use in a day or two, do you first roll it out and refrigerate as a disk, or do you leave it as a ball, wrap and refrigerate? Then can you work with it right away if it’s been in the fridge for a day or two?
There are two ways to do it. You can make the dough, wrap it, then refrigerate it until ready to use. You might need to let it sit on the counter for 5 minutes to warm slightly (it won’t roll so you’ll know when it’s ready). The other way is chilling your dough for an hour, rolling it out the line your plate, then chill the ready-to-bake plate until ready to use.
I’m so happy I found your site! I need some help with doing the crust in a cake pan. Mine turns out a mess each time – I try to form it so that the sides are a bit tilted (my first try I pushed it straight against the cake pan and what a disaster!) but it never works. I don’t really want to buy a 6 inch pie pan, so any help you can give would be wonderful – thank you!
I can say you’re not alone because cake pans really aren’t ideal for pie. I did test it out because I knew I’d get questions about it. It’s doable but likely you may need to sacrifice the first slice in order to get the rest of the pie out. With that said, make sure you’re greasing the pan. You can even line it with foil then leave some overlap for handles to lift it out of the pan.
Thank Carla for the quick response – I will try those suggestions! I might give in a try to find a 6-inch pan today – I take care of my mom and she eats so little that it is the perfect size for both of us. I really appreciate your blog, and will be reading over all your recipes very soon :-)
Does this recipe make a single or double crust 6″ pie?
Single crust. If you’d like a double crust, you can double the recipe then split into two dough balls before rolling.
Taste & texture were great but the edge of my crust glued itself to the glass pie pan. It was impossible to cut thru it. I’m guessing I overbaked. Also I didn’t use my foil during blind baking to cover the edge. If it matters I used butter and EarthBalance. Your thoughts?
I think you answered your own question by not using the foil.
I made this pie crust for my mini pie maker with canned fruit filling and it came out amazing. top was brown and flaky and bottom brown as well. it’s like eating a pie from the bakery. I love it. thank you so much. these mini pie makers are new to me even though they have been selling for a few years. the instructions in their booklet is not fully correct. I try out different recipes and this crust is my go to for pie.
Happy to hear it works with your mini pie maker!