Apple Hand Pies
These Apple Hand Pies made with homemade pie crust are golden, flaky pastries stuffed with warm apple pie filling that taste like fall in every bite! Perfect for snacking and can be frozen ahead of time.
Growing up I used to go to a local apple festival every year with family during the first weekend in October.
It seems like that was THE weekend for everyone to plan their events and activities, so at some point I stopped going on a regular basis.
Sometimes we still go, but most of the time we just hit up the local apple orchards and pick our own. One farm has a fall festival where you can get a hybrid cinnamon roll donut that’s almost as big as your face!
After picking our fresh juicy apples comes to biggest question of the day – which apple recipe to make first?!
Since I’ve been blogging for over 18 years (!!!), it becomes harder and harder to think of new recipes.
I’ve made mini apple pies, apple dumplings, apple bread, cheesecake stuffed apples.
But what I didn’t make (until now) are these Apple Hand Pies!
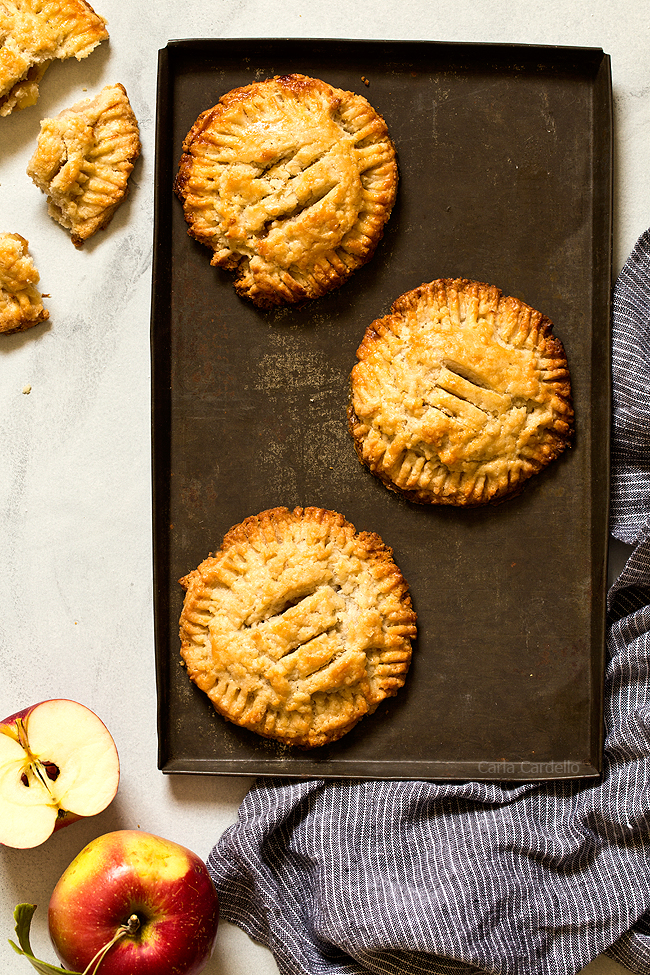
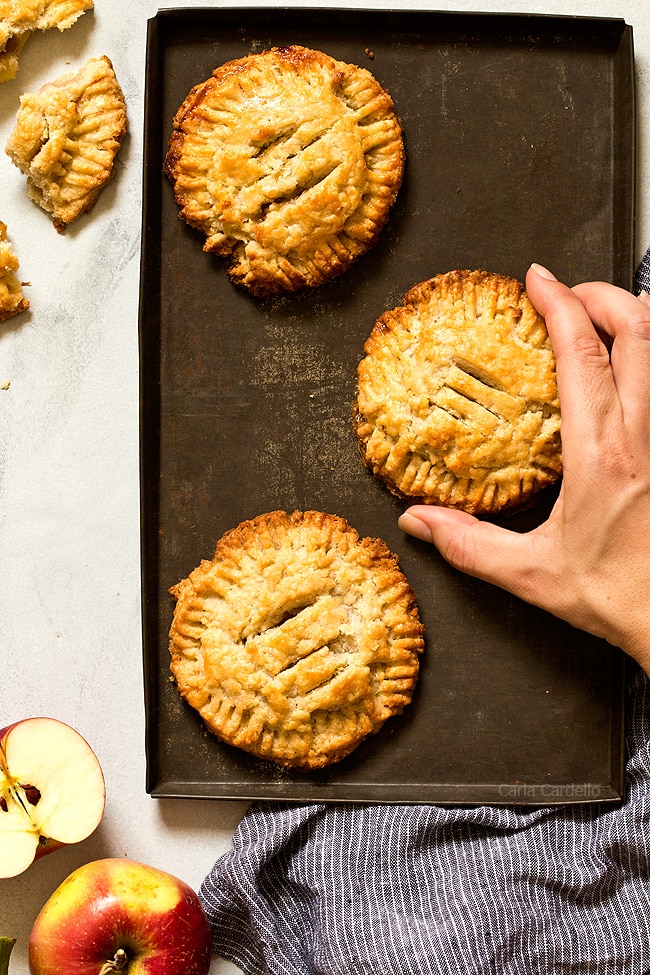
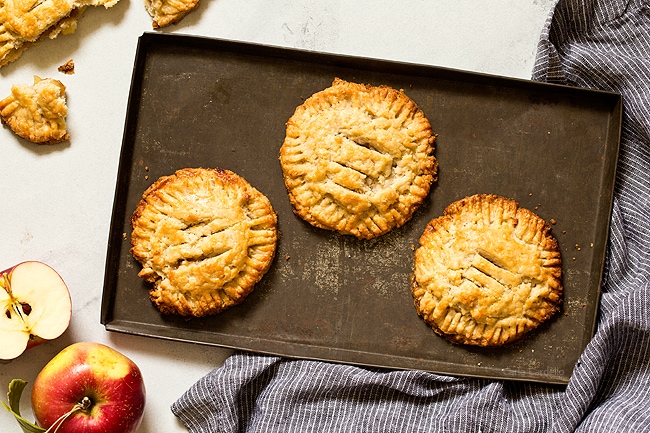
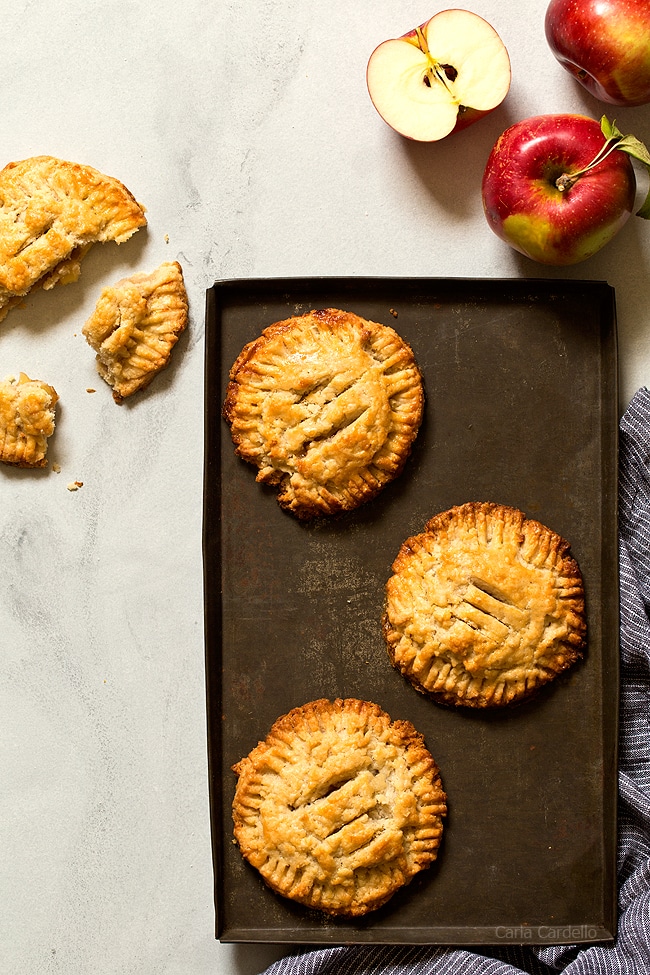
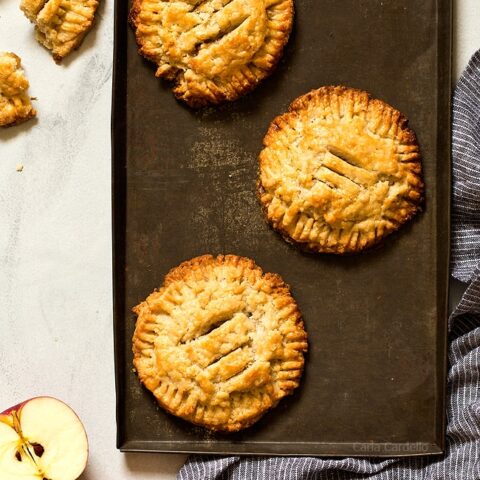
They’re mini apple hands pies with a golden, flaky homemade pie crust stuffed with apple pie filling.
They’re similar to apple turnovers but are round and made with pie dough. Similar to a portable small apple pie.
Apple hand pies are the best because you get your own individual pie! Whether you share the rest is up to you.
Most hand apple pie recipes make a dozen (or more!) mini pies. As tempting as it is, you and I certainly don’t need to eat 12 hand pies.
Or maybe we want to, but our bodies say no. A small batch recipe is a great compromise, don’t you agree?
Ingredients For Apple Hand Pies
Here’s what you need to make your hand apple pies:
- All-Purpose Flour: Makes a tender crust as well as helps keep the dough from getting too sticky.
- Sugar: Adds sweetness and helps caramelize the dough
- Salt: Flavor enhancer especially if using unsalted butter
- Cold Butter: Adds the most flavor and melt-in-your-mouth quality, although it doesn’t make the most tender dough…
- Cold Shortening: …which is why I also add shortening. Shortening makes the most tender, flaky crust even though it may lack in flavor.
- Cold Water: Creates steam in the dough to make flakes and also helps bind everything together to form a dough.
- Apple pie filling: Can use homemade or canned
- Egg: Ensures the pie is golden brown after baking. Without it, the crust will look anemic.
Can I use another fruit instead of apple?
Don’t want to make apple? Substitute strawberry pie filling, blueberry pie filling, peach pie filling or cherry pie filling.
How To Make Apple Hand Pies
Here’s how to make your mini apple hand pies:
- Make the pie crust in a food processor or by hand. Chill for 1 hour.
- Roll out the dough until 1/8 inch thick. Using a 3-inch cookie cutter, cut out as many circles as you can and place on a parchment-lined baking sheet.
- Add filling to center of half the circles. Top with unfilled circles, sealing to form hand pies.
- Cut 3 slits on top for ventilation then brush with egg.
- Bake at 350F for 18-20 minutes or until golden brown.
Serve warm or at room temperature. Store leftover hand apple pies in an airtight container for up to 3 days.
Can you freeze apple hand pies?
Yes, mini apple hand pies do freeze well!
Wrap each one in plastic wrap (either before or after baking) then place the group in a freezer bag. Freeze for up to 3 months.
To thaw, place in the refrigerator overnight then bake fully if pre-baked or bake long enough to warm them up.
More Apple Recipes
Looking for more? Check out my full list of recipes using apple pie filling including:
Apple Hand Pies
These Apple Hand Pies made with homemade pie crust are golden, flaky pastries stuffed with warm apple pie filling that taste like fall in every bite! Perfect for snacking and can be frozen ahead of time.
Ingredients
- 1 + 1/2 cups all-purpose flour
- 2 tablespoons granulated sugar
- 1 teaspoon table salt
- 1/4 cup (2 ounces or 4 tablespoons) vegetable shortening, cold and cut into 4 pieces
- 1/4 cup (2 ounces or 4 tablespoons) unsalted butter, cold and cut into 4 pieces
- 3 tablespoons cold water
- 1/4 cup apple pie filling (homemade or canned)
- 1 large egg, lightly beaten with fork
Instructions
- For the dough: In the bowl of a food processor, add the flour, sugar, and salt. Pulse 1 time to combine.
To make by hand, add to a large mixing bowl. - Add the cold butter and shortening then pulse until they are cut into the flour, looking like small pebbles.
If making by hand, cut the fat by hand with a pastry blender or 2 knives. - Add 3 tablespoons cold water then pulse until the dough comes together. If it seems crumbly, pulse for 1 more minute.
If it's still not coming together, add a teaspoon of water but don't add too much water or your crust will puff up too much.
If making by hand, stir in the water with a spoon. - Transfer the dough to a piece of plastic wrap and shape into an evenly round disk. Top with another piece of plastic wrap and refrigerate at least 1 hour.
- On a lightly floured surface, roll out the dough until 1/8 inch thick. Using a 3-inch cookie cutter or round glass, cut out as many circles as you can and place on a parchment-lined baking sheet.
- Gather up the dough scraps and reroll. Repeat until all of the dough is gone. You should get 8 circles. If the dough gets too warm and sticks, refrigerate until cold again.
- Spoon roughly 2 teaspoons of filling in the center of half the circles. Top with the unfilled circles, forming 4 pies. Seal the edges with a floured fork then cut 3 slits into the top.
If the dough sticks too much while assembling, refrigerate until cold again. - Once fully assembled, freeze for a minimum of 15 minutes. If you're freezing longer than an hour, wrap each one in plastic wrap then store in a freezer bag until ready to bake.
- When ready to bake, preheat oven to 350F.
- Brush each pie with the beaten egg. Bake 18-20 minutes or until golden brown. Remove to a cooling rack and cool for at least 15 minutes. Serve warm or at room temperature.
Store leftovers in an airtight container for up to 3 days.
Notes
- Enjoyed this recipe? Check out Mini Apple Pies, Small Apple Pie, and Apple Turnovers.
- Don't want to make apple? Use another fruit such as blueberry pie filling, cherry pie filling, peach pie filling, or strawberry pie filling.
Recommended Products
As an Amazon Associate and member of other affiliate programs, I earn from qualifying purchases.

First published October 9, 2017
This post may contain affiliate links. As an Amazon Associate and member of other affiliate programs, I earn from qualifying purchase.
Why don’t you have a printable. Receipt without printing 14 pages???????FIX your website
Are you using the print button on the recipe card itself??????? Go to the recipe card, look under the thumbnail, and hit the print button. If you don’t see it, please send me a screenshot and which browser you’re using so I can help troubleshoot.
Great recipe! So happy to find a recipe for small batch hand pies. The Apple version was delicious! I’m looking forward to experimenting with other fruit versions. Thank you!
Glad you enjoyed them, Sandy! My favorite filling is cherry, so I vote that next :D
How long would these keep in the freezer and what cooking time for a full frozen pie?
I’d say around 3-6 months depending on how well you store them. As for bake time, you’ll likely need an extra 10-15 minutes. Bake for the indicated time, check them, then if not done add another 10 minutes then go from there.
Thanks!