Homemade Salt and Vinegar Chips
Crispy Homemade Salt and Vinegar Chips from scratch taste just like store-bought chips with their lip-smacking flavor thanks to one secret ingredient. Learn how to make baked salt and vinegar chips as well as frying them.
What’s on your culinary bucket list?
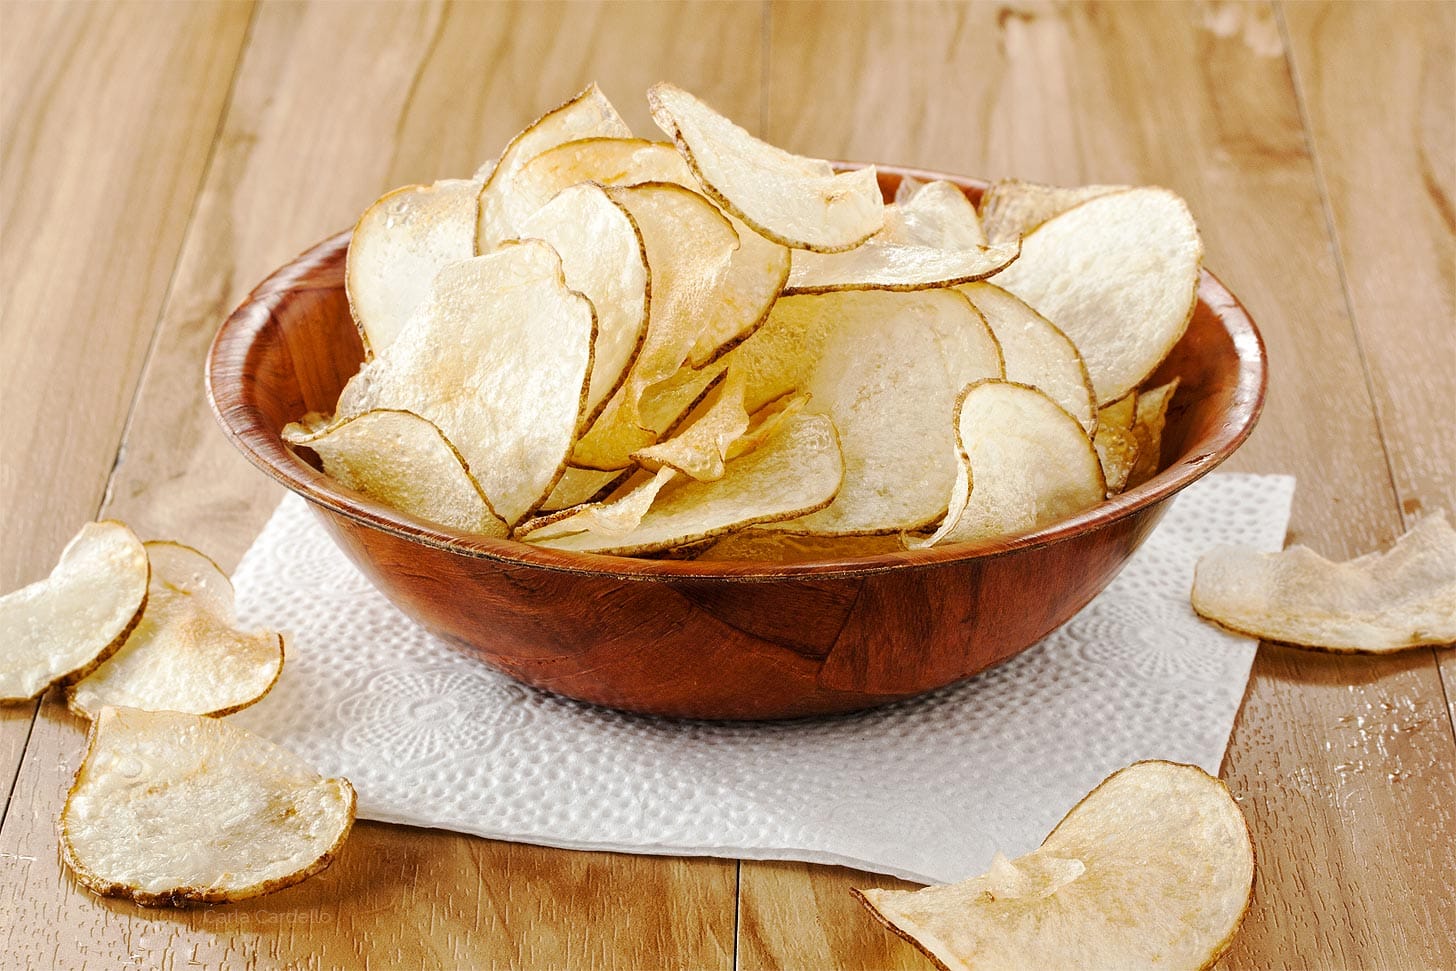
If you said “make your own potato chips”, you’re in luck! This easy recipe for Homemade Salt and Vinegar Chips will have you wishing you made chips from scratch sooner.
I chose salt and vinegar chips because that’s one of my favorite flavors. Not only do I love the taste, it helps calm my stomach from motion sickness.
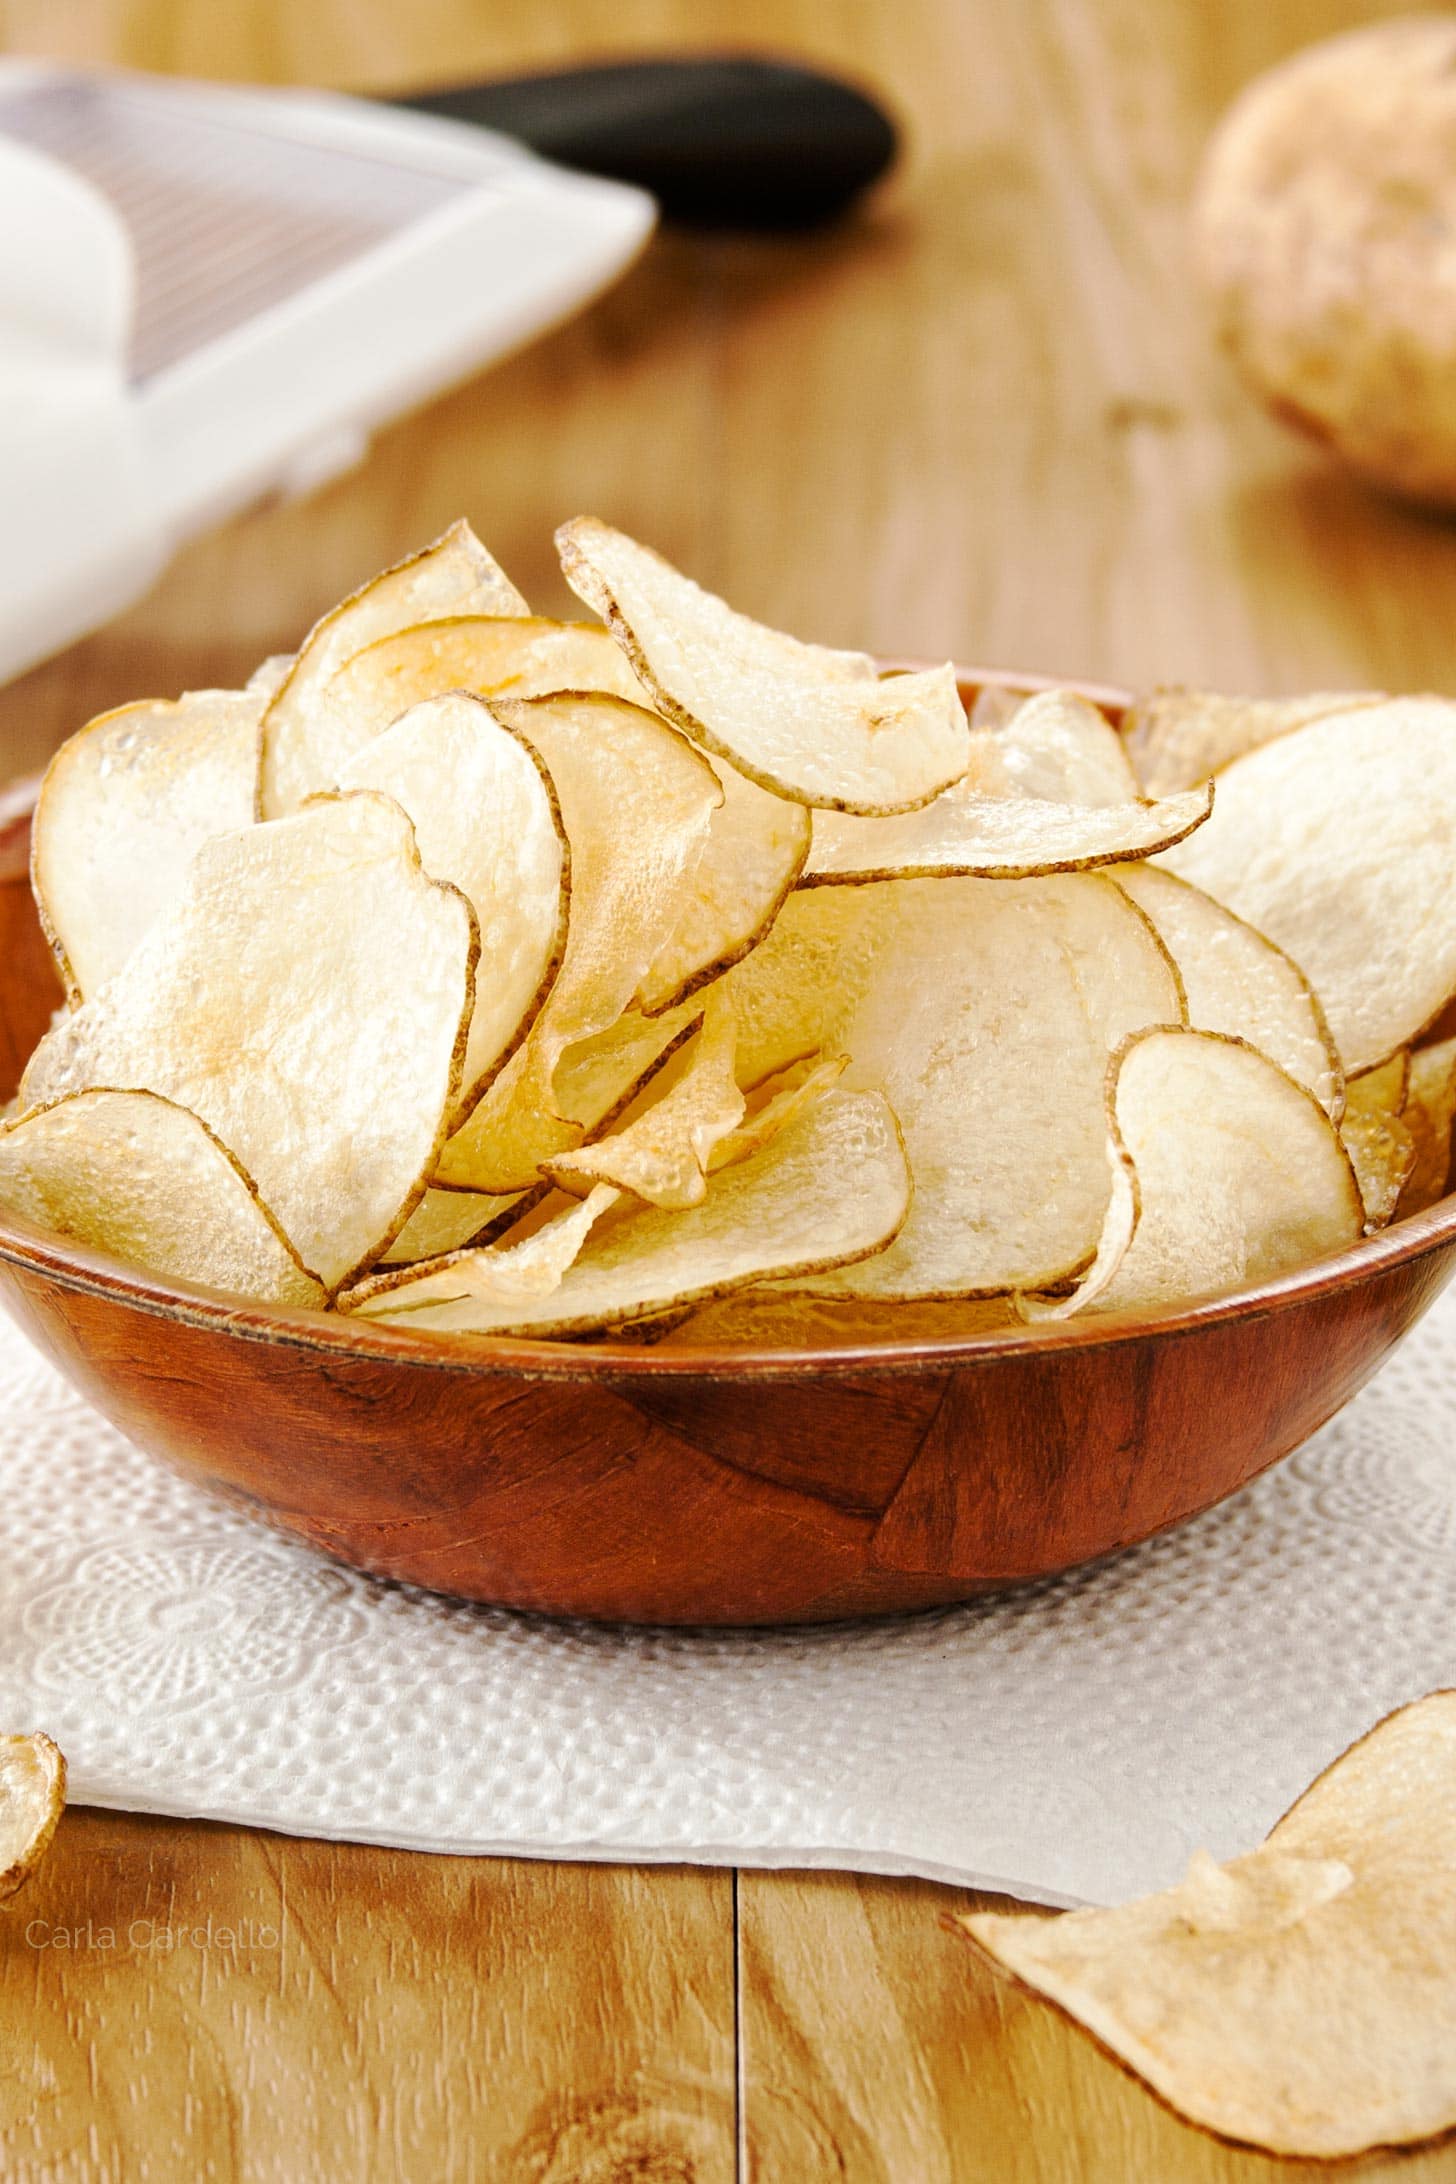
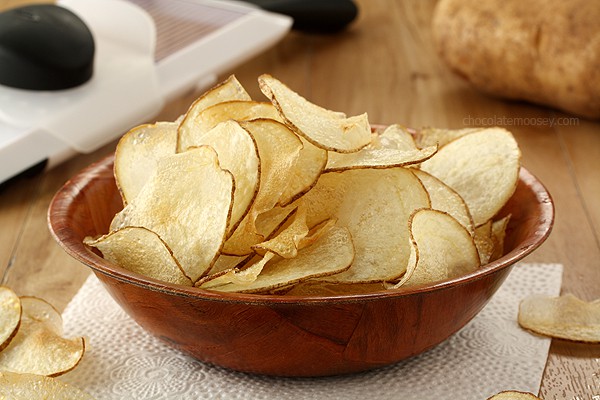
They’re crispy homemade potato chips tossed in a salt and vinegar seasoning. They taste just like store bought chips thanks to one secret ingredient.
Sure, it’s much faster and more convenient to buy a bag, but there’s something satisfying about making salt and vinegar potato chips from scratch.
Not only will I show you how to both bake and fry your chips, I’ll show you how to use a mandoline to slice potato chips thinly.
In addition to watching your favorite TV show, serve your salt and vinegar chips alongside some avocado burgers or BBQ bacon burgers.
Ingredients For Salt and Vinegar Chips
To make this salt and vinegar chips recipe, you’ll need the following ingredients:
- Russet potato: Russets tend to make the best chips due to their starch content, but you can also use other varieties such as red or Yukon gold.
- White distilled vinegar: For soaking the potato slices. Although you can use other flavors, a neutral white distilled is best.
- Vinegar powder: No matter how long you soak your chips, you won’t achieve that lip-smacking flavor without it. More on it below.
- Salt: I prefer kosher as the crystals are a bit larger and easier to taste. You can certainly use table salt but you’ll need to adjust the amount to your taste.
- Oil: Use a neutral oil such as vegetable or canola. Do not use olive oil for frying as they have a low smoking point.
What is vinegar powder?
Vinegar powder is dehydrated vinegar which adds tanginess without adding any additional liquid to the recipe.
Similar to my homemade BBQ chips, you toss your chips with vinegar powder as a seasoning.
The best place to buy your vinegar powder is online.
Can you leave out the vinegar powder?
I get it – vinegar powder is pricey for something you’re only going to use a few times. And there aren’t many guides to making it homemade, unfortunately.
However, it truly is the only way to get your salt and vinegar chips to taste like store-bought. You can also use your powder for Salt and Vinegar Popcorn or even Salt and Vinegar Wings.
If you still insist on not buying it, increase your vinegar soak time to 2 hours. However, please note your end results will be more subtle in flavor.
Tips For Making Crispy Potato Chips
Here’s how to make your homemade salt and vinegar chips crispy every time:
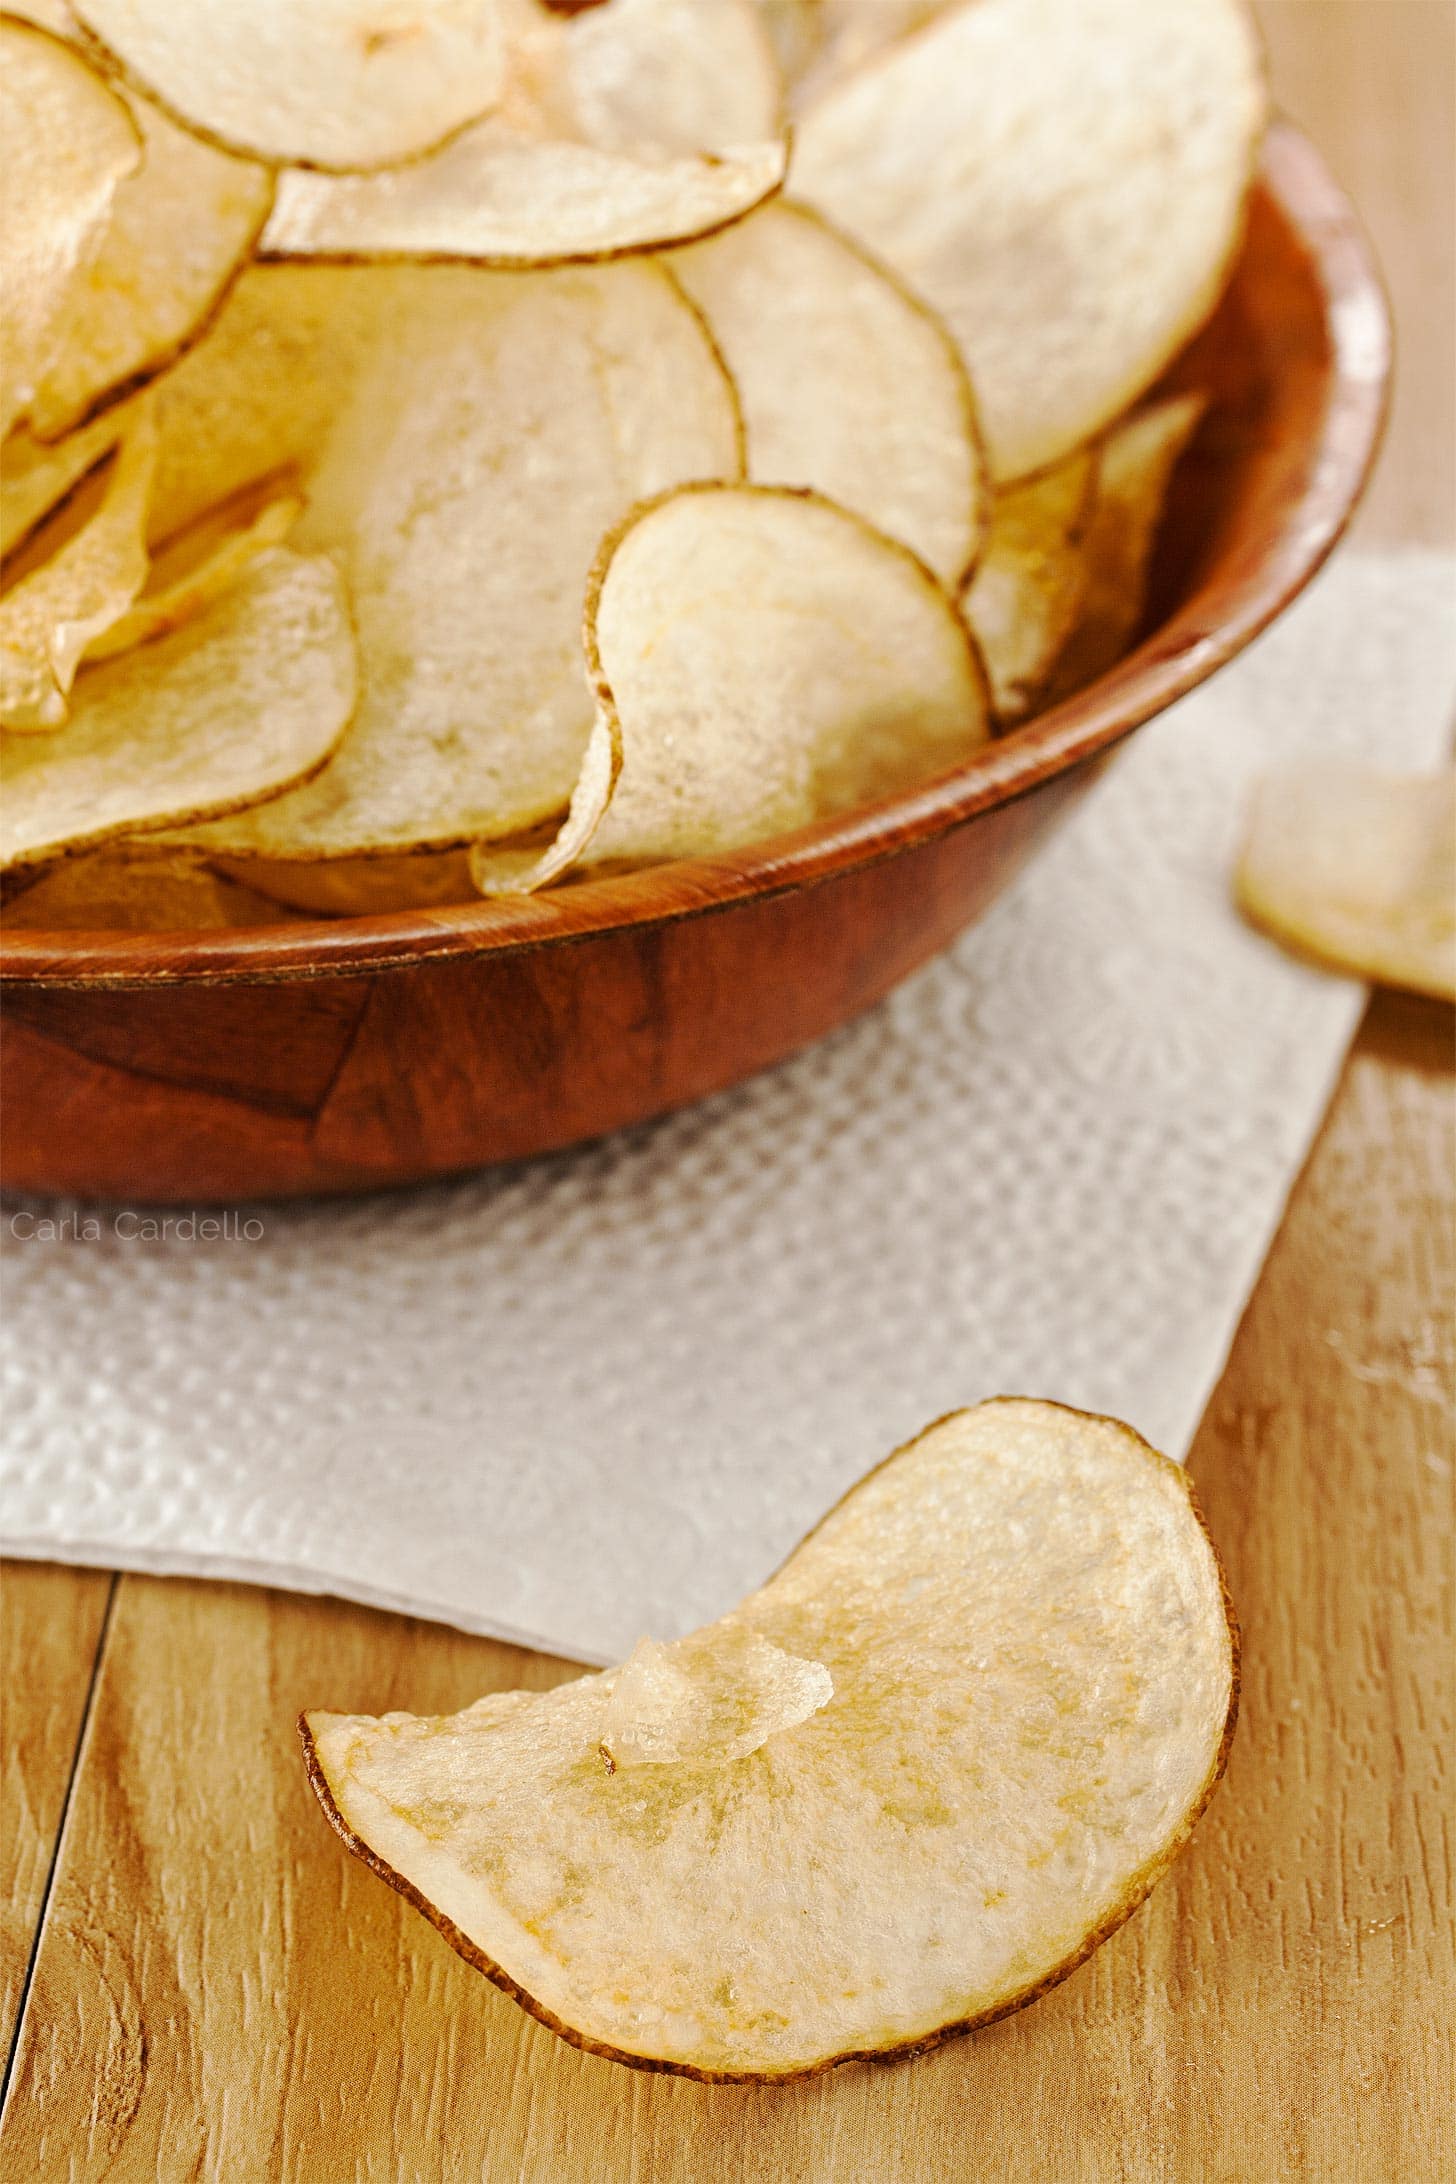
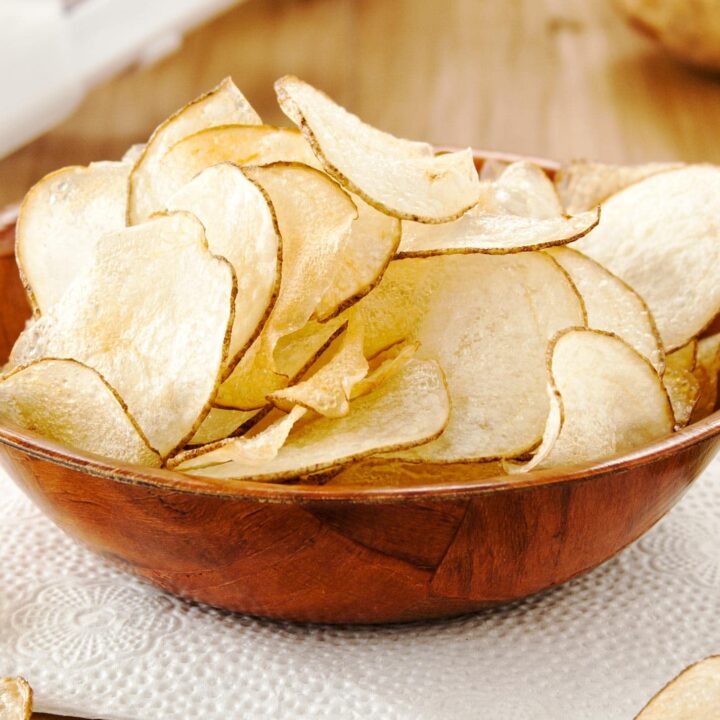
- Slice potatoes thinly. The key to making crispy salt and vinegar chips is using a handheld mandolin to thinly slice them. Too thick and the middle becomes cooked, not crispy. Save the thicker slices for making stovetop scalloped potatoes or au gratin potatoes for two.
- Soak potatoes in vinegar. Not only does it help infuse more vinegar flavor, a vinegar bath removes the surface starch which is what will cause the potatoes to brown (and burn) more quickly while cooking.
- Dry potatoes really well. Water is the enemy of oil, so make sure your slices are extra dry by patting them down with paper towels before cooking.
- Cool in a single layer. Once they’re done cooking, let your chips cool in a single layer for a few minutes. If you pile them on top of each other, they may get soggy from the heat.
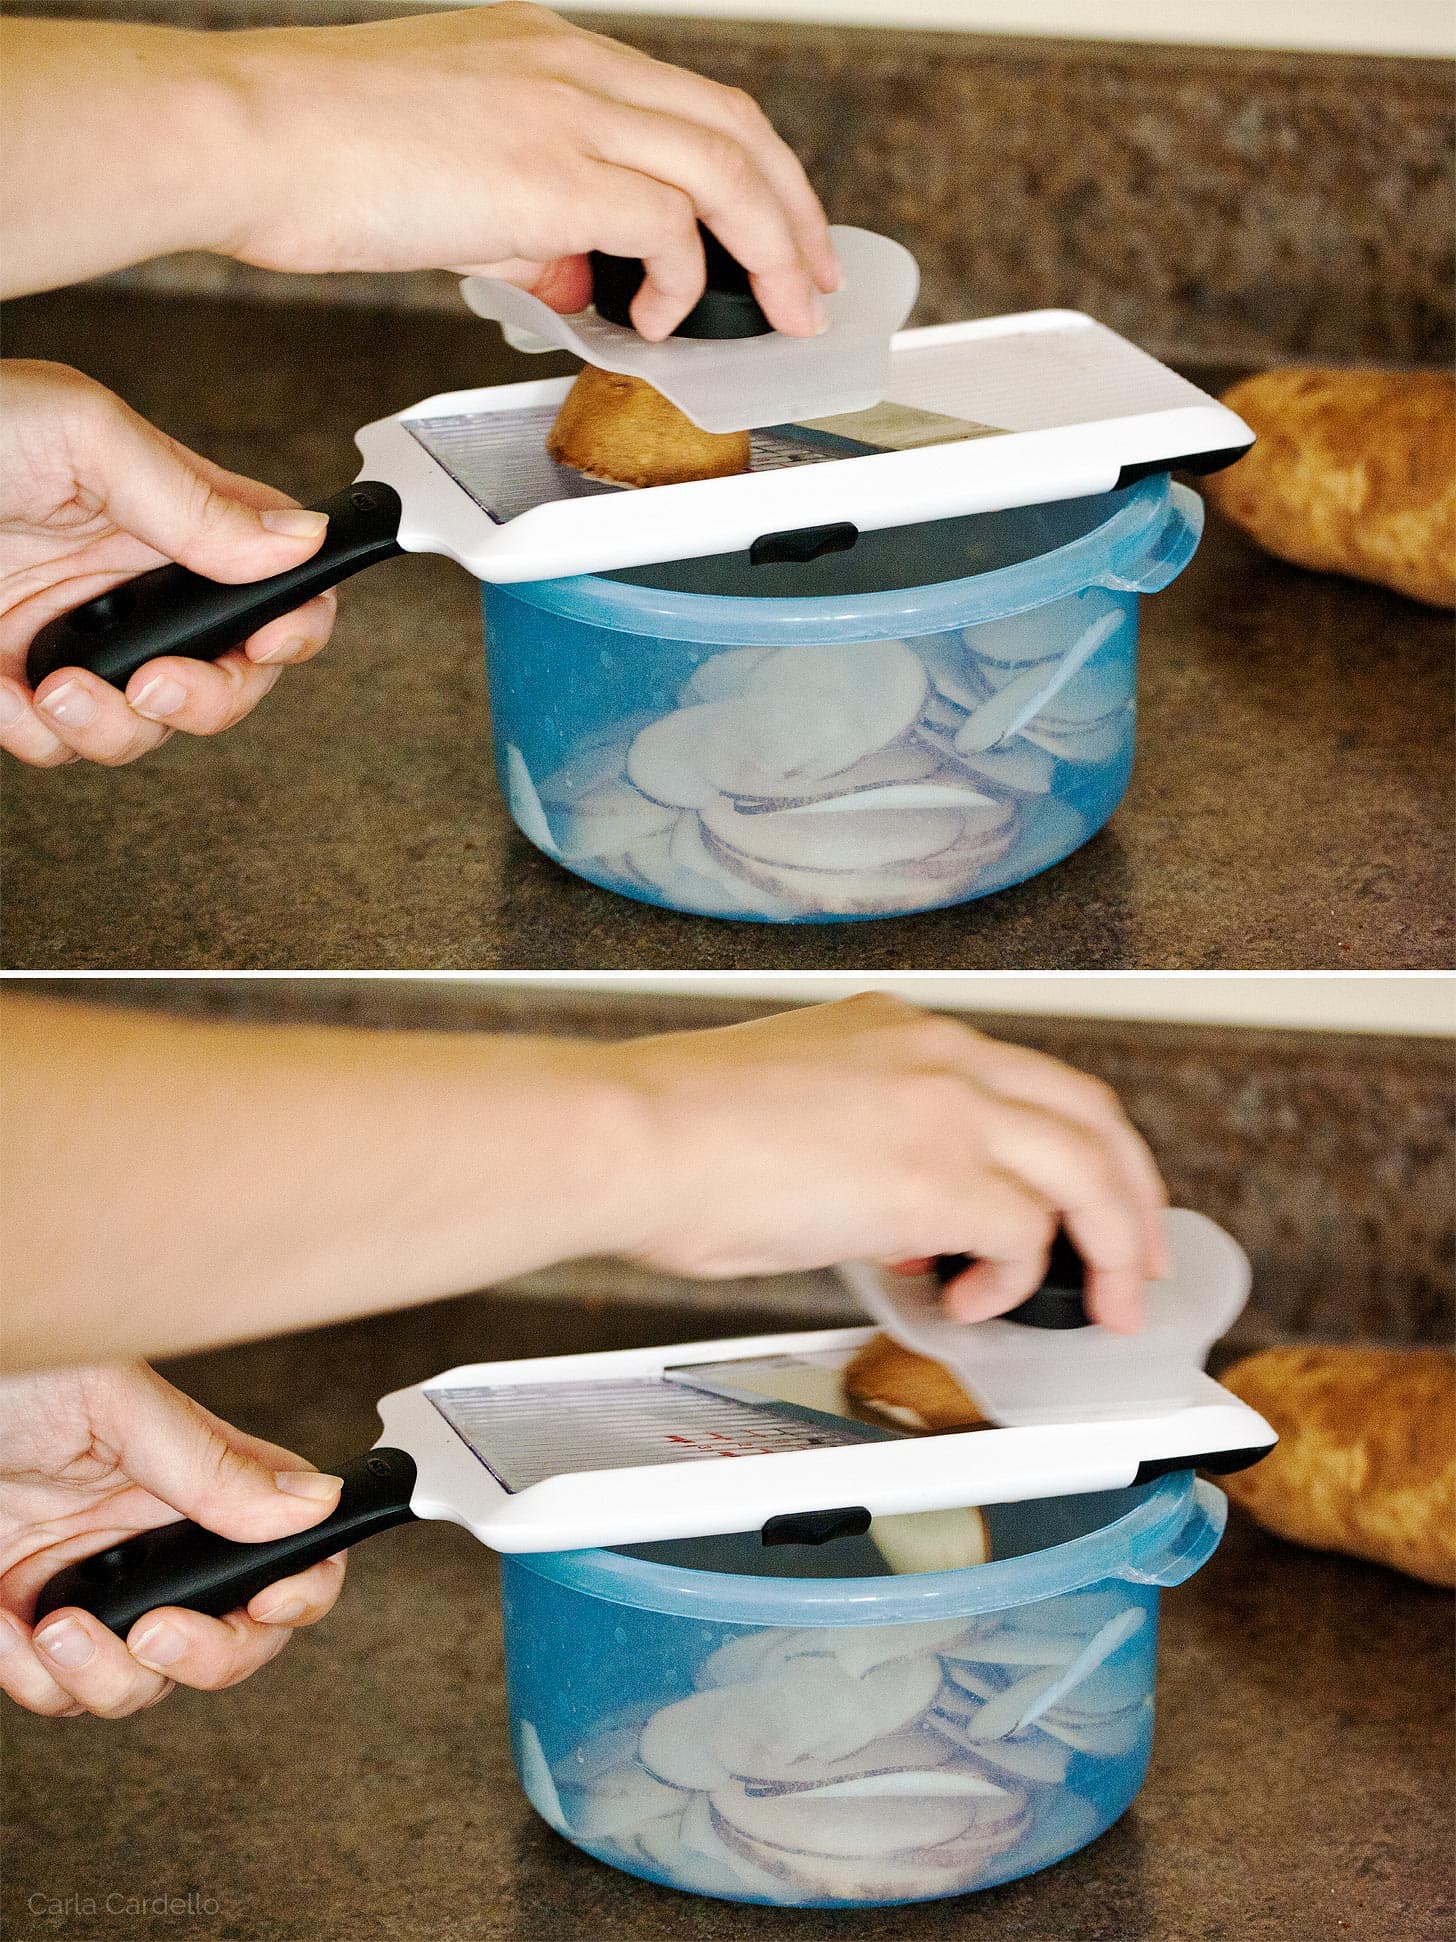
How To Use a Mandoline
To use the mandoline, place it over any bowl and use the gripper to hold the item you are slicing. This is very important because the blade is sharp.
However, some long and skinny vegetables such as carrots or parsnips don’t grip very well.
When I sliced some carrots for a soup, I couldn’t use the gripper until I got closer to the blade. Fatter produce such as potatoes and apples gripped just fine.
Because the blade is so sharp, my mandoline has two safety devices. The first is locking the blade in place. Make sure you do this before washing.
Second is the gripper slides onto the mandoline and covers the blade for storage. This is very critical if you have a junk drawer of tools (me!) and you don’t accidentally cut yourself when reaching for something else.
How To Make Salt And Vinegar Chips
Ok now that we got all of the technique out of the way, time to make your homemade salt and vinegar chips recipe!
First, thinly slice your potato then soak in vinegar for 30 minutes.
Originally I experimented with soaking times of 30 minutes, 1 hour, and 2 hours. However, the difference was very subtle, so why wait 2 hours when you can do it 30 minutes?
Once they’re done soaking and patted dry, you can either bake or fry your chips.
To fry salt and vinegar chips:
- Fill deep fryer with frying oil of choice and heat to 350F. I use vegetable oil, but you can also use canola or peanut oil.
- Fry potato slices a few at a time until golden brown, being careful not to overcrowd the fryer. Time will vary depending on the size and thickness, but the average is 3-5 minutes.
- Toss with salt and vinegar seasoning then cool for a few minutes to allow them to crisp up.
- Repeat with the remaining slices, ensuring the oil is 350F when frying. You may need to pause in between batches to let the oil heat up again.
To make baked salt and vinegar chips:
The method is similar to making my homemade pita chips.
- Preheat oven to 400F. Line two baking sheets with foil and lightly grease with cooking spray.
- Add potato slices in a single layer on the two sheets. Brush each slice with oil then bake for 10-15 minutes or until golden brown and crisp (but not burnt).
- Toss in the salt and vinegar seasoning then cool until crispy.
No matter which method you choose, chips are best eaten the day they’re made. However, you can store them in an airtight container for up to 1 week.
Salt and Vinegar Chips FAQ
It doesn’t matter as it’s a personal preference. I leave the skins on for one less task to do.
Yes, you can make salt and vinegar chips in an air fryer! Toss the slices with oil then air fry at 400F for about 10-15 minutes, flipping them every 5 minutes with tongs so they cook evenly.
More Potato Recipes
Since it’s cheaper to buy a 5 pound bag of potatoes, you’re going to have extras. Here are more potato recipes you can make:
Homemade Salt and Vinegar Chips
Crispy Homemade Salt and Vinegar Chips from scratch taste just like store-bought chips with their lip-smacking flavor thanks to one secret ingredient. Learn how to make baked salt and vinegar chips as well as frying them.
Ingredients
- 1 large russet potato, peeling optional (roughly 6-8 ounces)
- 3/4 cup white distilled vinegar
- 1 tablespoon vinegar powder* (see Note)
- 1/2 teaspoon salt, preferably kosher
- Frying oil (such as vegetable, canola, or peanut), enough to fill a fryer or to brush slices before baking
Instructions
- With a mandoline, thinly slice the potato to about 1/10 inch (2.5 mm) thick (setting 2 on an OXO mandoline). You do not want to see through the slices.
- Put the potato slices in a bowl and pour vinegar over top. The potatoes should be submerged - if not, add more vinegar until covered. Soak for 30 minutes. Drain and pat completely dry.
- In a large bowl (preferably with a lid so you can shake it for easier coating), combine the vinegar powder and salt.
To fry potato chips:
- Fill a fryer or deep saucepan with oil and heat to 350F.
- Once the oil is ready, ensure the potato slices are completely dry. Fry a few at a time until golden brown, being careful not to overcrowd the fryer. Time will vary depending on the size and thickness of the slices, but the average is 3-5 minutes.
- Remove the chips and drain on a paper towel lined plate. Immediately toss with the salt and vinegar mixture then cool for a few minutes to crisp up.
- Repeat with the remaining slices, ensuring the oil is 350F when frying. You may need to pause in between batches to let the oil heat up again.
To bake potato chips:
- Preheat oven to 400F. Line two baking sheets with foil and lightly grease with cooking spray.
- Ensure the potato slices are completely dry then place the slices in a single layer on the two sheets. Brush each slice with oil.
- Bake for 10-15 minutes or until golden brown and crisp (but not burnt).
If you find some smaller pieces are baking faster after 10 minutes, you can remove those then finish baking the rest. - Immediately toss with the salt and vinegar mixture then cool for a few minutes to crisp up.
Notes
- Vinegar powder is the key to giving these chips that lip-smacking store-bought flavor, so you really don't want to leave it out. You can buy vinegar powder online.
- Use the extra vinegar powder to make Salt and Vinegar Popcorn and Salt and Vinegar Wings.
- If you don't have vinegar powder, increase the soak time to 2 hours. Please note the vinegar flavor will be more subtle and taste nothing like store bought.
- Enjoyed this recipe? Check out my recipe for BBQ chips!
Recommended Products
As an Amazon Associate and member of other affiliate programs, I earn from qualifying purchases.


First published September 25, 2013
This post may contain affiliate links. As an Amazon Associate and member of other affiliate programs, I earn from qualifying purchase.
It doesn’t cut parsnips well?? Hahahahahahaha Ouch.
You poor thing. And Brian too. I can definitely see how the parsnips of doom happened.
Carla, I want these potato chips so bad it hurts. I can’t wait to make these. Now, to buy a mandoline.
Or you could win one ;) good luck! And even if you don’t win, I highly recommend buying one!
These sound CRAZY good… I love S&V chips above all others, well except maybe dill pickle
I have to be in the mood for dill pickle chips. I bet for homemade, you soak them in pickle juice rather than vinegar. Hmm
I’d either make a parsnip gratin or these chips. I have a daughter that LOVES salt & vinegar potato chips from the store. I’m thinking she’d enjoy them even more if I made them for her from scratch!
You can always make both! Then you’ll be mother of the year ;)
These potato chips look awesome! So thin and crisp and om nom nom
They sure are! I was pretty excited and they barely lasted a minute after sitting to watch tv.
I love that you showed us two ways to make this, since you know I don’t like to fry at home. Baking chips for the win!
I rarely drag out the deep fryer, so it’s great to have an option to bake!
Very nice looking chips! Salt and vinegar are my weakness! I have an OXO mandolin already, so I wont enter, good luck everyone! :)
Technically my weakness is Ruffle chips, but until I can figure that one out, S&V will do just fine ;)
I will be slicing apples for pie, apple crisp and other fall desserts.
There you go! That should make prep much easier.
I have the big old bulky granddaddy DeBuyer mandoline, which I love. But I always buy handheld mandolines as gifts, and would find a handheld sufficient (I don’t have one!) for most slicing tasks.
These are amazing Carla. My gramma used to make homemade chips for us all the time. She was from Quebec and man they know chips and fries there. I need to try these, my daughter is a huge salt and vinegar fan. They look absolutely perfect.
My neighbor is blind but cooks everyday. She makes her own granola etc. in the oven, but uses the microwave to make potato chips. She salts and spices them immediately after cooking.They are very good !!
Oh my, I am so going to make these. I would have never have thought to soak in vinegar – that’s such a good idea. I’ll let you know how I go.
Come to mama!! These look amazing! I need to make my own potato chips stat!
Trying these out today. Along with s&v green beans tired of greatn bean casserole…yuck .Oh yeah be careful with mandolin never used one . fingertip almost sliced off….such
Alrighty, I have two of my homegrown red potatoes sliced and soaking. Along, with a carrot that I sliced to make sure my mandolin would get things thin enough (separate containers)… I plan to be eating tasty, organic, and CHEAP chips in about 2 1/2 hours…
Hmmmm, okay… some of mine crisped and some didn’t… and they seemed to lack a strong vinegar flavor. I used the bake method and instead of foil used a silicone sheet. Could this be the issue?
I see the photos show the chips on baking sheets and a baking rack, but the directions say foil lined sheets… should I have baked them on a rack instead? Or is that how you drained your fried chips?
I used white distilled vinegar… is there a better/stronger vinegar to use? Soak time was about 2.5 hours, got busy with other stuff. ;-)
Hmm I’m not sure why yours didn’t crisp up without being in the kitchen with you. Maybe you didn’t brush with enough oil or baked them long enough? I never tried this recipe with red potatoes or with silicone mats, so I’m not sure if that matters. I’ll have to experiment. The tray in the photo is from frying, so that’s why they are on a rack.
Thank you. Is there any special type of vinegar I should use?
BTW-I purchased the Mandoline and Fryer you recommended from your link. They work great.
I used regular white distilled vinegar. Glad you’re enjoying the mandoline and fryer! As you probably saw, the fryer doubles up as an extra cooker when your stove is occupied. I’ve used it when I need a few hours for meat to cook.
I made these yesterday and my son and I gobbled them up and ate them before we could make it in front of the TV! I am thinking about slicing several potatoes at once, next time. Any suggestions on a maximum time these could safely soak in vinegar in the fridge? Thanks for a great recipe!
Haha yes I’ve been there too, kinda like eating the movie popcorn before the movie starts ;) I don’t know of a max time, but no more than 24 hours I’d imagine.
I am trying this today with daikons instead of potatoes. Low carb:-) Wish me luck!
I made the chips and they came out great. My finger slipped off the potato and a piece of my finger got sliced off. Be careful that oxo madoline is so sharp…
Oh no! I hope you are ok. Yes, the mandoline is very sharp and is highly recommended to use the grip guard as you get closer to the blade.
How is your instructions gonna mention to use foil and I’m your picture you used a rack? I made these and they didn’t come out too well. The vinegar was too strong and the chips didn’t get crispy prior to burning. :-(
The picture is showing the chips after I fried them, not baking. They are on a rack so the excess oil can drain off.
I am about to make some of the chips. When I soak them in vinegar, do I place them in the fridge or leave them at room temperature?
Room temperature
Thanks for the recipe!
Have you tried adding the vinegar after baking them? I’m not a very patient person :)
No, I have not. I know French fries can be served with salt and malt vinegar, so maybe you can with potato chips? Although I think soaking beforehand would be better flavor-wise.
Wow that was unusual. I just wrote an incredibly long comment but
after I clicked submit my comment didn’t show up.
Grrrr… well I’m not writing all that over again.
Regardless, just wanted to say great blog!
Oh no, sorry it didn’t show up!
Got the potatoes soaking now! Can’t wait to try them in about 2.5 to 3 hours. Is 2 hours the minimum amount to soak in viniger?
I highly recommend at least 2 hours. I’ve tried it with a shorter time and wasn’t as happy with the shorter soak time.
I too sliced my finger… I joked about it “finger flavored chips” but it still hurts. I soaked my chips way over 2 hours but my baked chips barely had vinegar taste. I also had some good crispy ones and others weren’t. I think that I missed drying the ones that didn’t crisp up.
OMG!> I am licking the salt off of my fingers as try to type, but i need another few right now, my stomach is actually growling for them! Wait a tic!
ok, I’m back, brought the plate with me, and my keyboard is now quite greasy! You say, “Karen, stop typing finish your treat, and come back, silly goose.” No. No. No. Now. OMGeezers, these are delicious! And I just made them PLAIN!! I could NOT WAIT even one second let alone an hour for salt and vinegar ones! Cut Them THIN!! Paper Thin! See-Thru Thin! The thinner the better. My see-thru ones, browned up like nobody’s biz, but they tasted of childhood! Lay’s regular, original-style potato chip, had a few tiny pieces of really browned chips, in the bottom of the bag, that I just loved to eat! So, thank you for this so much. My husband and his friend ate so many of them! They loved all the chips I made!. Yeah. I started slicing up everything in sight, when I grabbed the Chihuahua and started off to the kitchen, he stopped me! Enough!, he says. I say, “but I wanted to try a hispanic flavor….” Just Kidding!! I’m goofy that way! Apples,(yes) radishes (don’t bother, really) carrots (meh), and kept munching on my potato chips. I put the apple chips in with the potato chips, and waited.. 3, 2, 1, Whoa! what was THAT? that was goood!, the guys exclaimed as they dove into the mixed plate of chips! I wanted to surprise them! heh heh. sweet and salty, and salty potato chips all together is good!. My next batch of see-thru potato chips are soaking in organic cider vinegar right this second…Can’t wait! Oooo 15 minutes left! Thank you so much! I love this! I love you! Subscriiiii-Bing!
Found a recipe for vinegar salt to increase the lip-smacking burn that I love so much. Once the salt mixture is finished, I will surely be making these with a thick dusting of even more S&V goodness on top!
What?! Vinegar salt?! Now this I need to try.
Can you use cooking spray, like pam, instead of brushing them? Seeing as Pam is basically just canola oil anyway
I never tried it, but I would imagine as long as the chips are completely sprayed (aka don’t miss any spots), it would work as well.
I just sliced up my potato to soak and I am a little concerned that the vinegar doesnt cover all of the slices. Should I be soking them in a bowl, tin, tray or something else? Or maybe I should put more vinegar in? Thanks, Liv x
I soaked mine in a bowl that wasn’t too wide at the bottom. Since bowls can vary in shapes and sizes, if there isn’t enough vinegar, I would add a bit more to cover them.
I’ve made these on two separate occasions and they turned out fairly well. I’d like the vinegar taste to be more powerful & soaking for 3+ hours doesn’t seem to do it. Have you ever used vinegar powder for this recipe?
Funny you ask that – I ordered some online and waiting for it to arrive. When I first published this recipe, I didn’t know vinegar powder existed. Once I get to play with it, I’ll update the recipe :)
my sister and I really love this recipe. this recipe is awesome! :)
Please please please buy and use mandolin gloves. They will protect you from slicing off a finger tip and a emergency trip to the doctors. Kids running in and distracting you or awkward shape veggies slipping do happen. Be safe and thanks for the great recipe :0)
do the potatoes need cooked or just raw …?????
You slice them raw because you cook the potatoes later (either by frying or by baking).
I soaked them overnight when I got home it worked perfectly they soaked for roughly 8 hours
Was defiantly able to taste the vinegar
Oh good! Glad that worked for you.
yesterday i made BBQ potato chips with your recipe..they tasted lovely..,..great recipe.
Thanks for the feedback! Glad you enjoyed them.
Hi Carla! I want to try these but there are so many choices for vinegar powder and many of the reviews say that the powder tastes rancid or like chemicals. Do you have a recommendation for which brand to use?
I used vinegar powder from Spice Jungle and didn’t notice any rancid or chemical taste https://www.spicejungle.com/white-distilled-vinegar-powder
Awesome, thank you!
Do you have a recipe for baked Sour Cream & Onion potato chips? Sour Cream & Onion are my favorite.
I don’t have one published, but I do have it on my list to recreate. I know the Seriously Delish cookbook has a recipe for popcorn, so you can take that seasoning and use it on these chips. Someone posted the recipe from the book: http://www.shutterbean.com/2014/sour-cream-onion-popcorn/
These are my husband’s favorite chips! Thank you for a great recipe!
I bet he’d love them!
Yumm!!! I LOVE Salt and vinegar chips so being able to make them at home is awesome!
Thanks! Can’t beat homemade.
Time to break out the mandoline and try making homemade chips. You make it look easy.
They sure are easy to make! Hope you give them a try.
Wow! These homemade chips look delicious! I gotta invest into a good mandoline so I can try them :) Mine doesn’t cut so thin.
Oh yes you’ll want a sharp mandonline so they come out perfectly thin!
Whoah looks way better than anything you’d buy in a bag at the grocery store! Would be perfect for game day!
No better way to impress your guests!
these are my sons favorite flavored potato chips he really will love if I make these for him. I guess I better get this printed out!
I bet he can help you make them too!
Vinegar Powder is a game changer! I wonder if you could use popcorn flavored powder and achieve the same flavor results – I love me some dill pickle chips!
Ohhh I bet that would be brilliant! Let me know if you try it.
Who doesn’t love a good homemade potato chip with salt and vinegar sprinkled on it?! Two thumbs up for this recipe. Great for parties or an every day snack. :)
Glad you liked the recipe!
I have a question:
I have tried searching for vinegar powder online to see if they are in local stores in my country. But cream of tartar keeps popping up as well. Are those two the same but with different names?
They are two different things. Cream of tartar is a powdered acid which is probably why it shows up, but it’s not powdered vinegar. If you’re having trouble locating it at a reasonable price, I believe you can make it yourself because it’s pretty much dehydrated vinegar. There are instructions in this post, but I haven’t personally tried it myself https://www.tastecooking.com/vinegar-now-powder-form/
How do I make the chips crispy without them sticking to the pan in the oven?
Greasing the foil with cooking spray will help. If they keep sticking, they might be too thin. Hard to say without being in the kitchen with you.
What if you don’t have the vinegar powder? Do we still have to add that or no?
It won’t have a strong enough vinegar flavor without it.
it looks very good, i will try it soon!
Let me know what you think!
one of my favorite flavors too!
I tried another recipe and I didn’t like the results, so I’m trying this one! But I have a questions, after you soak your slides how do you dry them? Just let them air dry or should I use a paper towel?
Recipe says “Drain and pat completely dry” which refers to using a paper towel.
Seriously good!!!!
I just used a potatoe peeler and soaked in white vinegar over night. Gonna try the pickle juice idea!
Again so good!
Glad you enjoyed the recipe!
Omg these are fabulous, thank you!!! Had all the ingredients so was super excited to try this.
Just to share my experience with others: might try fiddling with the oven temperature… they seem to either end up brown nearly all over or soggy in the middle, even when hand brushed and on the thinnest setting.. not sure if temp changes work. Either way, I personally loved the brown ones, they didn’t taste burnt at all! My boyfriend preferred the non-burnt ones though. Also going to try using avocado oil spray we get at Costco to reduce time hand brushing them.
Thanks so much for this recipe. You made my night!!
Glad you enjoyed the chips!
I soaked these in vinegar overnight 12 hours I used a potato peeler and was able to make perfect slices that crisped up beautifully and the vinegar definitely came through. They were all gone by the time I remembered to add salt. These cooked really fast in the oven I almost lost this batch. Mine cooked in less than 10 so keep an eye on your oven.
Oh and after i dried these I just tossed olive oil and mixed. Crisped up nice in olive oil too
Thanks for the feedback!
isn’t the whole point of making something at home is to be healthier? vinegar power has Maltodextrin in it which is a carb from sugar and terrible for you. without it this recipe will be sub par at best. might as well just buy the bag of chips.
Not necessarily. You can make something at home because it’ll taste better, be more cost effective, and/or because it’s fun.