Strawberry Snack Cake
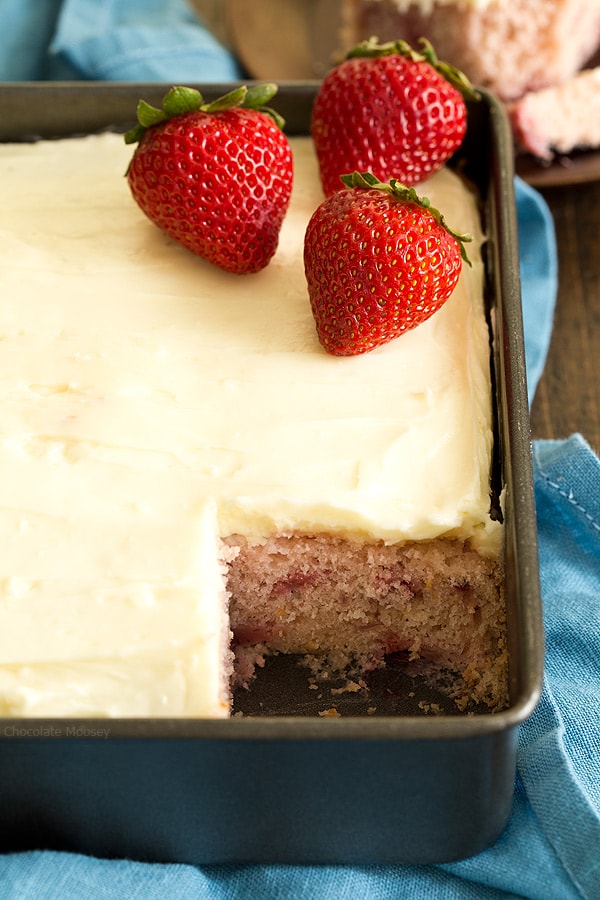
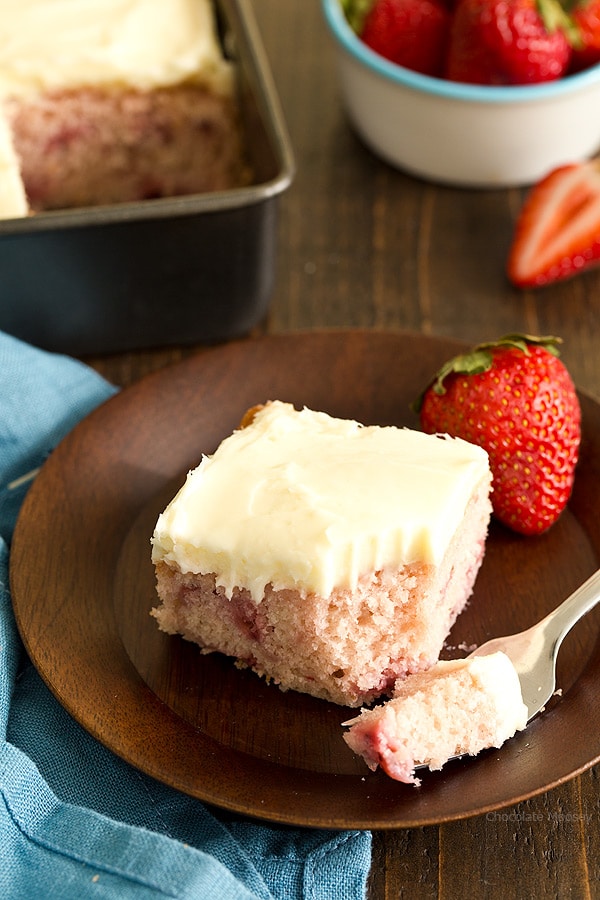
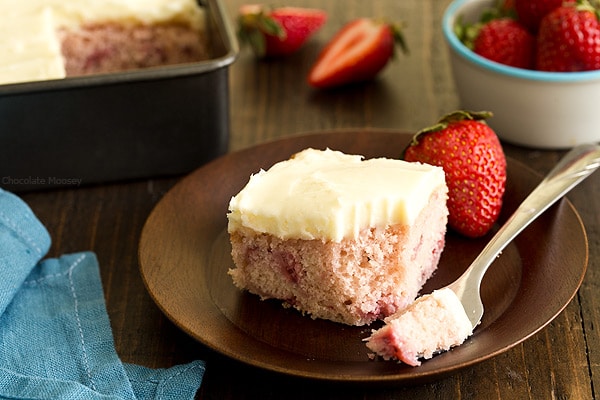
This fresh Strawberry Snack Cake is an 8×8 cake recipe made from scratch with fresh strawberries and not cake mix or Jello. Serve it with a homemade cream cheese frosting on top.
When it comes to baking cakes, I take a lot of pride making them from scratch. No cake mix. No Jello. No canned frosting.
All homemade with love.
Way back in the day when I first published my Strawberry Layer Cake, I was one of the few people who figured out how to bake a strawberry cake from scratch.
Most recipes back then used a box of Jello for the strawberry flavor so I developed how to add fresh strawberries without compromising on my from scratch philosophy.
Fast forward to today and I’m still using that method for my strawberry cupcakes with cream cheese frosting.
I thought it was fitting to add another strawberry cake to the list with Strawberry Snack Cake.
Snack cakes are always fun to make because you don’t need a specific reason to bake one other than having a craving for cake.
Topped with small batch cream cheese frosting, this strawberry snacking cake recipe is 100 percent made from scratch.
And unlike my small strawberry cake, you don’t need to frost the whole thing and make it look pretty.
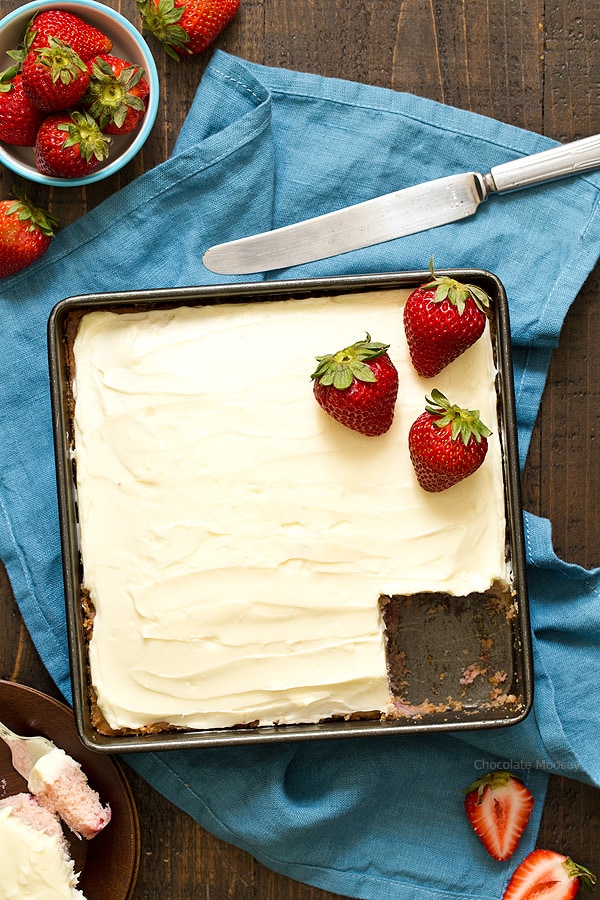
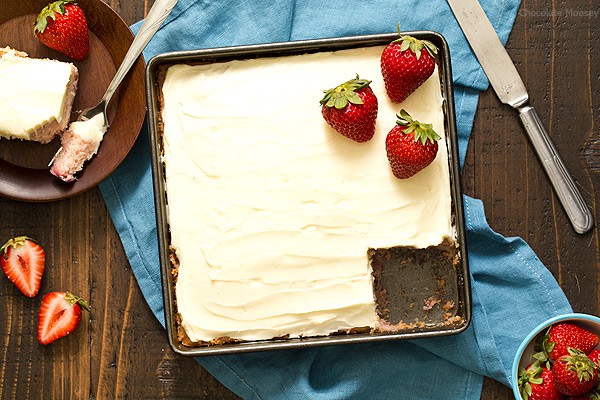
In fact, all you do is frost the top then serve it straight from your 8×8 pan. It’s perfect for traveling to potlucks, a friend’s birthday party, Valentine’s Day, or even Mother’s Day coming up.
What is the difference between a cake and a snack cake?
Not to be confused with a Little Debbies snack cake, a strawberry snack cake (or I guess technically a snacking cake) is a no-fuss sheet cake with frosting only on the top and is served straight from the cake pan.
Most snack cakes are 13×9, but because I make small desserts I opted for an 8×8 square pan.
Ok technically not dessert for two but it does make a smaller quantity which you can share with friends and family when the occasion calls for it (such as birthdays, anniversaries, and Mother’s Day).
Ingredients For Strawberry Snack Cake
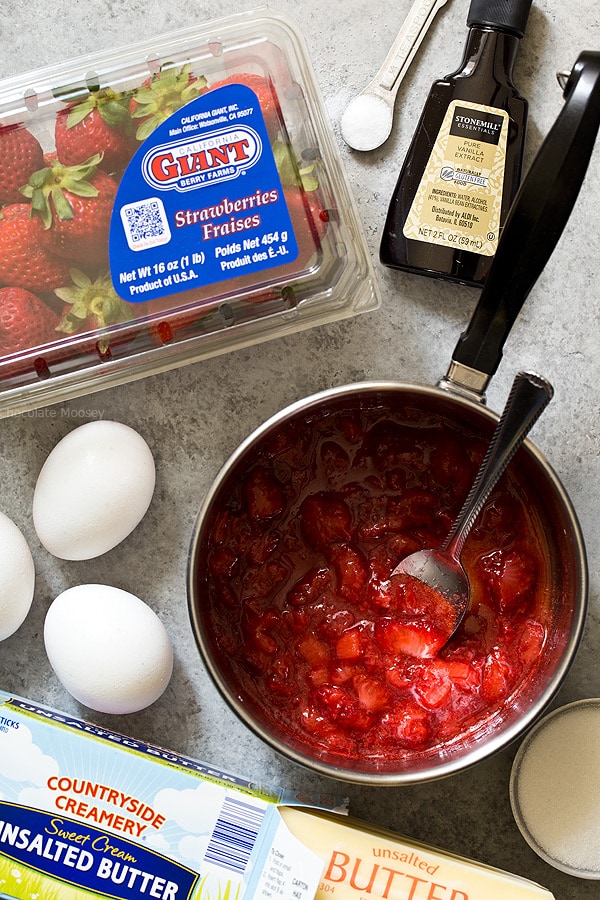
To make your strawberry cake from scratch, gather the following ingredients:
- Strawberries: Fresh is best, but you can also use frozen after thawing.
- Water: Helps the strawberries cook down
- All-purpose flour: Since most people don’t have cake flour in their pantry, I used all-purpose flour. Make sure you’re spooning it into your cup. Using the scoop and pack method means you’ll end up with more flour than directed. Learn how to measure flour from My Baking Addiction.
- Cornstarch: Since we’re not using cake flour, cornstarch helps with a more tender crumb.
- Baking powder: Leavening agent that helps the cake rise
- Salt: No bland cake batter here!
- Butter: Not only does it add flavor, butter helps the cake rise from its steam when it melts, trapping carbon dioxide in the batter as it bakes. This creates a tender crumb texture.
- Sugar: Sweetens the cake
- Egg and egg whites: In order for the pink color to shine through, too many egg yolks will muddy the color.
- Vanilla: Really brings out the strawberry flavor
- Milk: Helps smooth out the batter and create a moist batter
- Red food coloring: You’ll need a few drops as this cake is not naturally pink.
Not in the mood for strawberry? Make Pumpkin Snack Cake or Banana Chocolate Chip Cake instead.
Since you’ll have extra egg yolks, I have a list of recipes showing you what to do with leftover egg yolks.
How To Make Strawberry Snack Cake
To make your strawberry snacking cake:
- Add strawberries, water, and sugar to a saucepan and cook down until jammy. This maximizes the strawberry flavor without using Jello and without adding too much liquid to the batter.
- Cream together butter and sugar until smooth, about 1 minute then scrape down the bowl.
- Beat in egg, egg whites, and vanilla. You do NOT need to whip whites separately into a meringue.
- Add the dry ingredients alternately with the milk, adding the flour in 3 additions and the milk in 2 additions (begin and end with dry ingredients).
- Add strawberries then transfer batter to a greased 8×8 pan.
- Bake at 350F for 30 minutes or until a toothpick inserted in the center comes out clean.
Best Frosting For Strawberry Snacking Cake
I paired my strawberry snack cake with homemade cream cheese frosting, but my strawberry cream cheese frosting is also an excellent choice.
If you don’t want cream cheese, you can use small batch buttercream frosting or strawberry buttercream.
Love chocolate covered strawberries? Try small batch chocolate frosting or chocolate cream cheese frosting.
Love strawberry lemonade? Pair it with lemon buttercream frosting!
How To Store Strawberry Snack Cake
To store strawberry cake, leave it in the 8×8 pan then cover with plastic wrap.
Store at room temperature for up to 2 days (unfrosted or buttercream) or refrigerate for up to 1 week (unfrosted, buttercream, or cream cheese).
If refrigerating, let sit at room temperature for about 15-30 minutes before serving to get rid of the chill.
Do you need to refrigerate strawberry cake?
Technically strawberry cake (either unfrosted or with buttercream) doesn’t need to be refrigerated; however due to the fresh fruit, it only lasts a few days at room temperature.
You do need to refrigerate cake with cream cheese frosting.

Strawberry Snack Cake
This fresh Strawberry Snack Cake is an 8×8 cake recipe made from scratch with fresh strawberries and not cake mix or Jello. Serve it with a homemade cream cheese frosting on top.
Ingredients
- 1 + 1/2 cups chopped fresh strawberries
- 1 tablespoon water
- 1 + 1/2 cups all purpose flour
- 2 tablespoons cornstarch
- 1 teaspoon baking powder
- 1/4 teaspoon table salt
- 1/2 cup (4 ounces or 8 tablespoons) unsalted butter, softened
- 3/4 cup + 1 tablespoon granulated sugar
- 1 large egg, room temperature
- 2 large egg whites, room temperature
- 1 teaspoon vanilla extract
- 1/4 cup whole milk, room temperature (do not use low fat or fat free)
- Few drops of red food coloring
Frosting (Pick One)
- Cream Cheese Frosting (get recipe here)
- Strawberry Cream Cheese Frosting (get recipe here)
- Strawberry Buttercream (get recipe here)
- Vanilla Buttercream (get recipe here)
- Chocolate Buttercream (get recipe here)
- Lemon Buttercream (get recipe here)
Instructions
- Preheat oven to 350F. Lightly grease an 8x8 pan.
- In a medium saucepan, add 1 cup strawberries, water, and 1 tablespoon sugar. Bring to a boil, stirring occasionally. Boil for 5 minutes or until the strawberries cook down and thicken. Remove from the heat and cool at least 15 minutes.
- In a large bowl, sift together the flour and cornstarch. Stir in the baking powder and salt.
- In another large bowl (with the paddle attachment if using a stand mixer), beat together the butter and remaining 3/4 cup sugar until creamy, 1-2 minutes.
- Beat in the egg and egg whites, one at a time, until mixed in then add the vanilla.You do NOT need to whip the egg whites. Just add them like a regular egg.
- Add the flour mixture alternating with the milk, adding the flour in 3 additions and the milk in 2 additions (begin and end with dry ingredients).
When you add the final addition of flour, switch to a rubber spatula and gently stir in by hand. You do not want to overmix this part. - Stir in the cooked strawberry mixture and remaining 1/2 cup chopped strawberries. Add a few drops of food coloring until your batter is pink as desired (make it brighter than you want because it'll dull a bit after baking).
- Transfer the batter to the pan then bake 30-33 minutes or until a toothpick inserted in the center comes out clean. Cool completely.
- Decorate with frosting of choice. Cover and store in the pan at room temperature for up to 2 days (buttercream only) or in the refrigerator for up to 1 week (buttercream and cream cheese).
For best results, let the refrigerated cake sit at room temperature 15-30 minutes before serving.
Notes
- To substitute cake flour, omit the cornstarch and use 1 + 3/4 cups cake flour.
- Enjoyed this recipe? Check out my 6 Inch Small Strawberry Cake, Small Batch Strawberry Cupcakes, or 8 Inch Strawberry Layer Cake.
- Since you'll have extra yolks, check out my recipes using egg yolks.
Recommended Products
As an Amazon Associate and member of other affiliate programs, I earn from qualifying purchases.

This post may contain affiliate links. As an Amazon Associate and member of other affiliate programs, I earn from qualifying purchase.
I love strawberry cake! It looks so beautifully fluffy and delicious! I celebrated my first day of summer by eating strawberry ice cream so we are definitely on the same page!
I think we should combine forces and serve your strawberry ice cream with my strawberry cake ;)
I love your recipes. I subscribed to your email list. I need to have my messages sent to me in the plain text. Is there anyway that you can change this for me so I will be able to receive the emails. I really appreciate anything that you can do.
I checked your settings on my email list, and it says Plain Text is already set as your preferred email format. If you’re still having issues, email me at chocolatemooseyblog@gmail.com.
Yum! This strawberry snack cake is perfect! Since we’ve been in lockdown, our grocery trips are limited and I only had frozen berries on hand, and they worked out just fine. I chopped the strawberries while they were still frozen then followed the recipe from there. I thought buttercream would be better than cream cheese frosting on this cake, so I made your small-batch vanilla buttercream. Awesome! I really wanted strawberries in the frosting so I added some chopped at the end, but it didn’t work out (my fault! oops!). As soon as I added the strawberries, it broke the buttercream and I couldn’t get it back smooth again. Oh well–I still frosted the cake with it because it was still delicious even though it didn’t look great. If you ever develop a strawberry buttercream recipe, I’d be really interested in trying it. There must be some trick I don’t know about for how or when to add the strawberries. Thanks for a delicious, quality recipe. You made me day!
Glad you enjoyed the cake! Have you seen my recipe for strawberry cream cheese frosting? You puree the strawberries then cook down the puree so it’s not too watery. That would be the best way to incorporate them into a frosting. I can certainly look into making a strawberry buttercream: https://www.chocolatemoosey.com/2017/07/10/strawberry-cream-cheese-frosting/
Okay, thanks!. That might have been the issue–too watery I can true the pure/cooking thing next time.. In retrospect I thin, the cream cheese frosting would have been better suited for this cake since it’s a denser cake, more like a carrot cake denseness than a birthday cake sponginess. I’m not great about sticking to recipes as they’re written–in this case I definitely should have! But I’d still love a strawberry frosting for cupcakes and regular cake.
I think a strawberry buttercream frosting is a great idea for other cakes, so thanks for the suggestion!
Hello…Love your recipes & I am looking forward to making this cake! One question I have, is about the pan. Can you flip it out of the pan after baking, and frost the sides as well? I was thinking of making this for a small birthday gathering.
I haven’t tried it, but I don’t see why not! You may want to line the pan with parchment paper to make it easier.
Can’t wait for strawberry season to give this one a try! This looks SOOOO good!
Question … why the two egg whites, instead of an extra egg? Is it because the yellow would colour the cake and you’d get an icky colour? Or something else? Yes, there are other recipes to use the egg yolks, but I’d sooner not have to plan them into things.
And topping it off with lots of delectable icing choices, has me totally drooling! THANKS!
I addressed this under “Ingredients For Strawberry Snack Cake”
Thank You! I am SO sorry. I totally missed that. At least I had guessed right, as to the reason for the egg whites. Now for those new strawberries to show up in our fields!
This was so good and refreshing! My two guys really like it and it was just enough for the 3 of us to share without a huge leftover amount! The only issue was they didn’t like waiting for it to warm to room temperature!
Waiting is always the worst part! Glad it was a hit.
hi, Thank you for this fantastic recipe. this is the most flavorful strawberry cake I’ve made in my 70 years! i have 2 questions – can the recipe be doubled for a 9×13″ cake and does the cake freeze well? Best, congratulations on a wonderful xake! Sue
I haven’t tested it in an 13×9 pan, but best guess is yes. Just keep an eye on baking time. And yes cake should freeze!