Brownie Bottom Chocolate Mousse Cake
The best way to celebrate any milestone is with a triple chocolate cake: Brownie Bottom Chocolate Mousse Cake with chocolate whipped cream.
10 years ago this month, I published my first post on Chocolate Moosey – a super exciting, over the top recipe for… Peanut Butter and Jelly Cracker Sandwiches.
If that doesn’t say “broke college student starting a food blog”, I don’t know what does.
I started Chocolate Moosey because I was studying abroad in Ireland and needed a distraction from my homesickness. Who knew starting a food blog 10 years ago would transform my career to what it is today?
Here I am, 10 years later. I’m developing and shooting recipes for national clients and currently working on my culinary degree to become even better at my job.
I’m my own boss doing what I want (and also doing what I don’t want, like negotiating and paperwork).
I finally figured out what to do with my life without becoming a miserable cow.
But before I get too far, I need to stop and thank YOU.
Thank you for reading my blog for 10 years and for coming back. Thank you for making my recipes and sharing them on social media. Thank you for the emails and feedback.
I knew the best way to celebrate my blogiversary was with none other than a chocolate mousse cake (because half the people I tell about my blog think I’m saying Moussey instead of Moosey).
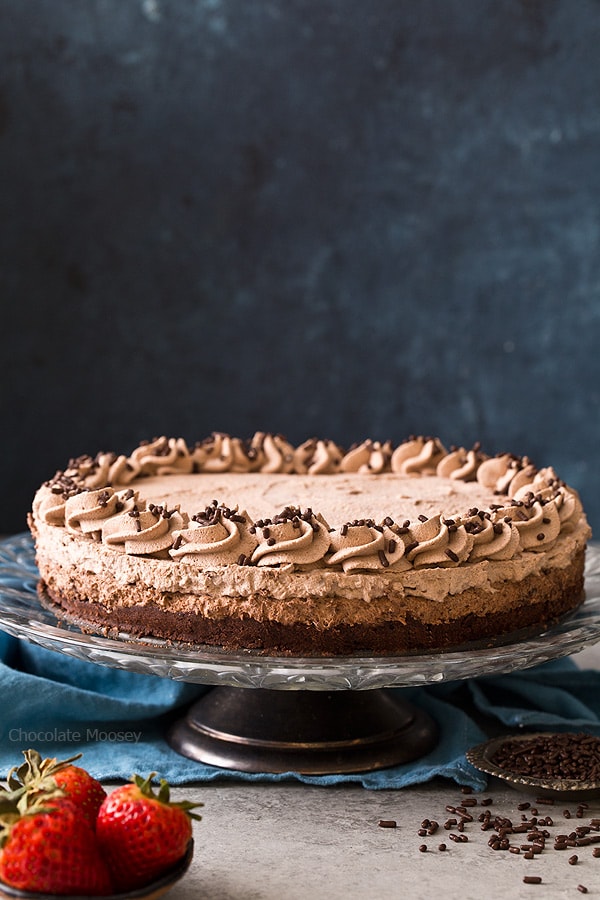
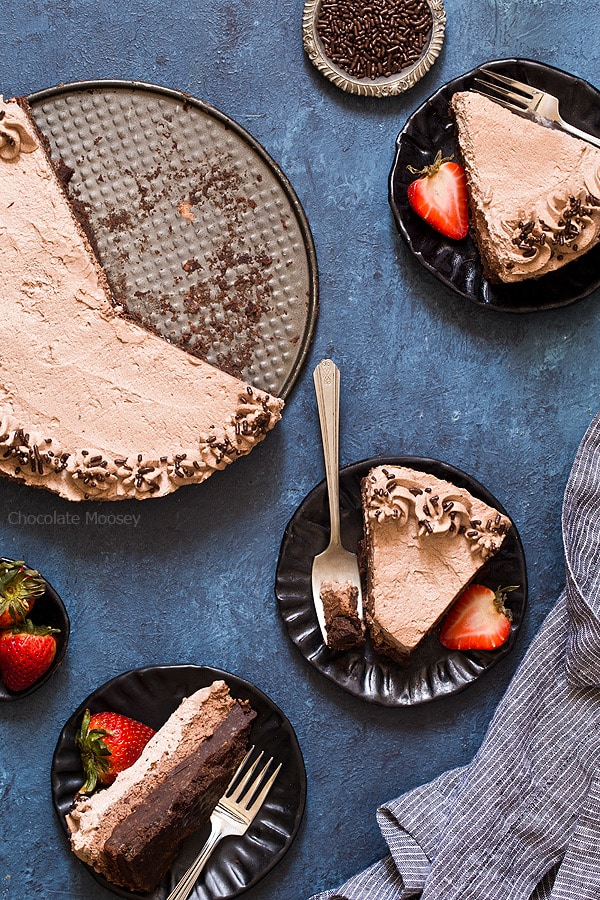
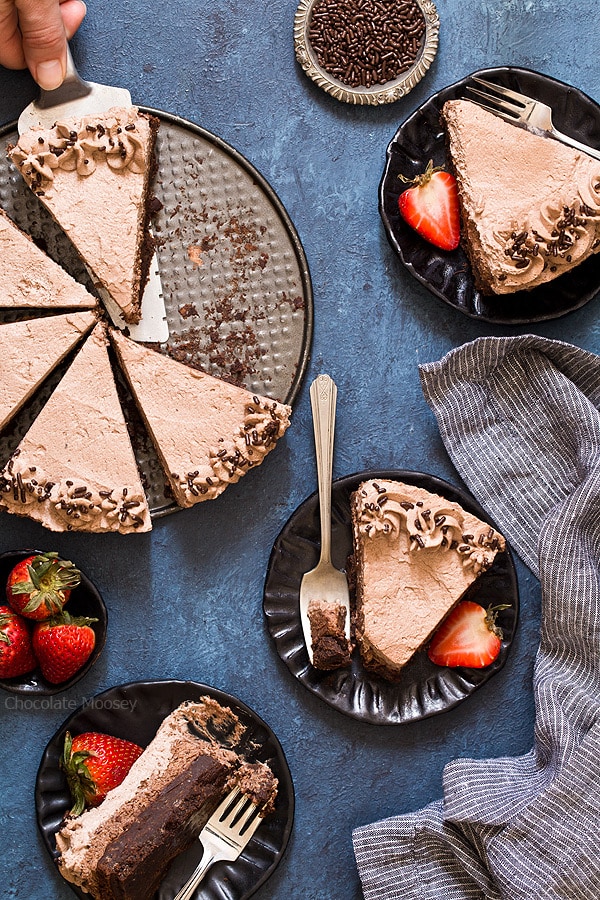
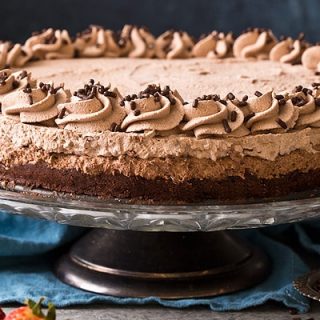
A Brownie Bottom Chocolate Mousse Cake with chocolate whipped cream, to be exact. A triple layer chocolate cake that is ideal for any celebration.
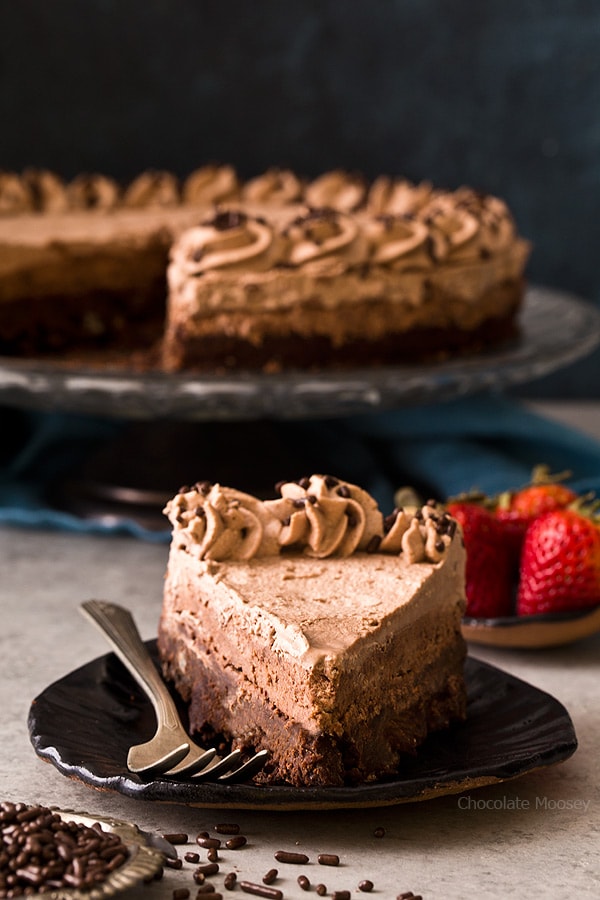
I made the homemade chocolate mousse without eggs.
Normally it’s served in a glass with a spoon, so traditionally the chocolate firms up enough you don’t need gelatin.
However, I wanted the filling a little more stable when you cut into the cake (especially if it sits out at room temperature), which is why I added a little bit of gelatin.
The top is – wait for it – chocolate whipped cream!
I love making flavored whipped creams like peanut butter whipped cream.
It was only a matter of time until I did chocolate whipped cream.
I wanted to keep the decorating simple, so I piped some whipped cream on top with chocolate sprinkles.
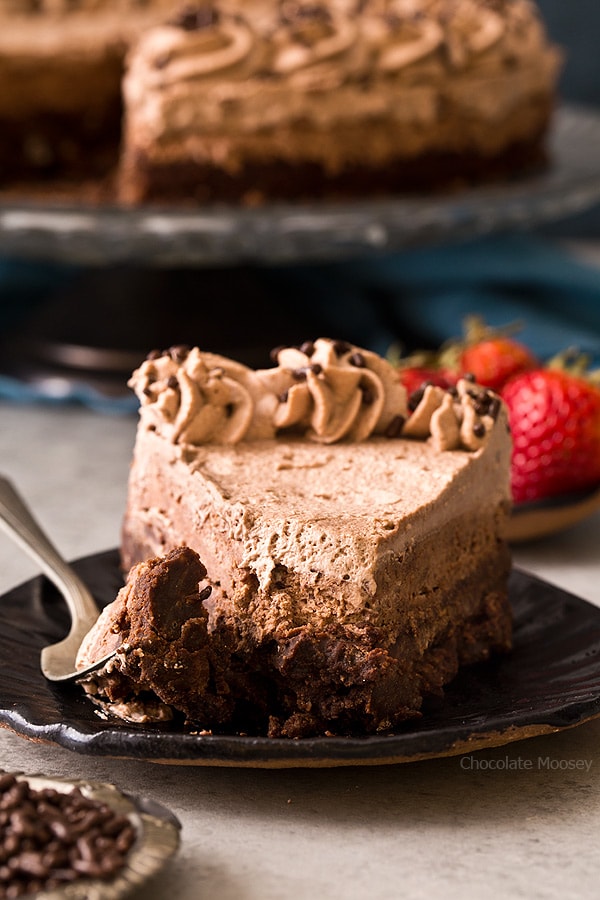
As you can see, the cake is so brown upon brown upon brown, I served it with fresh red strawberries. Plus chocolate and strawberries are a heavenly combination.

Not in the mood for chocolate? Check out my lemon mousse.
Brownie Bottom Chocolate Mousse Cake
The best way to celebrate any milestone is with a triple chocolate cake: Brownie Bottom Chocolate Mousse Cake with chocolate whipped cream.
Ingredients
Brownie Bottom
- 1/2 cup (4 ounces) unsalted butter, cut into 8 tablespoons
- 2 ounces unsweetened chocolate*, chopped
- 1/2 cup unsweetened cocoa powder, sifted
- 1 cup granulated sugar
- 1/4 teaspoon salt
- 1 egg, room temperature
- 1 teaspoon vanilla extract
- 1/2 cup coffee, room temperature
- 1 cup all-purpose flour
- 1/2 cup semisweet chocolate chips
Chocolate Mousse
- 4 ounces semisweet chocolate, chopped
- 1 teaspoon unflavored powdered gelatin
- 1 tablespoon cold water
- 1 cup heavy whipping cream, cold
- 2 tablespoons powdered sugar
- 1 teaspoon vanilla
Chocolate Whipped Cream**
- 1/4 cup powdered sugar
- 2 tablespoons unsweetened cocoa powder
- 1 cup heavy whipping cream, cold
- 1/2 teaspoon vanilla
- Chocolate sprinkles, for decorating
Instructions
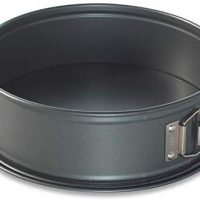
- Preheat oven to 350F. Lightly grease a 9 inch springform pan.
- For the brownie bottom: In a large saucepan, melt together the butter and chocolate.
- Remove from the heat and by hand stir in the cocoa, sugar, and salt (mixture will be grainy - keep going).
- Beat in the egg and vanilla then add the coffee.
- Stir in the flour just until fully incorporated then stir in the chocolate chips.
- Transfer the batter to the pan and bake for 18-20 minutes or until a toothpick inserted in the center comes out mostly clean (little chocolate is ok but shouldn't be wet batter). Cool completely before making the mousse.
- For the mousse: Add about an inch of water to a saucepan and bring to a simmer. Turn off the heat and place a heatproof bowl over top. Add the chopped chocolate and melt until smooth. Remove from the heat and cool 10 minutes.
- While the chocolate is cooling: In a small bowl, add the gelatin. Pour cold water over top. Let sit 5 minutes.
- In a large mixing bowl (with whisk attachment if using a stand mixer), beat the heavy cream until thickened.
- Microwave the gelatin for 5 seconds or until liquid. Gradually add it to the cream along with the powdered sugar and vanilla then continue beating until stiff peaks form (when you pull the beater up, peaks will form and not fall over).
- Fold the melted chocolate into the whipped cream, making sure the chocolate is at room temperature. Too hot and it may melt the whipped cream. Too cold and it may solidify.
- Spread mousse over completely cooled brownie layer. Refrigerate at least 1 hour or until firm. If your brownie layer isn't cool yet, you can store the mousse in the fridge until ready to add.
- For the whipped cream: In a small bowl, sift together the powdered sugar and cocoa powder.
- In the same mixing bowl as before using the whisk attachment (no need to wash the bowl - just make sure it's scraped as clean as possible), beat the heavy cream until thickened.
- Gradually beat in the cocoa mixture and vanilla then continue beating until stiff peaks form (when you pull the beater up, peaks will form and not fall over).
- Spread whipped cream on top of mousse layer. Decorate with chocolate sprinkles. Refrigerate at least 1 hour or until ready to serve. For easier cutting, freeze until whipped cream is firm enough to cut.
Refrigerate leftovers in an airtight container for up to 1 week.
Notes
*You can substitute semisweet chocolate for the unsweetened. Reduce the sugar to 3/4 cup.
**If you want to change it up and make peanut butter whipped cream, omit the 2 tablespoons cocoa powder and use 1/4 cup peanut butter. Beat it with the cream in the beginning so it stays smooth.
Recommended Products
As an Amazon Associate and member of other affiliate programs, I earn from qualifying purchases.
This post may contain affiliate links. As an Amazon Associate and member of other affiliate programs, I earn from qualifying purchase.
Congratulations on your blogiversary! The cake is absolutely gorgeous, and is indeed perfect for celebrating milestones!
Thank you for always reading and commenting :)
What a delicious way to celebrate 10 years of blogging. Happy Blogiversary!
Thank you!
Congrats Carla! You’re inspiring and your 10th blog-anniversary cake is inspired. xo
Thanks, Laura!
Congratulations on your Blogiversary ! Love this, it looks beautiful & delicious
Thank you, Claire :)
This looks fabulous! Does the whipped cream hold up without adding a stabilizer, and for how long? I’m saving this for the next party dessert I make. COngrats on 10 years, too. Blogging takes patience and persistence to become a success.
Yes it does, for about 1-2 days in the refrigerator. It’ll last a little longer if you freeze the cake.
Carla, you have outdone yourself with this recipe. Just reading the ingredients told me that I would love it. Even though it’s unlikely that I will ever have a good excuse to bake this cake, I’m saving the recipe, so it will be around when I come up with a good enough excuse. Congratulations on 10 years of blogging. I’m looking forward to seeing your posts for the next 10 years.
Thanks, Susan! I’m sure you can think of any reason to eat cake ;)
1-I know this is so late but AHHHH 10 YEARS THAT IS AMAZINGGGGG!!!! HAPPY BLOGIVERSARY!
2-This. freaking. cake. Like….brownie….silky mousse, heavenly chocolate whipped cream, It’s 3 layers of YUM.
Thanks, Kayle! <3
Congratulations on your blogiversary! It would be great if I could taste it: p
Thanks! Wish I could teleport you some samples ;)
Oh my goodness this looks like heaven! This pregnant lady needs this right now!!
All the chocolate! :D
I made this a few days ago (sorry, no picture!). It was both fabulous and not. I think that I overcooked the brownie base because it was just too difficult to cut as nicely as your pics show! The soft top layers didn’t hold up and it was a bit messy. But but but…..the flavors were over the top wonderful! Our guests and my husband were swooning – they didn’t care what it looked like! The brownie base is so chocolaty but not sweet at all! I think that I will make it just on its own because it was just about the BEST brownie we have ever had! Wonderful!
Glad you enjoyed it despite those few things! The top two layers can get a bit soft to cut if they’re not cold enough, so sometimes if I’m having trouble, I’ll freeze it to firm it up some more before cutting.
Can I substitute gelatin for Agar Agar? Do I use equal quantities?
I’ve never worked with agar agar, so I honestly don’t know. If you google how to substitute agar agar for gelatin, you should be able to find answers.
I would love to try this but a smaller version for just two of us. How would I cut the recipe back for a 6 inch springform pan? I have really enjoyed and appreciated your small batch desserts now that we are empty nesters. Thank you!
I haven’t tested it yet. Usually halving isn’t enough batter so I start by doing 3/4 of the recipe then making adjustments from there. Since 3/4 of an egg isn’t a thing, I usually round up to 1 egg then adjust the other ingredients to compensate for that little extra liquid (either less liquid or more flour). Sorry it’s not an easy answer as it takes a few tries. I can add it to my list to test it but it won’t be until 2022. I do have my loaf pan brownies you can use for the base then you can spread mousse and whipped cream on top. https://www.chocolatemoosey.com/2017/10/23/small-batch-fudge-brownies/