5 Things You Need To Do To Improve Photography
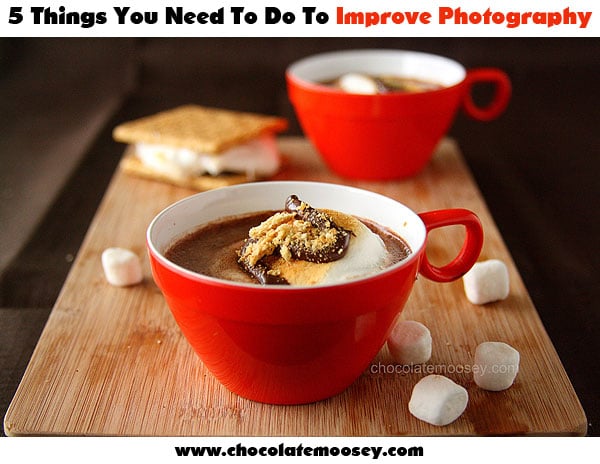
Improving photography – it’s the one goal I heard over and over again when I asked what everyone’s goals were for 2013. Since my last 5 Things post really took off, I decided to start another one focusing on how to improve photography. I’m talking more about your thought process rather than equipment used (although I do have plans to write that too). These 5 things are meant to change your perspective on photography. Maybe it’s something you’ve never thought about before. Or maybe you found yourself in a photography rut and can’t get out. When you really think about these 5 concepts, you’ll start to see the world differently.
[rss-cut]
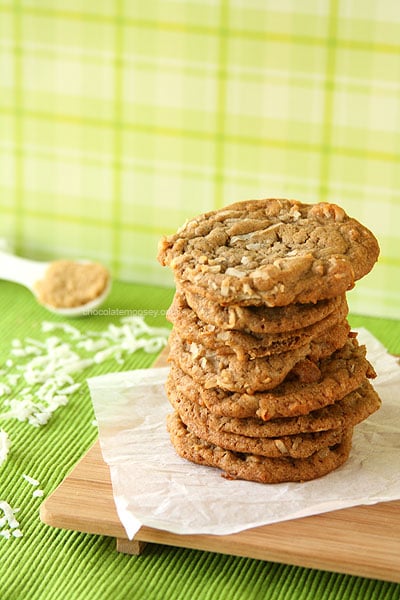
Brown Sugar Cinnamon Coconut Cookies
1. Define your style. – There are so many types of styles, it’s easy to get overwhelmed and lost. So how do you find your style? I was at a conference a few months ago where some of the panelists talked about finding your voice. In order to find your voice, you have to try out other voices to see what does and doesn’t work for you. Although they were referring to writing, it applies to photography as well. Your style is your voice. Food photographers have all kinds of styles. Some use props. Some don’t. Some go modern with a simple bowl and spoon. Some layer all kinds of props in the background. Some go for white and bright colors. Some go dramatic with dark lighting.
If you’re not sure what your style is, how do you take your photos right now? Do you use bright colors? Props? Simple? Whatever it is, try the opposite. You may feel frustrated with the first shoot, but don’t give up! Try it two or three times. Listen to your gut. If you still feel uncomfortable, then it’s not the style for you. There is nothing wrong with that. It’s all about finding your voice.

Left: Easy Chocolate Peanut Butter Fudge; Right: Creamy Lemon Fudge
2. Push out of your comfort zone. Take a look at your last five photo shoots. Are there similarities? Are there differences? There are a few blogs I’ve noticed lately that have the same exact shots. The same plate, the same background, the same napkin, even down to the same food styling. The only difference is the food itself. I know you love this setup because it worked or maybe you were photographing all in the same day, but if you keep doing the same exact setup, not only are you not growing, your pictures become boring (especially if you do a round up or recap and the photos are side-by-side). Break up the monotony! Change out the props. Use different colors. Style your food differently. Maybe you have two separate cookie shoots to do. If you pile cookies onto a plate for one, do something entirely different for the other. Line them up in a row or stack them on top of each other. If you feel that you must style the cookies the same, at least use different props or a different background. Challenge yourself to make it an entirely different shoot, even if they are shot in the same day.
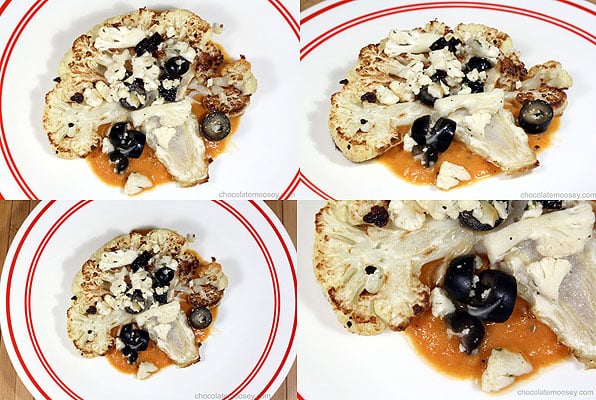
Cauliflower “Steaks” with Olive Relish and Tomato Sauce
Another trend I’ve also noticed is posting photographs with very similar angles. I’m guilty of this too and trying to improve on that. For example, look at my Cauliflower “Steaks.” Sure, I have four photos, each with a slightly different angle, but I now see them as boring. Maybe I just needed one overhead shot and one eye level shot then get rid of the extra two. They don’t add anything new to the post, so why waste the space? Now when I edit photos, I try to pick only one of a certain angle. Sometimes it’s the same angle but one wide shot and one close up, but at least they are different enough to add to the post. Next time you shoot, try shooting at different angles. Instead of the usual 45 degree eye level shot, get down low to capture the filling in a sandwich cookie. Or grab a chair and shoot overhead to capture that beautiful tart. Or if your food flows upward like a jar or glass, shoot vertical instead of horizontal. If you do shoot vertical, shoot at eye level then raise your camera above that (but not all the way overhead). See which shots really capture the food. Remember, there is no hassle in deleting, so experiment and shoot away!
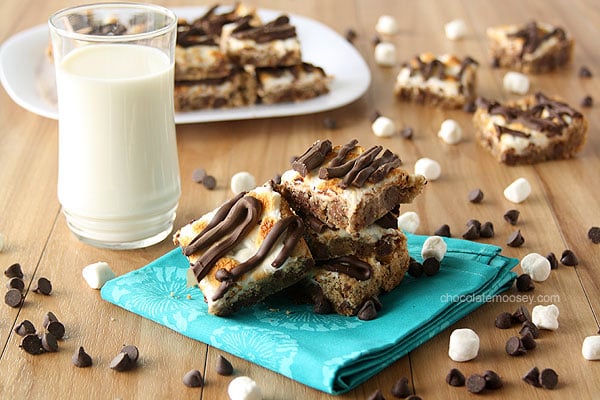
Smores Chocolate Chip Cookie Bars
3. Find inspiration. – If you’re like me, you are always looking for ways to improve your photographs. Look around you. Cookbooks, magazines, blogs, Pinterest. Photos are everywhere! Pay attention to them. Which ones do you really like? Which ones make you roll your eyes? Do they have props? No props? A lot? Minimal? What about the lighting? Are they bright? Dark? If you don’t like a photo, why not? Too many props? Too dark? Too boring? I have a folder on my computer of photographs that inspire me. When I am having trouble styling, I browse these pictures and try to visualize what I want. Don’t confuse that with copying – my pictures very rarely end up like any of them. I may like the way one picture is styled but has too many props. Or there may be one with cool props but the styling is too complex.
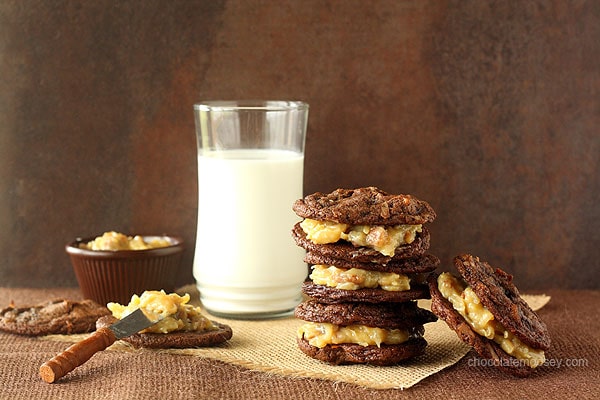
Award-Winning German Chocolate “Cake” Sandwich Cookies
4. Tell a story with props – I know some of you are rolling your eyes right now and are getting ready to close your browser. Just wait! Although I am a strong believer in making the food the sole subject of your photographs, I am also a strong believer in details telling the story. You want your photographs to be inviting. Sure, maybe a bowl of ice cream is enough to make the recipe, but adding a spoon or even making a bit of a mess with the ice cream scoop invites you in and makes you want to pick up that spoon and lick the screen (and makes the scene more realistic. Come on, ice cream is messy. And you can’t tell me you’ve never licked the scoop before).
Take my German Chocolate “Cake” Sandwich Cookies photograph for example. Sure, I could’ve just stacked the cookies onto a plate and called it a day, but I wasn’t satisfied with that. I added a glass of milk to emphasize how rich these cookies are (every person who ate one commented needing a glass of milk). On the left, you see a spreader with some filling on a cookie. This emphasizes the process of making the cookies. I added a bit of tan burlap underneath for some color since the photograph is full of dark brown. I thought about dark green to complement the coconut, but several of my past coconut recipes already used dark green.
I think a lot of people complain about props because they can be overused and overshadow the food. Using patterned dishes is tricky because the pattern may detract from the actual dish. If you are new to using props, start out small. Use solid colored dishes (white is always safe). If you feel that your photo is too plain with white dishes, add a napkin or place mat for some color. Think about how you eat a dish. Do you use a spoon or fork? Or maybe you’re giving cookies as a gift. Whatever your dish is, think about the details.
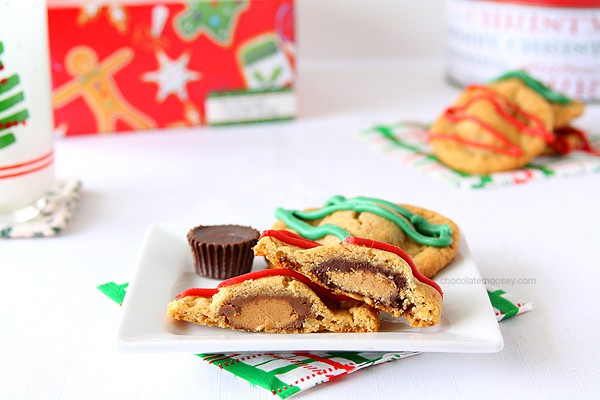
Double Peanut Butter Surprise Cookies
5. Ask for feedback. This is one I still struggle with but appreciate the most. I like to bury my head in the sand and pretend there is nothing bad to say, but I know criticism is one I have to face if I want my photographs to improve. For awhile, food styling stumped me. Last month, I reached out to a friend who was good at styling and asked about her thought process. She explained that she tries to tell a story. It wasn’t just treats thrown on a plate. It was a Christmas recipe, so she styled it as if it were a gift for someone. And sometimes, it is just good to get another opinion. I have another friend who brainstorms ideas with me and share what she has so far. Then recently, I was invited to join some Google+ communities that critique your photos. I haven’t posted anything yet, but not only do you get feedback, you also learn from others posting. If you are nervous about harsh feedback, start with a friend or two that you know will be honest.
—
What did you think? Is there anything you would add to the list?
This post may contain affiliate links. As an Amazon Associate and member of other affiliate programs, I earn from qualifying purchase.


Thank you – these are great tips. I shall take them on board, although I’m struggling with the feedback thing. I’m starting to think the only person who reads my blog is that ‘Anonymous’ spammer! :/
If you’re serious about getting honest feedback about your photography, chances are you’re not going to get it with blog comments. A lot of people won’t say anything unless invited. Try joining a photography group that allows feedback or reach out to a friend and ask for opinions.
Also, hang in there! I’ve been blogging for 5.5 years now, and it takes awhile for comments to start happening regularly. Try embracing the blogging community and join a group or two. I’m in several on Facebook and Google Plus.
Really good points. I struggle with using the same props and shooting with the same angles all the time!
Really great tips Carla! I get stuck in ruts with the same setup and need to experiment more. Your articles are so helpful. Keep them coming – please!
Carla – thank you for this. Photography is an absolute struggle for me and it is so helpful to understand other people’s processes. (P.S. I know I don’t comment often, but I really enjoy your site)
I’m always in love with your photography! The German Chocolate cookies are one of my favorite! I’m always trying to learn new things and I LOVE your photography posts!
Thank you for this post! I am frequently stumped with how to make a photo of an ugly meal look appealing (because I’m blogging about feeding my family from our CSA farm share–all year long–and some meals are just not as photogenic as, say, the pile of fresh veggies I started out with). Perhaps ugly meal is not the right word, because I know we do eat with our eyes. Timing is also a problem–I’m fixing dinner and the sun is going down so I am losing my natural light: there was the time the dog got loose and I missed the chance to bake and photograph the pizza before the sun went down.
I’m not yet ready to ask for feedback, too new at this, but I will try to tell more of a story with my photos and change up my angles.
Thanks!
Thanks, I pinned this post!
Great post! I am always looking for tips to get my photography better. I can get accepted to the food porn sites most of the time, but that doesn’t really mean my photos are great, or even as good as they can get!
These are great great tips. I really try and switch up my shots but sometimes when pressed for time it is so easy to go to what works. Today I am going out of my comfort zone for my last recipe of the day, tha is to you!
One of the best tips you gave me was on my first SS post when you asked a ton of questions about Christmas cookies and the story I was trying to tell. We talked about that in the class I took, but I think it’s easier styling someone else’s food than you’re own. I had no problem creating a scene and photographing it there, but when it’s my own, I get frustrated :/
Awesome! Exactly what I need and thanks for the inspiration. Now, I need to practice this.
I’m definitely guilty of the same angle/same shot business. It’s so hard and especially because I’m shooting in a lightbox most days! Without a doubt a goal for this year! Thanks for another great article.
Great post, Carla! I’ve generally found my inspiration from foodgawker and Pinterest, and finding my own style took so long! But in the end, I’m happy with where I’m at. And I’m absolutely loving your style too!
Again, loved your photo tips.
Great article! Yes, you are right that every photographer has a style. I’ve tried several and I think I finally found the one what works for me. But there will always be room for improvement.
Wonderful tips and photos! I especially liked your thoughts on finding your photographic voice. Neat concept!
Great tips, Carla, and ones I will take to heart. I finally got a DSLR for Christmas and one of my goals for this year is to learn how to use it more effectively. (After I learn how to use it. :)) I think your last point may actually be the most important. If we think about the story we want to tell, there is no way we can keep taking the same old boring shots.
Thanks Carla! These are great ideas. I need to reach out to others more, I think.
Improving on my photography was indeed one of my blog resolutions this year. =)
Thank you for all the tips! I will definitely look into what I am currently doing and what I can do to improve.
It’s nice to know eyeryone gets into a rut! Great post!
You are brilliant! I’m learning so much! My goal is for my photos to look as good as yours!
LOVE these tips! I’m kind of at that point right now where I’ve hit a plateau with my photos and am looking to improve — so this is a perfect place to start. Bookmarked! :)
Great tips! I know my photography skills need some work but I don’t always know what’s wrong or how to fix them and I don’t know anyone to help me so it’s tough
If you’re willing to put yourself out there, there are several groups that will critique your photos. Here is one that is small and invite only (I think you can ask to join?) https://plus.google.com/communities/102973942178580778575 Then there’s this one that is a lot bigger https://plus.google.com/communities/114895417659148613939
If you are not on Google Plus, try looking on Facebook for some groups. I heard Flickr has groups too, which is nice because it’s definitely all photography. Good luck!
This is a very detailed post with lots of inspirations,I was hoping that you mention important technical aspects. But your ideas came from a different angles of the subject. Good job Thank you
Thanks! There are so many technical guides out there, I wanted to focus on perspective and the thought process.
One thing I notice about a lot of your examples, that is a technique I never use, is that you often have additional items in the background. So if it’s a plate of muffins, there are additional servings of muffins out of focus away in the back (as though they’re at a separate place setting at the table). How do you find space for that in your setup? Our house is really poorly lit, as far as window placement goes, so my struggle is finding a place with halfway decent lighting to set up. Do you have any tips for that?
I’m one of the lucky ones who has a big enough table. It’s just my kitchen table, really, which I’m guessing you have one as well. If you don’t or if it’s constantly being used, you can set up on the floor (I know it’ll be a pain getting certain angles, but you can focus on overhead shots). Another thing I’ve done is set up a bunch of boxes the same height to make a “table”. I placed my faux wooden board on top of some boxes. Of course you need to be careful not to tip the board over. It was low enough to get some overhead shots but high enough to get eye level shots.
As far as lighting, there are artificial lights you can buy. I have a cheap $30 umbrella light I bought from Amazon I use in the winter (if you don’t want to buy two, you can use foam board to bounce light back). There is also a set of tabletop lights you can buy, but they are pricier.
Thanks! I will check those options out.
I loved reading this post. It’s very insightful and encouraging. I have just started tackling the DSLR not too long ago, and I am constantly having those frustrating moments. But one of these days, I will find my style.
Thank you for the tips! I am looking forward to reading your post on aperture and shutter speed. I need to improve my food photography pronto. I am so embarrass about it, but hey you start somewhere right? So thank you for your tips!