Understanding Shutter Speed
It’s been awhile since I brought you a photography lesson. Awhile back, I covered the different camera modes for most DSLRs. Today I’m going to talk about the Shutter Speed (Tv for Canon, S for Nikon) Mode. Now that the weather is getting nicer and people are playing outside, there are plenty of opportunities to practice action shots. However, there are also opportunities for action shots right in your kitchen. This guide is written specifically for DSLRs; however, there are point and shoot cameras that have the Tv/S Mode as well. Learn what shutter speed is, when to use which numbers, and how speed applies to food photography.
Homemade Caramel Sauce
Shutter speed: 1/40; Aperture: 8; ISO: 800
What is shutter speed? Just as the name states, this is the speed your shutter takes a picture. You can set it at a high shutter speed to capture one clear instance in an action shot or you can set it at a low speed to create a motion blur. Although the shutter speed is used mainly for movement, adjusting the speed also helps with low lighting situations, regardless of movement. Some photographers refer to the shutter speed as “exposure time,” which means the longer your shutter stays open, the more light is let in.
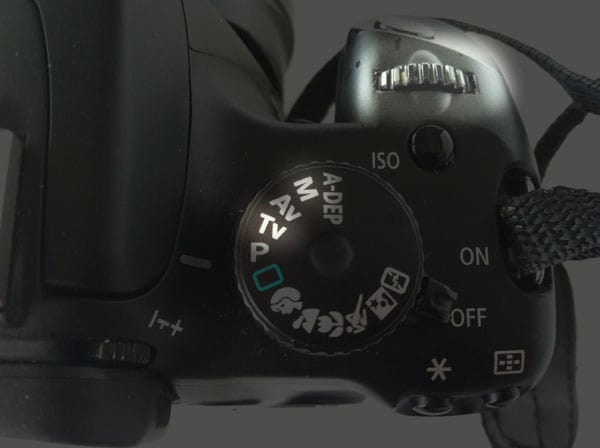
To have control over the shutter speed, set your camera in either Tv mode (short for Time Value) for Canon cameras, S mode for Nikon cameras, or in Manual (M) mode for both cameras. You may need to refer to your manual for number location. To change the number, I turn a knobbed wheel, located near my shutter button.
Shutter speed is measured in seconds. There are two types of numbers: whole numbers (1, 5, 10, etc) and fractions (1/125, 1/200, 1/500, etc). The whole numbers mean the camera takes full seconds to snap a picture (one full second, five full seconds, etc). The higher the whole number, the slower the shutter speed (five seconds is slower than one second). The fractions mean the camera takes less than a full second to snap a picture (one hundred twenty five of a second, two hundred of a second, etc.). The higher the number to the right of the 1, the faster the shutter speed (for example, 1/500 is faster than 1/125).
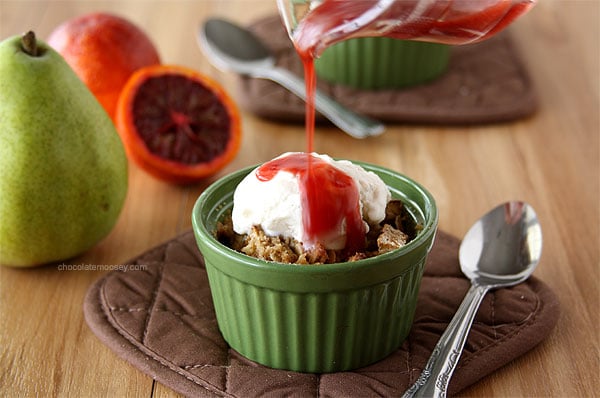
Mini Pear Walnut Crisps With Blood Orange Caramel Sauce
Shutter speed: 1/6; Aperture: 5; ISO: 100
When do you use a slow shutter speed? There are two main reasons you’d want to use a slow shutter speed. First reason is to create a motion blur. A motion blur is when your subject is moving, but the movement is blurred. Motion blur is really helpful with liquids because it softens the flow. Try turning down the shutter speed when pouring sauce onto your dessert. Even though the speed for my blood orange caramel sauce is still a fraction, there is enough delay to blur.
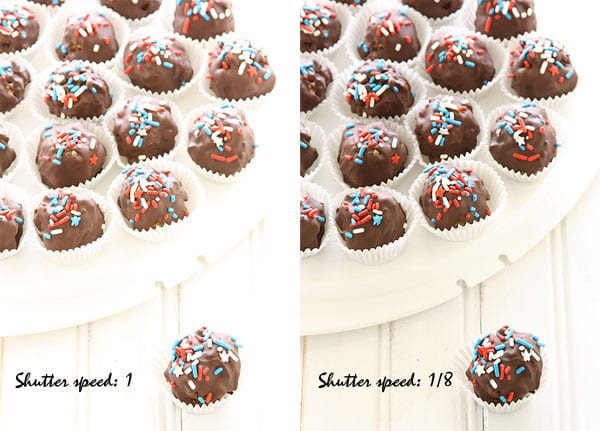
The second main reason to use a slow shutter speed is to allow more light to enter. This is why photographers sometimes refer to shutter speed as “exposure time” because the slower the speed, the brighter the exposure. If you want your scene to be bright, keep turning down your shutter speed until you get what you want. For example, in these truffles (which I haven’t posted yet), notice the difference in brightness. However, leaving your aperture open longer also means blurriness. Unless motion blur is your goal, you will almost always need a tripod. If you are traveling without one (and they are a pain to carry), you can lean up against a building to steady your arm or find a surface, such as a wall ledge or table. Although it won’t be perfect, you decrease your chance of blur.
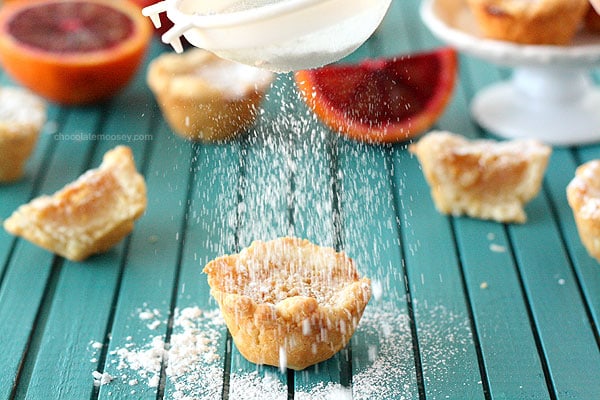
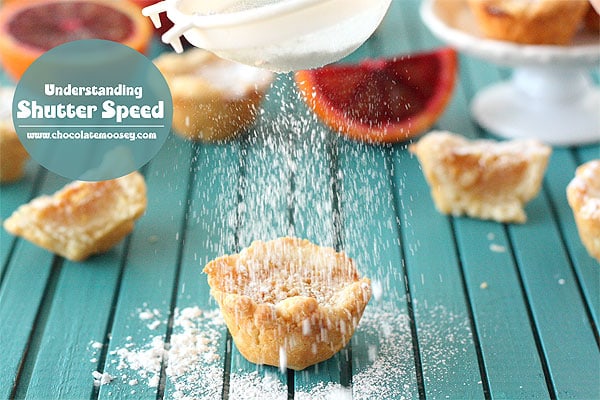
Blood Orange Pie Bites
Shutter speed: 1/250; Aperture: 4; ISO: 1600
When do you use a high shutter speed? Use a high shutter speed when you want to “freeze” a frame of action. The best example is sports. If a player is kicking the ball and you don’t want any blur, use a high shutter speed to capture that one golden moment. Since I don’t have any sports shots, let’s look at me dusting my pie bites. I wanted to capture the bits of sugar in mid air. In order to make some distinction of the sugar, I chose a high shutter speed. However, this meant the amount of light captured was very low. I had to really bump up the ISO in order to see anything. I left the aperture at 4 because I didn’t want to background to be too much in focus.
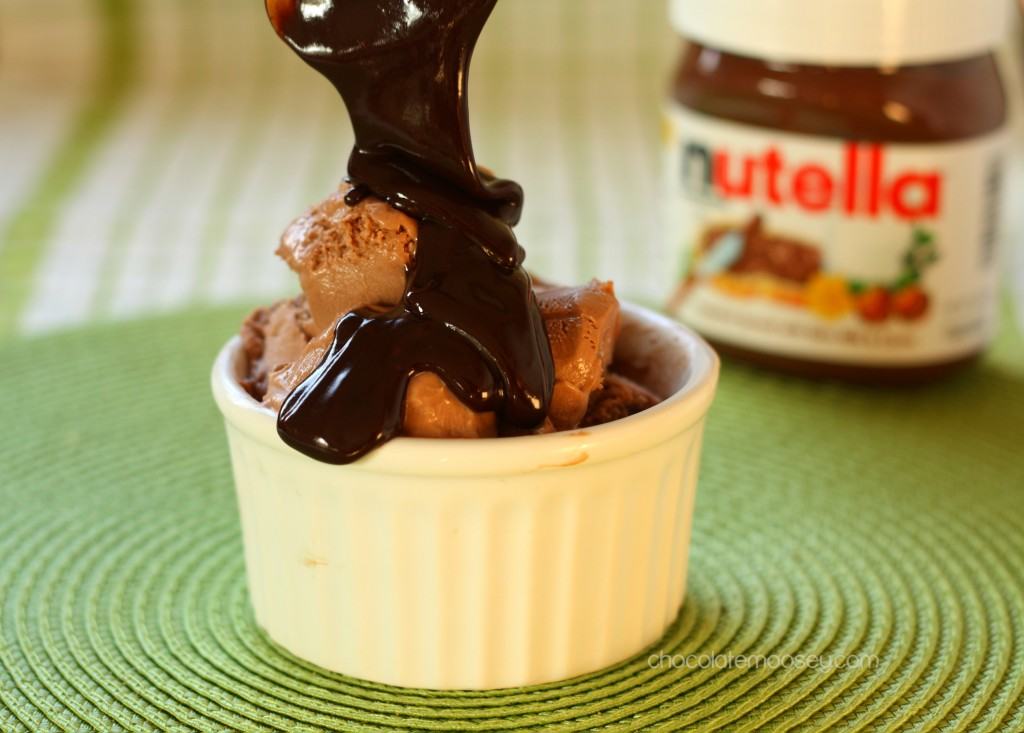
Nutella Espresso Hot Fudge Sauce
Shutter speed: 1/50; Aperture: 3.2; ISO: 400
Since most of you are photographing food, you may wonder why you would bother with the shutter speed. There are examples of action if you think out of your comfort zone. Try pouring sauce onto your ice cream or dunking a chip. If you do step-by-step directions, think about all the movement you are doing – stirring, chopping, mixing, piping. Seeing the blur of stirring your pot is much more interesting than seeing onions and peppers just sitting there. Most of the time, this involves another person stirring while you photograph. However, if you are alone in the kitchen (like I am), you can play around with a tripod and self timer (or stir with one hand while you press the button with the other. They also make remote controls so you can have an extra few inches away from the button).
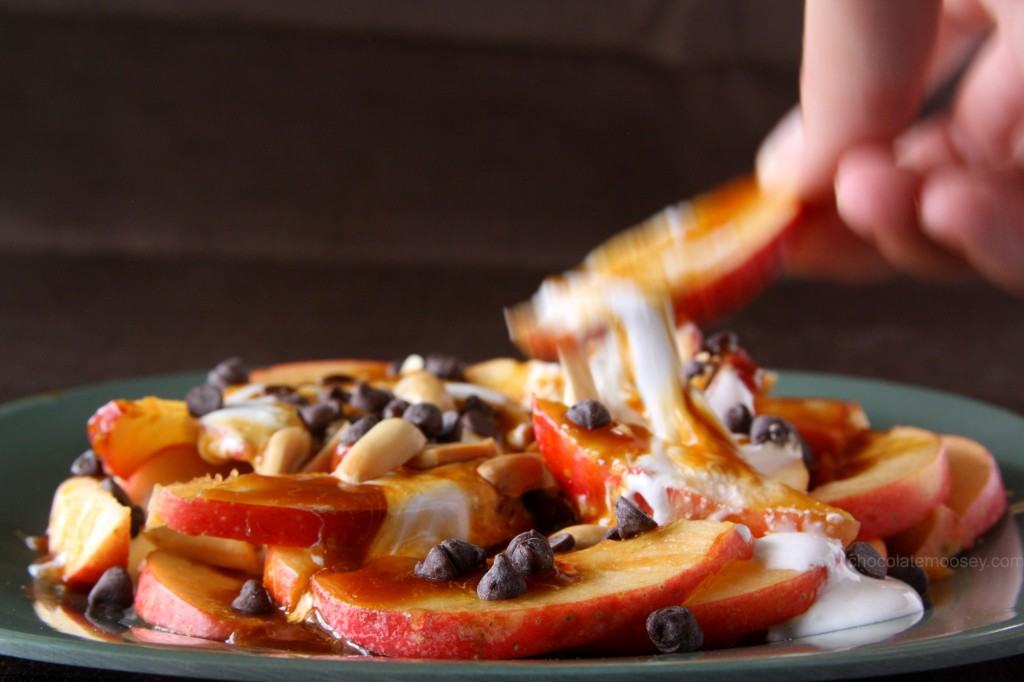
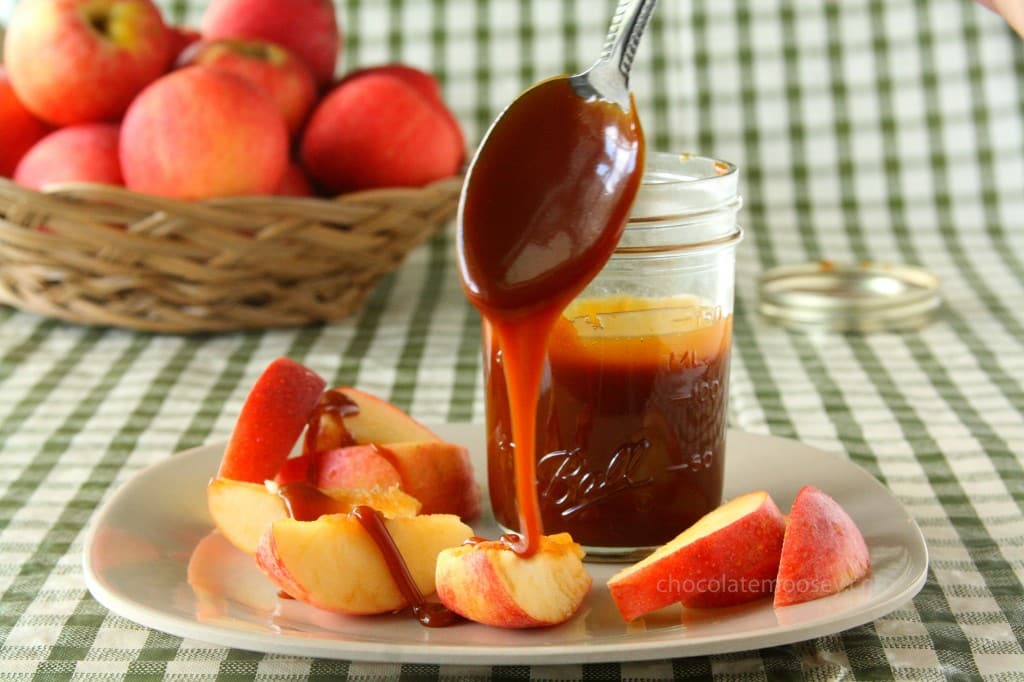
Apple Nachos
Shutter speed: 1/8; Aperture: 10; ISO: 800
The one thing I find frustrating about shutter speed is lighting. You’ll notice the faster you set your speed, the darker your picture becomes. The easiest way to fix this is to use more light, but this isn’t always possible, especially if you are traveling. This is when you need to adjust your camera settings. Shutter speed works hand-in-hand with aperture and ISO. Lighting is based on balancing those three settings. When you adjust the shutter speed, the aperture and ISO are compensated. Think of a scale. All three settings need to balance or the scale will tip over. For example, when I photographed myself grabbing an apple nacho above, you can see the blurriness of my hand. That is because I am in mid action, and the shutter speed didn’t keep up. Even though my shutter speed is one eighth of a second, my aperture and ISO are really high. I wanted most of the plate to be in focus, hence the high aperture. I picked a high ISO in order to have enough light for the shutter speed and to help compensate for the high aperture.
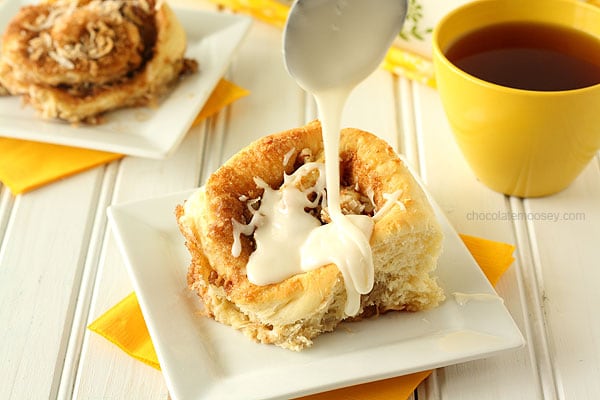
Lemon Coconut Cinnamon Rolls
Shutter speed: 1/25; Aperture: 5.6; ISO: 400
Now that you know all about shutter speed, are you going to start taking more action shots? I’ve been experimenting with basic shots, such as pouring on sauce or dipping a chip. I don’t do a lot of step-by-step pictures, mainly because it is just me and I don’t have time to take pictures and chop the carrots and stir the onions and add the broth and whatever else you need to do without burning everything.
Speaking of action shots, I have a neat trick that will make shooting a bit easier! Stay tuned next week for another shutter speed post!
This post may contain affiliate links. As an Amazon Associate and member of other affiliate programs, I earn from qualifying purchase.


I’ve said it before and I’ll say it again. You have such wonderful photography tutorials (and other tutorials too). You really help explain it in ways novices can understand. Thanks for sharing this great information!!
OMG! Your photos are AMAZING!!!!!
I wish I had your guide 2 years ago when I started blogging. ^.^ Very detailed and comprehensive Carla, all food bloggers & newbie Food photographers should save this article to use it as reference in the future.
I think, when using slow shutter speed one really needs a tripod. What some might do at this point is increase the ISO value which isn’t a good solution because of the grains. Fast shutter speed comes really handy when taking snaps of squirrels. =D
Crystal clear explanation Carla. I have bookmarked all your photography posts and when in doubt I always stop by to check. Wish you would post more on photography topic.
As a new photographer and blogger, this was very helpful! Sometimes I capture a money shot and sometimes I don’t. I have playing with aperture and ISO, but not shutter speed. Maybe I should put that in the mix. Thanks!
Thank you for this! I want to try more “action” in my food – and shutter speed always confuses me. And, most of the time, it makes me angry too…lol.
Ah shutter speed, all the things I forgot from my photograph classes in high school and in college. Thanks for the refresher Carla! I’m going to play with that setting now that I understand things again!
Thanks, Carla!
Who knew that my little point and shoot camera (a Sony) has an S mode?
Well, my spouse did.
Lovely action shots. I appreciated the photography education!
This was so helpful. Now I have never used the TV setting before. Never knew what it was for. I’ve taken a few chocolate syrup pictures and have gotten lucky, but now I’m going to pay more attention. Can’t wait for next week.
I am just starting to use my DSLR more with my blog. This post was incredibly helpful. Thank you!
I keep your photography lessons in my favourites – I really HAVE TO read and experiment for my future posts; I’m so ashamed of my photos.
Extremely helpful post, Carla. I suck at photography so I love little lessons like this.
This is so helpful, thank you. I bought my first DSLR a few weeks ago and I still don’t really know what I’m doing with it, so thanks for such a clear, informative post!