How To Take Action Shots In Food Photography
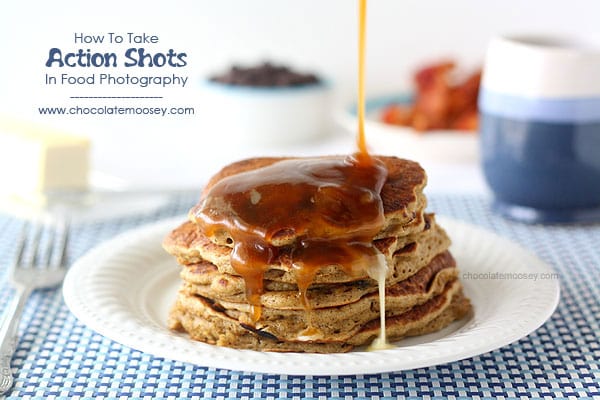
Want to make your photographs more exciting and set yourself a part from others? Try incorporating action shots next time you shoot. “But my subject doesn’t move,” you say. That’s where the exciting part comes in. Action shots do exist in the food world – pouring on sauce, dipping a chip, stirring a pot, piping on frosting, caramel oozing out. Think about the interaction that you have with food. If you keep reading, I will show you a trick on getting action shots without the need for another person in the kitchen.
(First, before we get started, make sure you read my post on how shutter speed works. This guide will assume you have basic knowledge of setting the shutter speed.)
One of the challenges I face is I don’t have help with photo shoots – just me, myself, and I. So how do you incorporate movement when you need your hands for the camera? Let’s break it down step by step:

Ignore that there is no action going on in this shot. I didn’t have many tripod shots.
Set up your tripod. Yes, you need a tripod. You may be able to wing it without one if you have an assistant, but for best results, use a tripod. I have the Manfrotto 055XB tripod.

Set up your shutter speed. Please read my shutter speed guide for more information.
Now it’s time to shoot, but before you hit that shutter button, you need to decide how you’re going to accomplish your action and shoot at the same time. Here are three methods to shoot your action (my favorite is using the self timer):
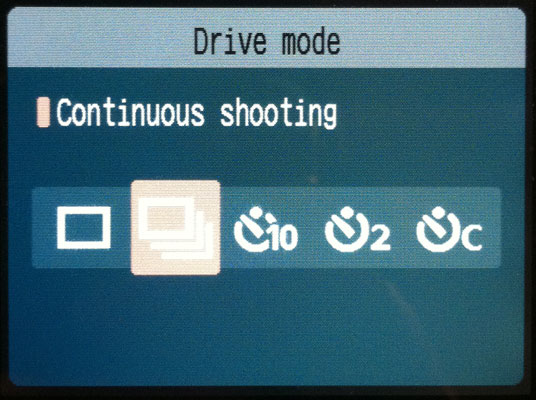
1. The One Hander. Just as the name states, you use one hand to press your shutter button while the other hand is busy with the action. Perhaps you are pouring on sauce or dipping a chip. Maybe you are stirring a pot. This one is a little tricky because you have to adjust your body so you don’t get too much of your arm in the shot (unless you want it in the shot). You can also set your shutter to continuous shooting so you can hold down the shutter and take as many shots as you’d like before letting go.
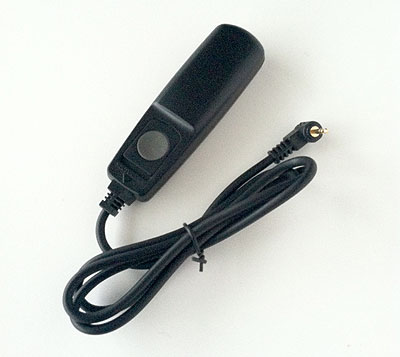
2. The Remote Control Button. You can buy a remote control for your camera fairly cheap on Amazon. I think mine was about $5. You hook the remote to the camera as your instructions state. When you are ready to shoot, instead of hitting the button on the camera, you hit the button on the remote. Since the remote has a cord attached to it, you have a few extra feet to move and not have to stretch your body.
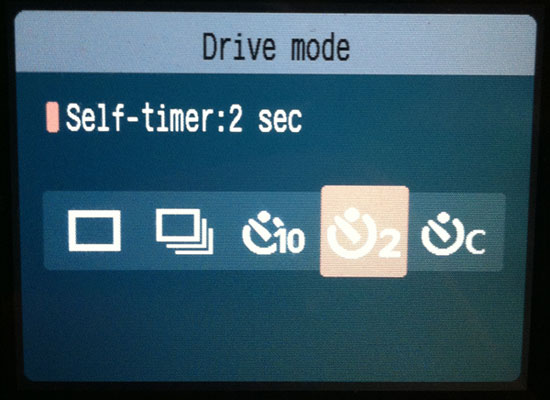
3. The Self Timer. This is my favorite method. Most if not all cameras come with a self timer button. This means you set the timer, hit the shutter button, then it counts down so many seconds before shooting. For my camera, I can choose 2 seconds or 10 seconds. That way, I have both hands free for movement. Even if I’m not shooting action shots, I like to use the 2 second timer to help minimize possible camera movement when hitting the shutter button.
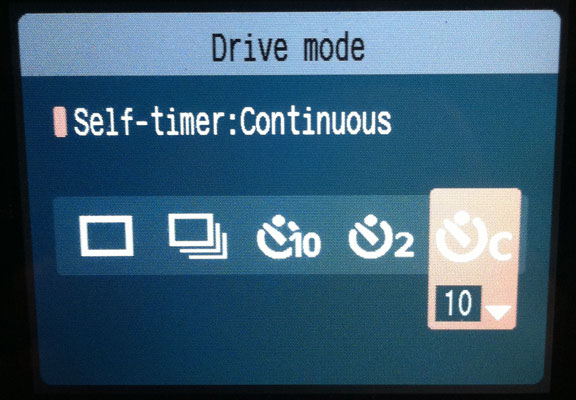
But let’s take the self timer one step further. My camera has an option for continuous self timer. This means it’ll count down the seconds like a regular self timer (for my camera, it’s 10 seconds), but it’ll also take continuous shots in a row. For example, if I set it to 10, that means after 10 seconds, my camera will take 10 shots in a row. You can reduce the number to 2, 5, 8, shots if you don’t want 10. This is my favorite method because it captures several movements at once; it’s really difficult to capture that perfect movement with just one shot. Plus you can see the progression of the sauce being poured on or the caramel oozing out, almost like a flip book. And remember, you don’t have to use all of the shots either. There are been times where I don’t like the progression shots, so I delete those and just keep the end result.
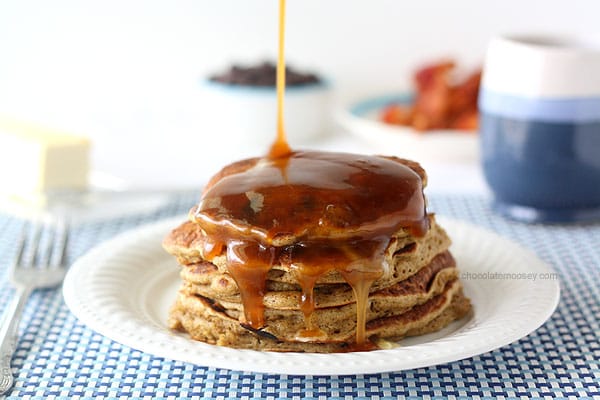
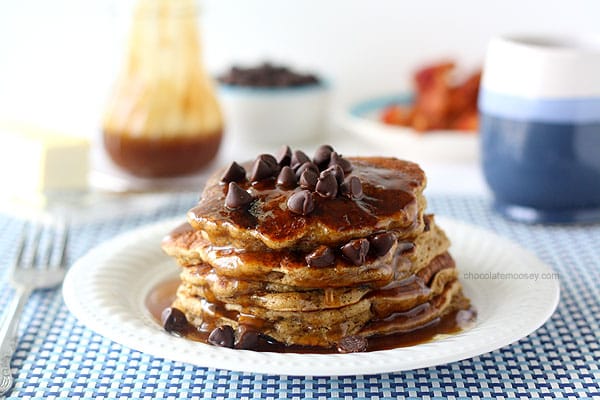
Spiced Chocolate Chip Pancakes with Homemade Caramel Syrup
Shutter speed: 1/15; Aperture: 3.2; ISO: 400
Repeat until you have the shots that you want. I usually don’t reshoot action shots due to limited amount of food, but if you have extras, feel free to keep shooting.
Now that you know how to take action shots, how will you incorporate them into your next shoot?
This post may contain affiliate links. As an Amazon Associate and member of other affiliate programs, I earn from qualifying purchase.


Thanks for sharing this! Great tutorial, and now all I want is a big plate of pancakes, which I suppose was the whole point!
So helpful, Carla, thank you! Pinning, and definitely referring back to later.
Excellent tutorial Carla! Now I have to figure out how to do this while shooting tethered. Perhaps I can enlist my husband to help. I’m sure he wouldn’t mind pouring or clicking.
Now if only I had a tripod, and a decent camera to put on it, and yea lots of other things…
Carla, you are a godsend when it comes to useful photography posts. You write in such a clear manner that I think even I might be able to learn how to do this! Thanks, woman.
When I do an action shot it is defo a funny thing to watch! I need to get me a tri pod stat!
I need that tripod!
Carla,
More than anything else I appreciate seeing the set up next to your kitchen window. Seeing behind the scenes shots really helps me understand it because I am s visual learner. Appreciate it!
Now to figure out where my spouse stashed the tripod, or wait until we’re in contact again to ask him.
Carla,
What a great tutorial! Thank you for sharing your knowledge and skills with us!
Awesome post, Carla. I love taking shots mid pour.
Hey,
this tutorial is excellent thank you for the tutorials! I recently started blogging and the photography part is one of the hardest things for me. Is there a camera that you recommend you would recommend for someone starting out with food photography?
Hi,
I have question about the remote control which you mentioned in this tutorial…I have a Olympus EPL3 camera and when I looked for one in amazon…this is the one it showed http://www.amazon.com/SP-510UZ-SP-550UZ-SP-560UZ-SP-565UZ-SP-570UZ/dp/B00GC5EIQY/ref=sr_1_1?s=electronics&ie=UTF8&qid=1397064987&sr=1-1&keywords=remote+switch+for+olympus+epl3+camera
could you please suggestion, if this is the right one I am looking for??
Your answer would help me a lot.
Thanks
Anu
Hi Anu, It looks very similar to the one I have. As long as it says it’s compatible with your model, it should work. I don’t own an Olympus so I can’t speak for this remote.