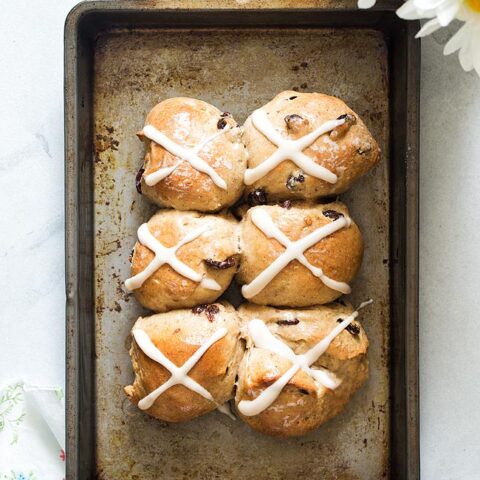
Small Batch Hot Cross Buns
These Small Batch Hot Cross Buns made from scratch are homemade spiced sweet buns made with yeast and raisins then marked with a cross on top for Easter.
What are your Easter traditions?
Every year for Easter I serve hot cross buns, which are homemade spiced sweet buns made with yeast, raisins, cinnamon, nutmeg, and clove then marked with a cross on top.
Sometimes I’ll buy them from a bakery if I don’t have time to make them scratch. However, it seems like they’re harder and harder to find lately, so I’m back to making them homemade.
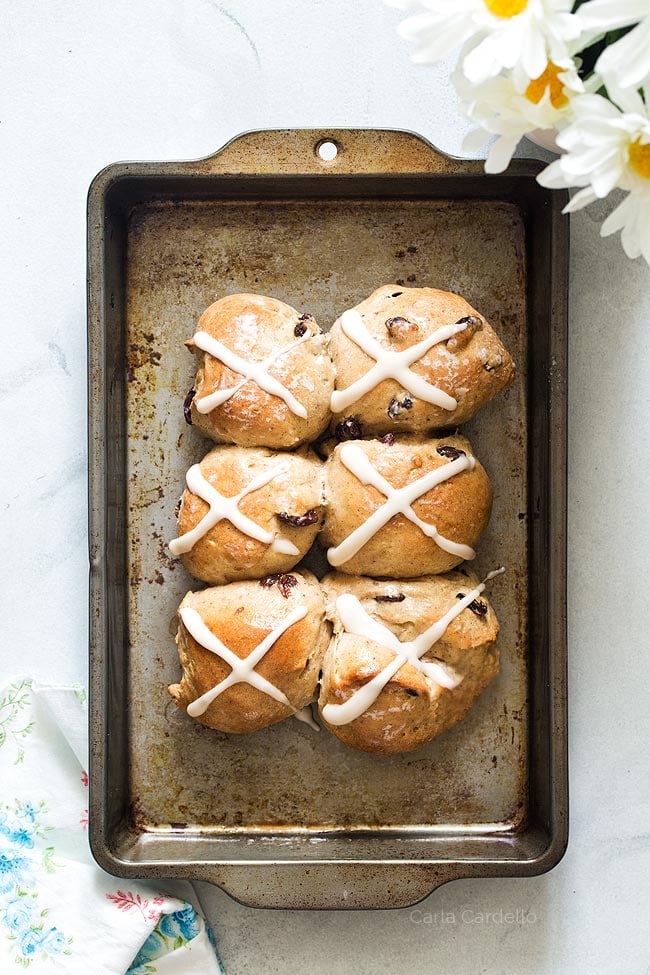
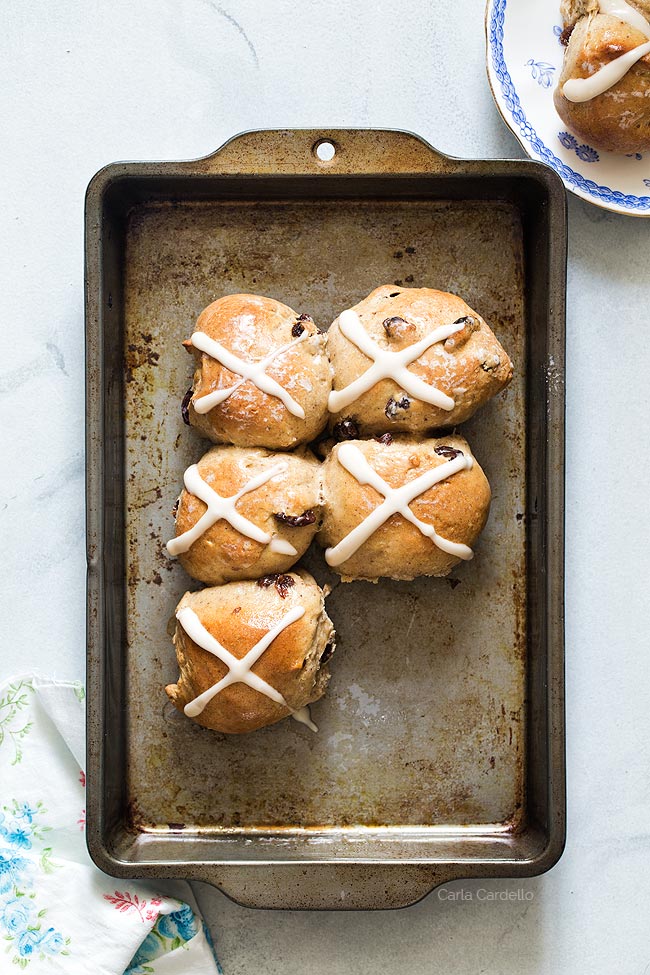
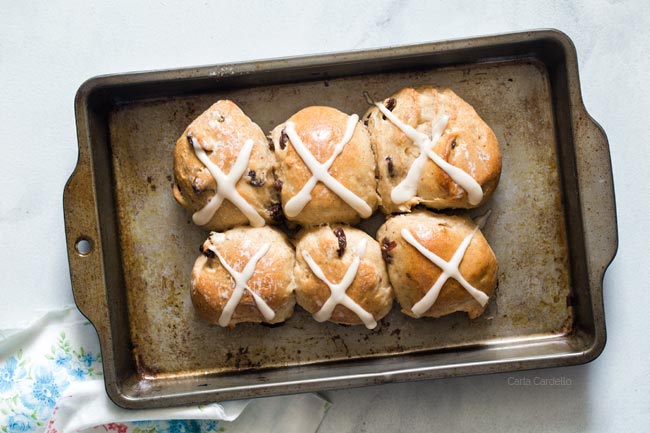
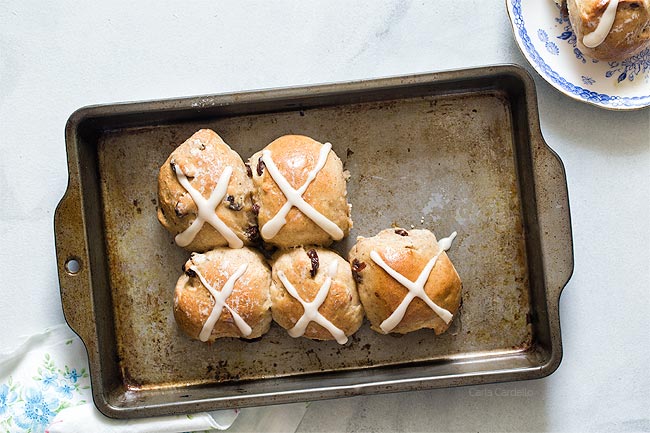
This Small Batch Hot Cross Buns recipe makes 6 buns. Perfect for your Easter Dinner For Two.

What are hot cross buns?
Hot cross buns are spiced sweet buns made with a yeast dough. They are then flavored with raisins, cinnamon, nutmeg, and clove.
Piped on top is a basic powdered sugar icing.
What is the significance of hot cross buns?
Hot cross buns originated in the United Kingdom. Their significance is a religious one to represent Jesus.
The cross piped on top signifies a crucifix, hence why they are an Easter tradition, more specifically on Good Friday.
I’m not a religious person, but I still love eating hot cross buns regardless of their meaning.
Which yeast should I buy?
When buying yeast at the store, you may notice two types: active dry yeast and quick rising yeast.
Active dry yeast is your traditional yeast used in most bread recipes. It requires two rounds of resting and rising before baking.
Quick rising yeast is a fast-rising yeast that shortens rise time by 50 percent. This means it only requires one round of resting and rising.
My hot cross buns for two call for active dry yeast. However, if all you have is quick rising, the first resting period will only take 10 minutes before shaping into rolls.
Do I need to proof yeast before using?
Proofing yeast is a step done prior to adding yeast to a recipe. You add yeast to warm water and wait until the mixture starts forming. This proves the yeast is alive and ready to bake.
It certainly never hurts to proof yeast before using, just in case your yeast is dead.
However, as long as the packet hasn’t expired, it’s not a necessary step. The liquid in the recipe is enough to activate your yeast as long as it’s still alive.
How To Make Small Batch Hot Cross Buns
At first glance, this recipe may seem time-consuming. However, most of it is resting and rising time. You can work on other tasks while the dough rests.
The bake time for hot cross buns is 20 minutes, so you can pop them in the oven while you start the rest of dinner.
First, you need to prep your ingredients, starting with the water.
It’s important you measure your water temperature with a digital thermometer (Amazon affiliate link) and making sure it’s between 105F-115F degrees.
Too cold means the yeast won’t activate. Too hot and the yeast will die.
I put the water in a heat-proof measuring cup then microwave it in 10 second increments until hot enough.
If the water does get too hot, let it sit while you measure the rest of the ingredients. That’ll give it some time to cool down.
Once you beat together your wet ingredients with the yeast, add your dry ingredients to the bowl. On low speed or by hand, mix until a dough forms.
How To Knead Dough For Hot Cross Buns
Kneading is working the dough with your hands until a smooth ball is formed.
This process helps strengthen the gluten in the dough, which gives the rolls their structure and texture.
After mixing your dough, transfer it to a flour-dusted surface. The dough should be slightly sticky but not too sticky.
If it’s too sticky to handle, add a little more flour. However, don’t add too much or your dough will become too tough.
Gather all the dough pieces together and form a ball with flour-dusted hands.
Using the heels of your hands, push the dough away from you. Fold the dough in half, rotate 90 degrees, and push the dough again. Keep doing this until a smooth dough forms.
Normally kneading takes about 10 minutes, but since we’re working with a small batch, it’ll take about 2-3 minutes.
Your dough is well kneaded when it holds its shape (aka won’t droop) and indentation in the dough with your finger quickly fills back in.
Place the dough in a greased bowl, cover loosely with a towel, then let rest in a warm spot for 1 hour.
Your dough is ready when you can leave a finger indent and the dough does not rise back up.
How Warm Does The Dough Need To Be To Rise?
Recipes call for dough to rise in a warm, draft-free area. But how warm is warm?
Your dough needs to be between 80F-90F degrees when rising.
Sounds easy enough, but what if you don’t have a warm spot in your kitchen?
One trick I’ve learned is turn your oven on for 1 minute to warm up then immediately shut it off. Let some of the air escape a bit then add your dough.
Just don’t forget about it when you preheat the oven!
How To Shape Hot Cross Buns
After your dough has rested, divide it into 6 equal pieces and roll into balls. Place the dough balls seam-side down into a greased 8-inch round pan.
I used a small baking tray for presentation purposes, which you can also use.
Don’t have either of those? You can put the balls into muffin cups. They won’t have that rustic look from pulling the buns apart, but they’ll still be equally as delicious.
They may seem small, but the dough will puff when it rests again. Cover again with a towel and rest in a warm area for another hour.
Do you need an egg wash for hot cross buns?
Traditionally you brush the top of your buns with an egg wash before baking.
However, I didn’t want to waste a whole egg just to brush 6 rolls.
Instead, I used 1 teaspoon milk. It’ll still give the buns their golden brown shine without wasting an egg.
How To Make A Sugar Glaze For Hot Cross Buns
Right after the hot cross buns have finished baking, immediately brush them with some sugar dissolved in water.
How To Make The Icing For The Cross
Once the buns have completely cooled, the last step is piping a cross on top.
Mix together the powdered sugar, milk, and vanilla until an icing forms. It should be thick and a little runny, but not too runny because you need to pipe a cross.
Transfer the icing to a sandwich bag and push it all to one corner. Cut a small hole in the corner then pipe crosses onto the bun.
Let the icing harden before serving.
How To Make Hot Cross Buns Ahead Of Time
Because homemade hot cross buns do require time to rest, sometimes it’s best to break the steps up over several days.
Bread dough rises the fastest at a warm temperature. However, it’ll still rise in the refrigerator, just at a much slower pace.
This means after shaping your dough into rolls, you can let the dough rest overnight in the fridge. Let the pan sit out at room temperature until no longer cold to the touch then bake as directed.
How To Store Small Batch Hot Cross Buns
Hot cross buns are best eaten the day they are made. However, you can store them in an airtight container for up to 2 days.
More Yeast Recipes
Since you’ll have yeast leftover, here are more bread recipes using yeast:
The original recipe on this post was made with 1 teaspoon lemon zest and dried cherries. I updated the recipe to be more traditional, but you’re welcome to keep the spring twist.
Small Batch Hot Cross Buns
These Small Batch Hot Cross Buns made from scratch are homemade spiced sweet buns made with yeast and raisins then marked with a cross on top for Easter.
Ingredients
- 1/3 cup lukewarm whole milk (105F-115F)
- 2 tablespoons unsalted butter, melted
- 2 tablespoons granulated sugar
- 1 large egg, room temperature
- 1 + 1/8 teaspoons (1/2 package or 1/8 ounce) active dry yeast
- 1/4 teaspoon vanilla extract
- 1 + 3/4 cups all-purpose flour
- 1/2 teaspoon salt
- 1/2 teaspoon ground cinnamon
- 1/4 teaspoon ground nutmeg
- 1/4 teaspoon ground cloves
- 1/4 cup raisins, plumped and cool
- 1 teaspoon whole milk
Glaze
- 2 teaspoons granulated sugar
- 2 teaspoons water
Icing
- 1/4 cup powdered sugar
- 1 teaspoon whole milk
- 1/8 teaspoon vanilla extract
Instructions
- In a large mixing bowl, mix together either by hand or on very low speed the milk, butter, sugar, egg, yeast, and vanilla. Let sit for 5 minutes while the yeast dissolves.
- By hand or on very low speed, stir in the flour, salt, cinnamon, nutmeg, cloves, and raisins until the dough comes together.
- On lightly floured surface with floured hands, knead the dough for 2-3 minutes or until the dough is smooth, hold its shape without drooping, and indentations immediately fill back up. Transfer to a lightly greased bowl, loosely cover with a towel, and rest in a warm, draft-free area for 1 hour.
- Lightly grease a 6 or 8 inch round pan or muffin pan. Divide the dough into 6 pieces, shape into balls, and place in the pan seam side down. Cover loosely with a towel and let rise in a warm place until puffed, about 1 hour.
At this point if you're not baking right away, loosely cover the pan with plastic wrap and refrigerate overnight. Let the pan sit out at room temperature for about 30 minutes before baking. - Preheat the oven to 375F. Bake 20 minutes or until golden brown.
- While the buns are baking, make the glaze: In a small saucepan or microwave-safe bowl, heat the sugar and water together until the sugar dissolves. As soon as the buns are done baking, brush with the sugar water. Let the buns cool completely
- Once the buns are completely cool, make the icing: In a medium bowl whisk together the powdered sugar, milk, and vanilla. The icing should be thick but still fluid enough to pipe. If it's too thick, add a touch more milk.
- Transfer the icing to a plastic sandwich bag, cut off one corner, and pipe a cross onto each bun. Let the icing harden before serving.
Buns are best eaten the day they're made but can be stored in an airtight container at room temperature for up to 2 days.
To plump raisins:
- Place raisins in a bowl. Pour hot water over top until raisins are completely submerged. Let sit 5 minutes or until plumped. Drain and pat dry before using.
Notes
- Enjoyed this recipe? Check out my Small Batch Dinner Rolls.
- Planning your holiday menu? Check out Easter Dinner For Two for recipe pairings.
This post may contain affiliate links. As an Amazon Associate and member of other affiliate programs, I earn from qualifying purchase.