Peanut Butter Rice Krispie Treats
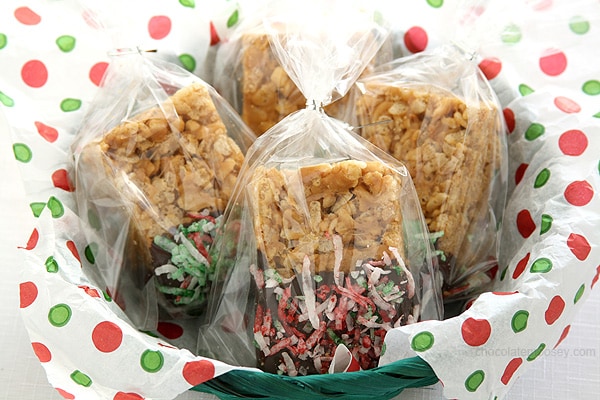
Small Batch Peanut Butter Rice Krispie Treats made in a loaf pan then dipped in chocolate make an easy no bake dessert. Sprinkle with coconut flakes, chopped nuts, or sprinkles to decorate for the holidays.
I was shopping at the grocery store the other weekend, spending more money than usual (don’t we all when November rolls around?).
When the cashier rang me up, she said, “You’re a baker, aren’t you?”
That’s because in addition to what I call normal people groceries, I also had marshmallows, chocolate, coconut, peanut butter, chocolate chips, molasses, and a few other things ready for the oven.
I bet I could’ve cut my grocery bill in half if I didn’t bake, but I can’t help it – I love baking around the holidays.
Every Christmas I give gifts from the kitchen – homemade goodies made from the heart.
Not only is it easier on my wallet, it lessens the stress of what to buy everyone. That’s why I’m showing you to make Chocolate Dipped Small Batch Peanut Butter Rice Krispie Treats.
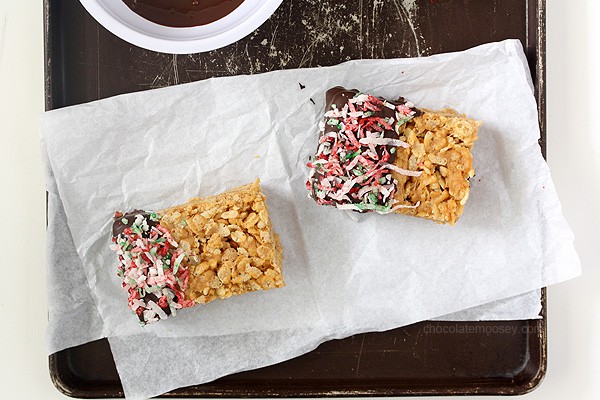
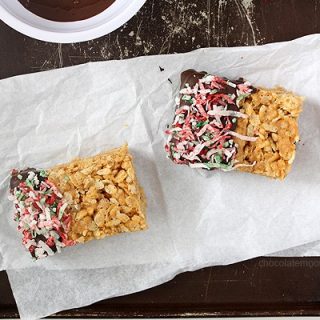
These easy rice krispie treats with peanut butter and chocolate are nutty, crunchy, and sweet.
And you certainly don’t have to save this recipe for gift giving only! This recipe makes an excellent no bake dessert for yourself to eat during summer (and maybe share with a loved one if you’re feeling generous).
It’s no secret I love rice crispy treats. They can easily be made with your eyes closed.
Ok so they need to be open just a little so you can see, but it won’t require much brain power.
During the summer I made peanut butter rice crispy treat truffles, but then I realized I never made classic peanut butter squares.
All you do is add peanut butter to take on a whole new flavor.
How to make peanut butter rice krispie treats
First, melt butter and peanut butter together in a large pot. Even though this recipe makes a small batch, I like to use a Dutch oven (affiliate link) so I have plenty of room to stir.
Once melted, add the marshmallows. Keep stirring until melted and don’t let them burn.
Next, turn off the heat and stir in the cereal until everything is coated.
Immediately transfer the cereal to the loaf pan and pat down into a single layer. Let cool until firm then serve.
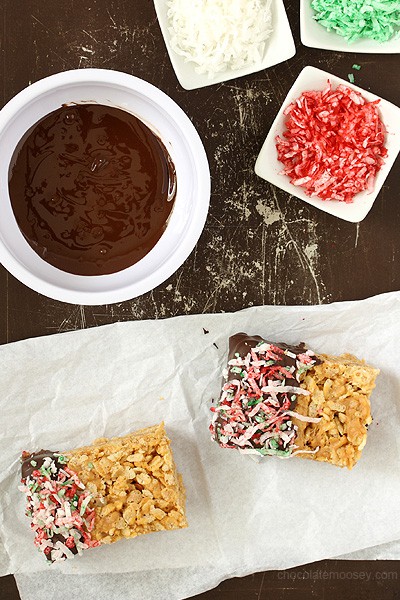
At this point, you can cut and serve as is. However, if you want to make chocolate peanut butter rice krispie treats and decorate for Christmas, you have a few more steps to complete.
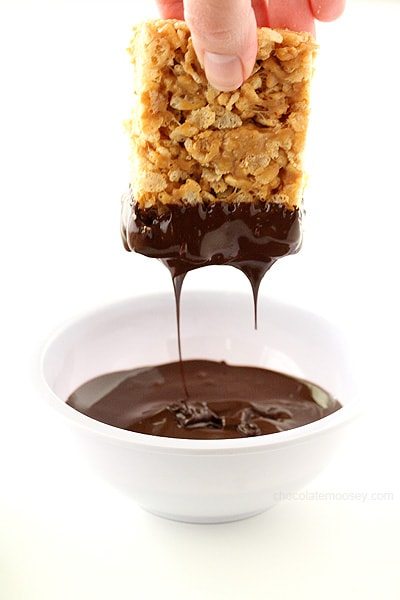
How to make chocolate dipped rice krispie treats
Before melting the chocolate, you need to decide which bowl to use. Since you’re dipping the rice crispy treats, you want a deep and narrow bowl.
Too shallow and you won’t dip very far. Too wide and you need to use more chocolate than called for in the recipe.
Don’t have a good dipping bowl? You can use a spoon to pour chocolate onto the treat or you can do a chocolate drizzle.
Once you find your bowl, add the chopped chocolate. Microwave for 30 seconds then stir. Continue to microwave in 15 second increments until the chocolate is fully melted.
If your bowl isn’t heat proof, you can use a different bowl for melting then transfer the chocolate to your dipping bowl.
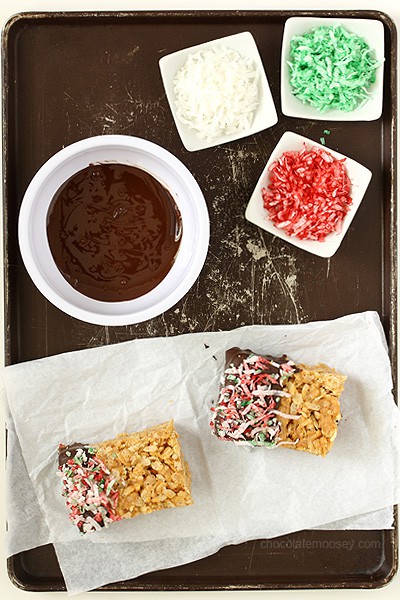
How to decorate rice krispy treats
To decorate the treats for Christmas, I sprinkled on coconut flakes I dyed red and green.
Of course if your recipients don’t like coconut, you can use sprinkles or chopped peanuts. The key is knowing your recipient and personalizing your homemade gift.
How to keep rice krispie treats from sticking to your hands
There’s no doubt rice krispie treats are sticky (and hot!) from the marshmallows. Of course you can grease your hands with some butter, but 1 – I find that messy and 2 – the cereal is still really hot to handle.
The best way to keep rice krispie treats from sticking to your hands is patting them down with a piece of parchment paper.
Not only will it not stick, you won’t burn your hands. Win win.
How long do rice krispie treats last?
When stored in an airtight container at room temperature, rice krispie treats can last up to 1 week.
How do you keep rice krispie treats from getting hard?
Nothing is as disappointing as making a fresh batch of rice krispy treats, only for them to set up rock hard.
A few tricks to keep your rice krispie treats from getting hard:
-
- Use fresh marshmallows: When you melt fresh marshmallows, they become soft and gooey. This is ideal for keeping your cereal treats together.However, when you melt old marshmallows, they are dry and firm so they don’t melt as well. Always use fresh marshmallows for best results.
- Melt on low and slow heat: As tempting as it is to crank the heat up on high to make your treats faster, the high heat will overcook the marshmallows, resulting in hard treats.Keep the heat on low and resist the temptation to go faster. Your teeth will thank you.
More Rice Krispie Treat Recipes
Small Batch Peanut Butter Rice Krispie Treats
Small Batch Peanut Butter Rice Krispie Treats made in a loaf pan then dipped in chocolate make an easy no bake dessert.
Ingredients
- 1/2 cup smooth peanut butter
- 1 tablespoon butter (add 1/8 teaspoon salt if unsalted)
- 5 ounces marshmallows (roughly 3 cups mini marshmallows or 4 cups regular marshmallows)
- 3 cups crispy rice cereal
Chocolate Dipped (Optional)
- 4 ounces semisweet chocolate, chopped
- 1/2 cup shredded coconut, sprinkles, or chopped nuts
- Red and green food coloring (optional)
Instructions
- Line a 9x5 loaf with parchment paper.
- In a Dutch oven or large pot over low heat, melt together the peanut butter and butter (add the salt if using).
- Once melted, add the marshmallows and stir with a wooden spoon until completely melted.
- Turn off the heat and stir in the cereal until everything is coated.
- Transfer the mixture to the pan and pat into a single layer using another piece of parchment paper. Cool completely before cutting into squares, about 1 hour. Store in an airtight container for up to 1 week.
- If dipping in chocolate: Line a cookie sheet with parchment paper. In a narrow microwave-safe bowl deep enough for dipping, add the chopped chocolate. Microwave for 30 seconds then stir. Continue in 15 second increments until fully melted.
- If using food coloring for the coconut, divide the coconut into three small bowls. Leave one bowl plain. With the second bowl, add a few drops of red and stir to mix. In the last bowl, add a few drops of green and stir to mix.
- Dip one treat into the chocolate and place on the cookie sheet. Sprinkle on coconut, sprinkles, or nuts. Repeat until all treats are dipped. Let the chocolate harden before storing.
Recommended Products
As an Amazon Associate and member of other affiliate programs, I earn from qualifying purchases.
This post may contain affiliate links. As an Amazon Associate and member of other affiliate programs, I earn from qualifying purchase.
THESE LOOK SO GOOD!
Life isn’t worth living without baking–that cashier was just calling you out for being awesome
Haha well she said it nicely. I think she was wishing I would make her something ;)
Yes to everything about these but the coconut! You know how I feel about coconut by now. :-)
No problem! Yours can be made with just sprinkles ;)
Yum! I would love to receive one of those in the mail. I love Rice Krispy Treats too and I think the addition of peanut butter and chocolate would be perfect! #client
Thanks Tonia!